DR4900 用户手册_Full version.pdf - 第13页
Figure 8 Main screen 1 Timers 6 Connected hardware 11 Concentration range bar 2 Sample ID list 7 Online connectivity 12 Sample analysis icons 3 Main menu 8 Operator 13 Program title 4 Menu title 9 Ambient temperature, da…
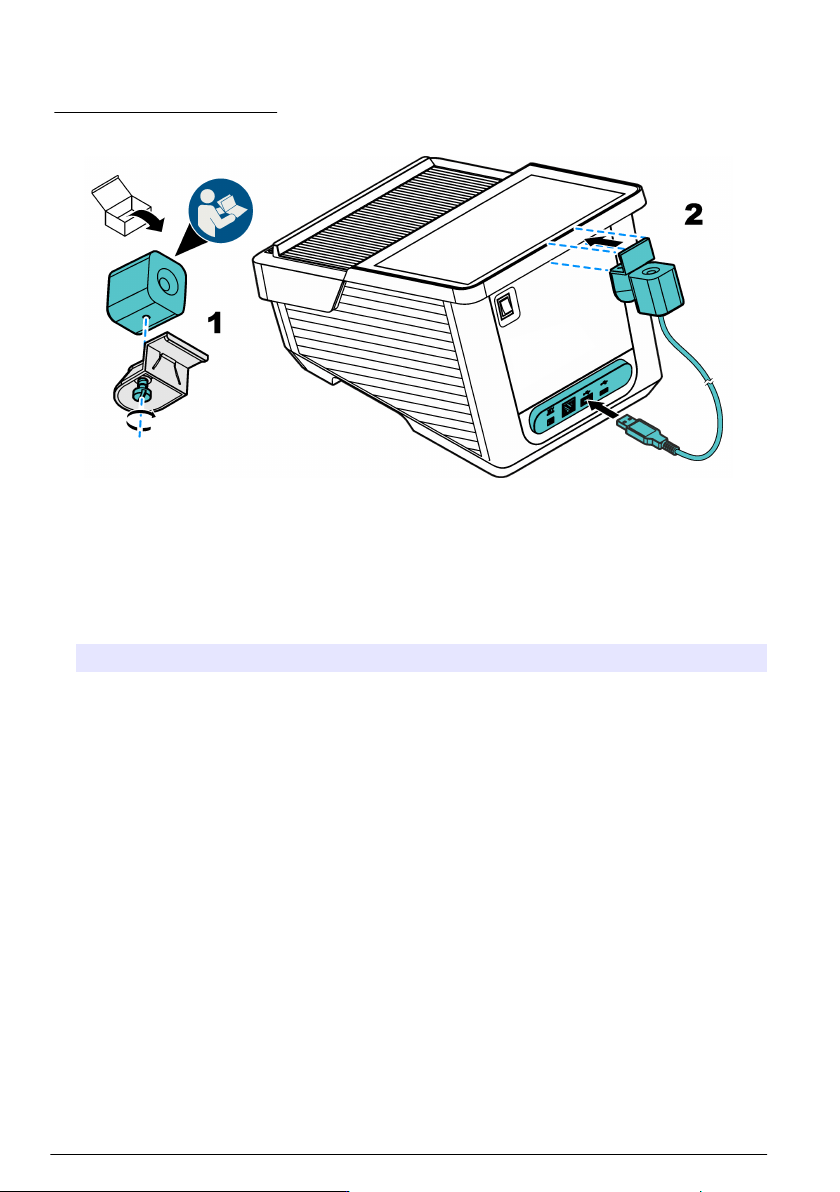
3. Install the camera holder with the camera on the backside above the accent light. Refer to step
2 of Figure 7.
4. Refer to Use the camera (optional) on page 28 for camera instructions.
Figure 7 Camera installation
Section 5 Startup assistant
When the instrument is set to on for the first time, a start-up assistant starts.
1. The startup procedure takes about 45 seconds. The startup procedure is complete when a
melody is heard.
2. Select the options:
Option Description
Language Select the applicable language from the list.
Date & time Set the date and time.
Display Move the slider to adjust the brightness of the display.
Ethernet and Wi-Fi
connection
Note: An Ethernet cable or Wi-Fi dongle must be connected.
Configure the Ethernet parameters to connect the instrument to a network or
send data to a PC.
Security Set a password for operator access.
Note: Push Next to save the password.
3. Push Done to complete the setup.
The instrument starts when the instrument is set to on with a system check. The system check
examines the lamp, the filter adjustment, the λ-calibration, the air measurement and the voltage
of the instrument.
Note: If the lid is not closed during the system check, the system check will stop.
The accent light will pulsate blue during the startup. Refer to Table 5 on page 20. Then, the
measurement screen will show.
Section 6 User interface and navigation
Figure 8 shows an overview of the main screen. Refer to Icon description list on page 13 for
descriptions of icons that show on the display.
The instrument display is a touchscreen. Only use a clean, dry finger tip to navigate through the
menu of the touchscreen.
12
English
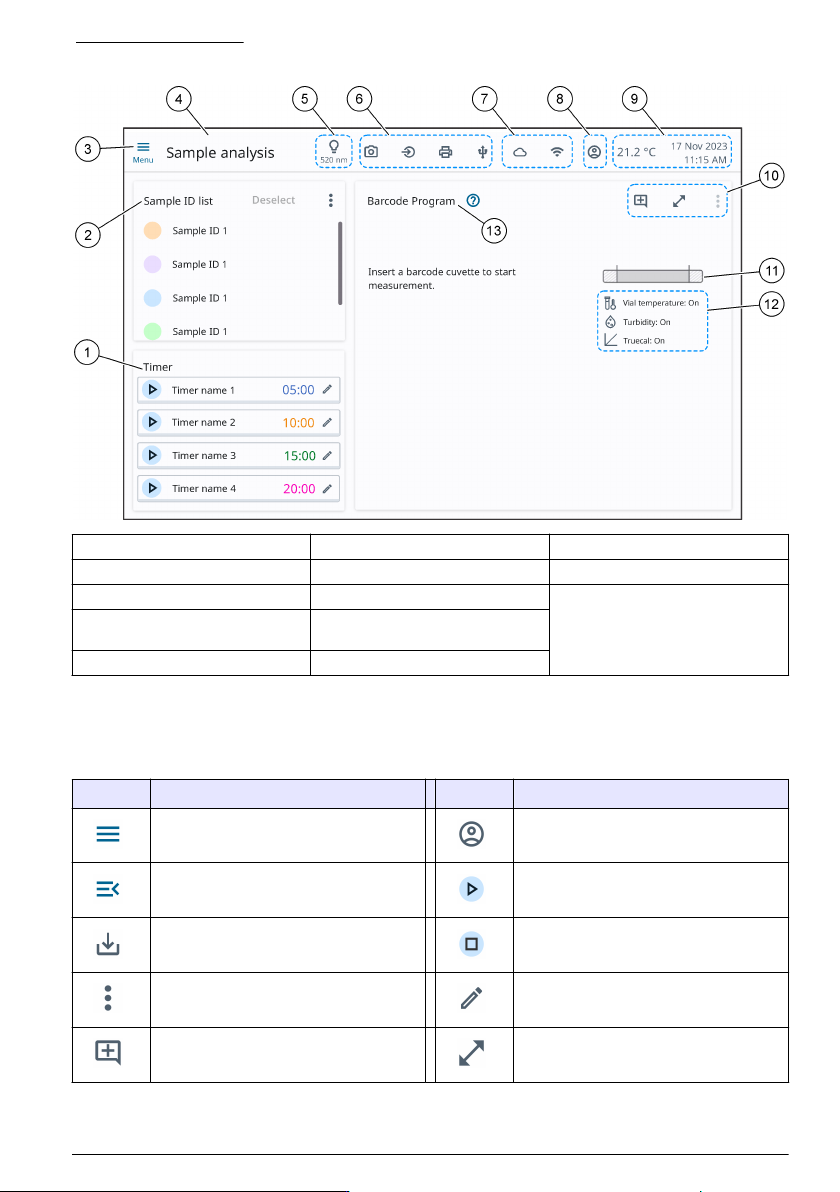
Figure 8 Main screen
1 Timers 6 Connected hardware 11 Concentration range bar
2 Sample ID list 7 Online connectivity 12 Sample analysis icons
3 Main menu 8 Operator 13 Program title
4 Menu title 9 Ambient temperature, date and
time
5 Selected wavelength 10 Display and program icons
6.1 Icon description list
Refer to Table 1, Table 2 and Table 3 for descriptions of icons that show on the display.
Table 1 Menu icons
Icon Description Icon Description
Main menu Operator
Close menu Start timer
Save Stop timer
Options Edit timer
Add comment Expand measurement view
English 13
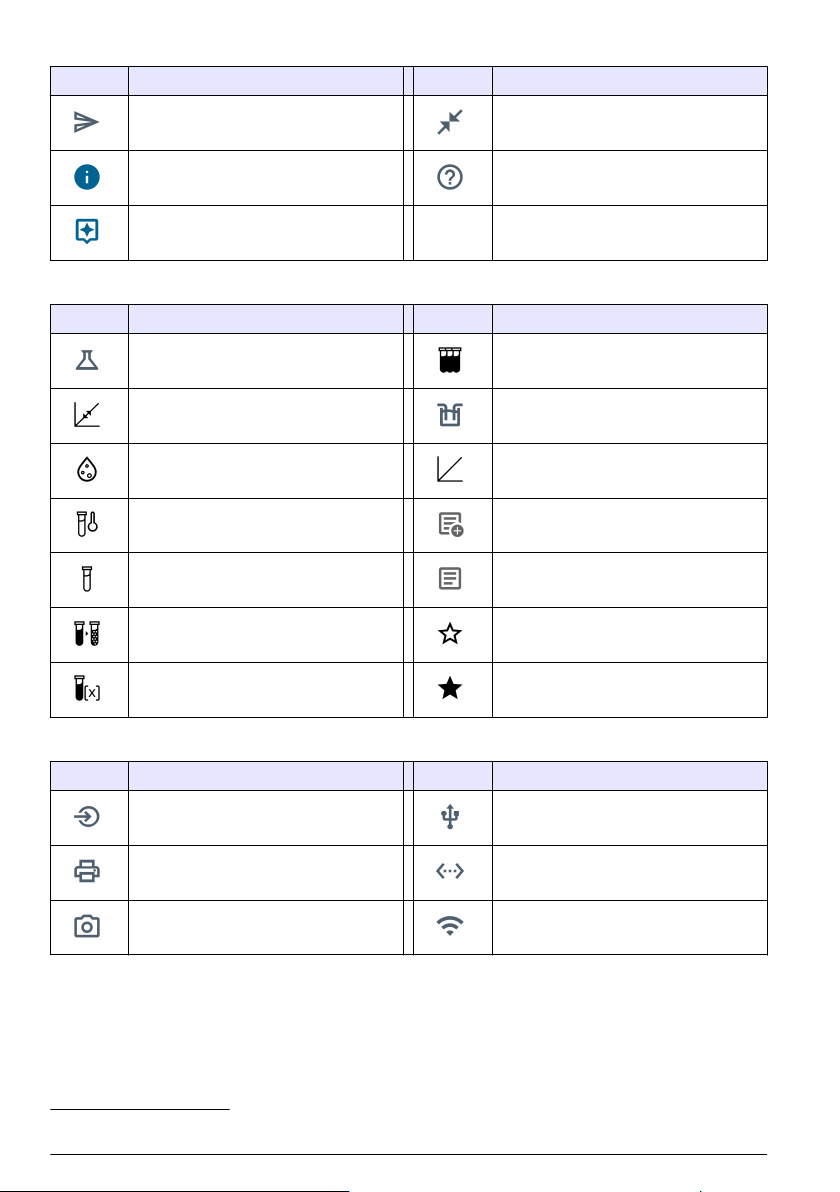
Table 1 Menu icons (continued)
Icon Description Icon Description
Send Close expanded measurement view
More information Open working procedure
Instructional assistant
Table 2 Sample analysis icons
Icon Description Icon Description
Sample analysis Multiple measurement
Standard adjust Sipper is connected
Turbidity TrueCal
Cuvette temperature Add comment
2
Reagent blank Comment available
2
Dilution factor Favorite
Concentration factor Selected favorite
Table 3 Connectivity and hardware icons
Icon Description Icon Description
Input devices USB flash drive
Printer Ethernet
Camera Wi-Fi
2
Sample ID menu only
14 English