X-Series-Maintenance-Manual(1).pdf - 第107页
Major Maintenance Performing Maintenance Tasks Maintenance Tasks for C&P6/12 Head Maintenance Manual SIPLACE X Series 107 Performing Maintenan ce Tasks 5.7.3 Performing Maintenance Tasks Cleaning the Tur ning Stati o…
Major Maintenance
Maintenance Tasks for C&P6/12 Head Preparatory Steps
106 Maintenance Manual SIPLACE X Series
Preparatory Steps
5.7.2 Preparatory Steps
Assembling the head mount
► Assemble the head mount.
Read the head mount manual (German and English: [00196371-xx]).
► Connect the assembly mount ESD connection to an ESD connection at the workplace.
Dismantle the placement head
► Set the nozzles down in the nozzle changer.
► Switch the placement machine off at the main switch.
► Dismantle the head cover.
► Dismantle the placement head and remove it from the placement machine. For removal and
installation details, read the service manual for the respective machine.
CAUTION
ESD regulations!
► Always observe the ESD regulations described in the user manual.
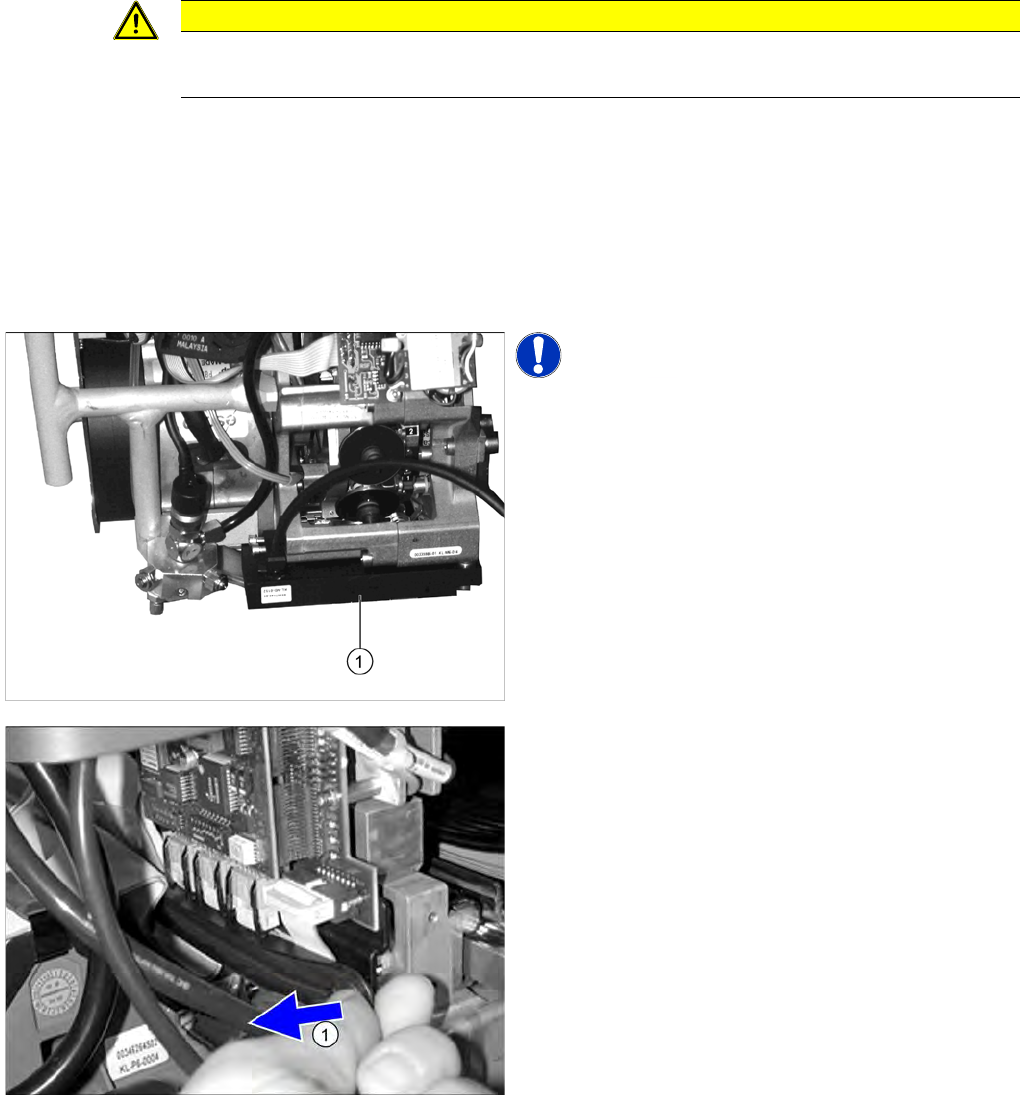
NOTICE! The component sensor is optional.
If a component sensor (1) is available, loosen the two
fastening screws and remove the head.
The DLM4 head does not support the BE-Sensor and is
missing accordingly.
► Cover the feeder area to protect the feeder modules
and front part of the head.
► (1) Open the strain relief.
Major Maintenance
Performing Maintenance Tasks Maintenance Tasks for C&P6/12 Head
Maintenance Manual SIPLACE X Series 107
Performing Maintenance Tasks
5.7.3 Performing Maintenance Tasks
Cleaning the Tur ning Stati on Read Unit
5.7.3.1 Cleaning the Turning Station Read Unit
Ribbon cable (Example of X series)
► Open the clamp (2) above the two flat ribbon cables
(1) and remove the flat ribbon cables.
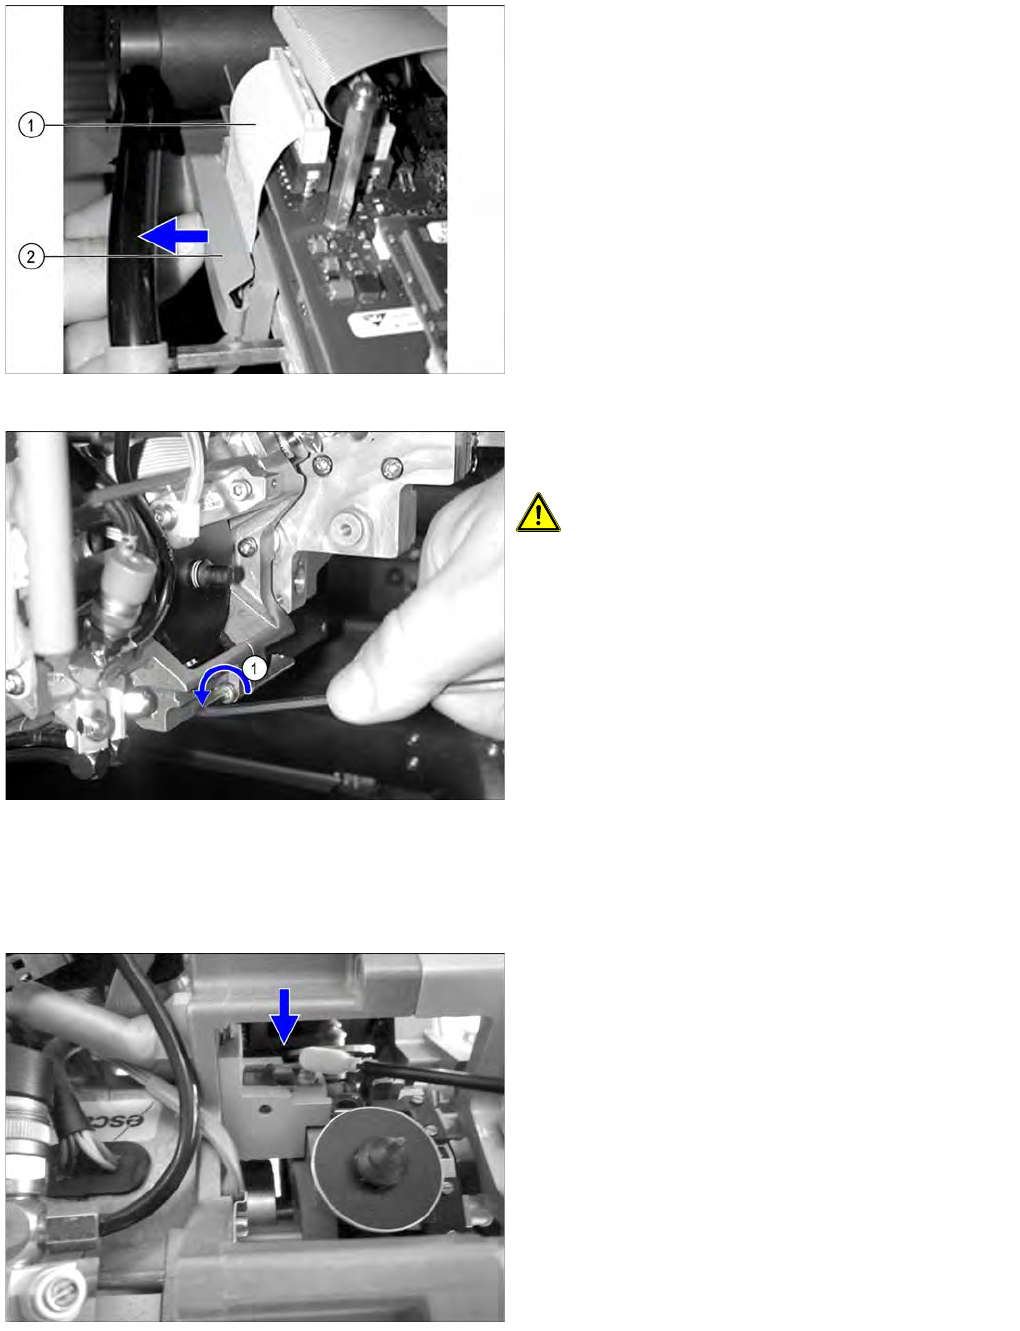
► (1) Loosen the 4 screws (Inbus 3 mm) fastening the
front section of the head and remove it.
CAUTION! Hold the front part of head firmly as
you remove the screws.
► Turn the star half a revolution to avoid damaging the
valve plunger drive with the valve plunger.
► Fit the placement head onto the head mount.
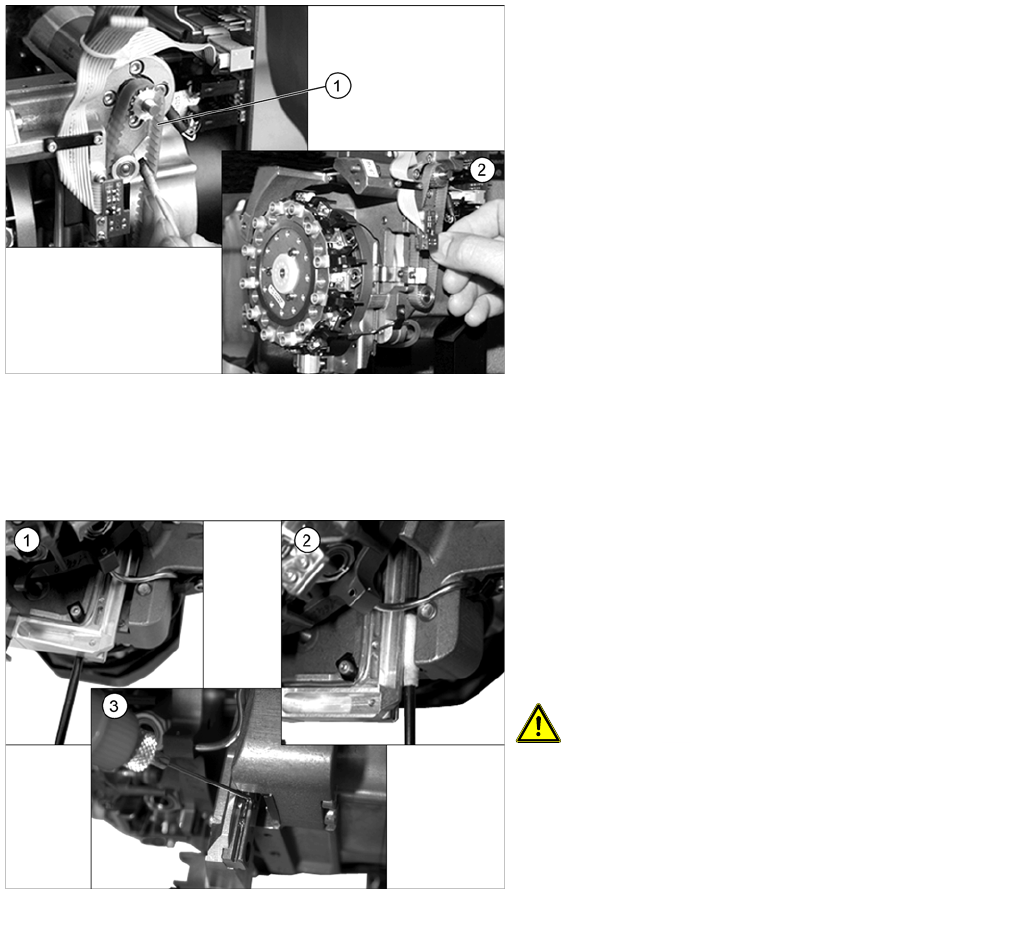
► Remove the sleeves and place them in the vessels
provided.
► Remove one sleeve.
► Clean the read unit lens with a cottonwool bud
moistened with ethanol.
► Fit the sleeve back into place.
Major Maintenance
Maintenance Tasks for C&P6/12 Head Performing Maintenance Tasks
108 Maintenance Manual SIPLACE X Series
Z Axis
5.7.3.2 Z Axis
► Use a brush or cottonwool bud to clean the Z axis
toothed belt (1).
► Clean the rollers and toothed wheels with a
cottonwool bud or a lint-free cloth.
► Check the toothed belt for wear or damage.
► If the toothed belt is worn or damaged, replace it. For
removal and installation details, read the service
manual for the respective machine.
► Grease the new toothed belt slightly with "ISOFLEX
TOPAS NCA 52". Then remove excess grease with a
lint-free cloth.
► (2) Check that the Z axis linear guide runs easily and
without play. Please contact your SIEMENS Service
team if you have any problems with this.
► Check the jaws and the raceway for damage. Please
contact your SIEMENS Service team if you have any
problems with this.
► Move the Z axis into its bottom position.
► Clean the grooves in the miniature roller table at the
front (1) and back (2) using cottonwool buds dipped
in ethanol.
► Wipe the needle of the oil dispenser clean
[00367071-xx].
CAUTION! Do not force oil out of the oil
dispenser. A visible drop would be too much oil.
► (3) Simply place the needle immediately beside the
ball cage/bearing on the grooves of the guide rail.
The action will cause sufficient oil to reach the
grooves (capillary effect).
► Move the Z axis up and down several times to
distribute the oil.