X-Series-Maintenance-Manual(1).pdf - 第92页
Major Maintenance Maintenance Tasks for C&P2 0A Head Final Work 92 Maintenance Manual SIPLACE X Series Final W ork 5.5.6 Final Work Attaching the maintenance label Fitting the placement head ► Fit the placement head …
Major Maintenance
Performing Maintenance Tasks Maintenance Tasks for C&P20A Head
Maintenance Manual SIPLACE X Series 91
Cleaning the Com ponent Se nsor
5.5.5.7 Cleaning the Component Sensor
CAUTION
The hold circuit has a centering pin.
► During fitting, make sure that the centering pin is inserted into the opposite hole in the seat
of the hold circuit, otherwise the hold circuit could be fitted at an incorrect angle (twisted by
120 degrees).
CAUTION
Installation instructions
► Make sure that the seal is inserted correctly!
► Insert the silencer once more and screw it in place. The screw may only be tightened "hand-
tight".
CAUTION
BE-Sensor, cottonwool buds
► Take care not to damage the component sensor prisms.
► Make sure that you do not use the cottonwool buds soaked in oil from cleaning the sleeves.
Always use a new cottonwool bud!
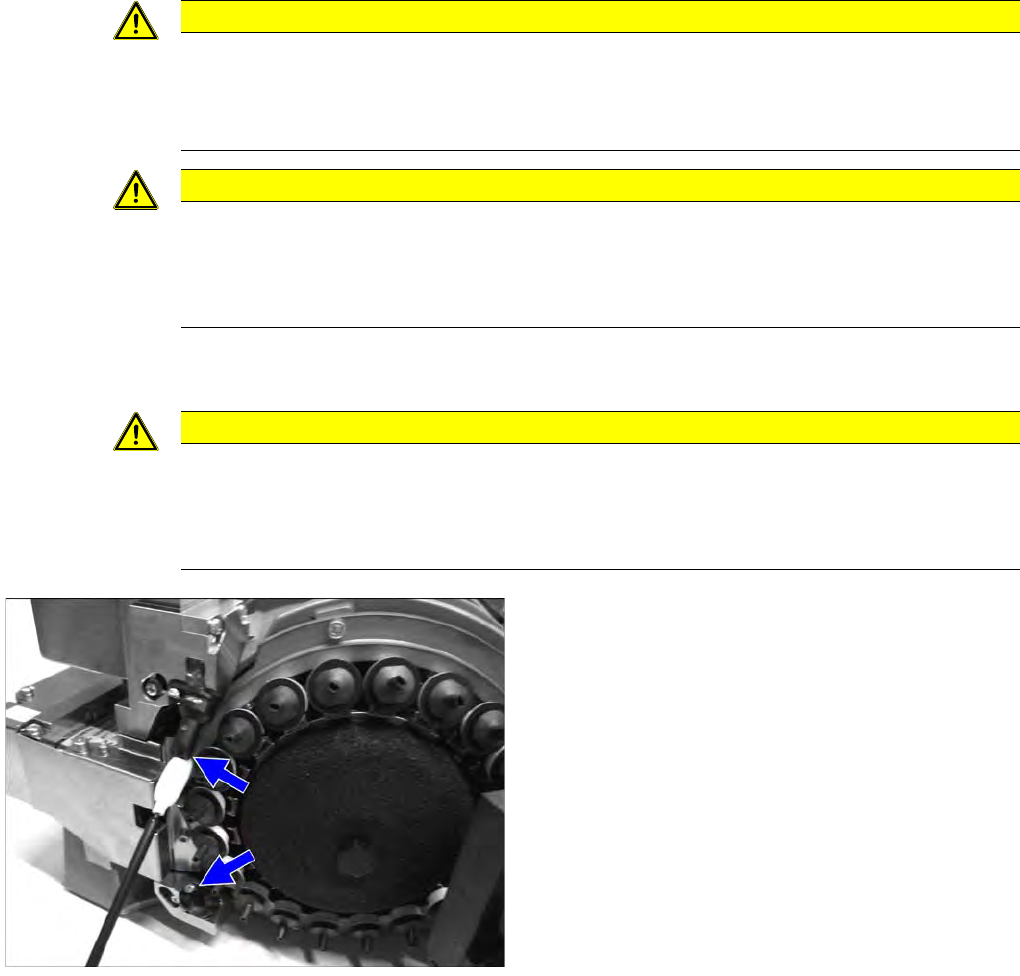
► Remove the protective hose for the component
sensor.
► Clean the prisms of the component sensor with a
cottonwool bud soaked in ethanol.
► Fit the protective hose back onto the component
sensor.
Major Maintenance
Maintenance Tasks for C&P20A Head Final Work
92 Maintenance Manual SIPLACE X Series
Final Work
5.5.6 Final Work
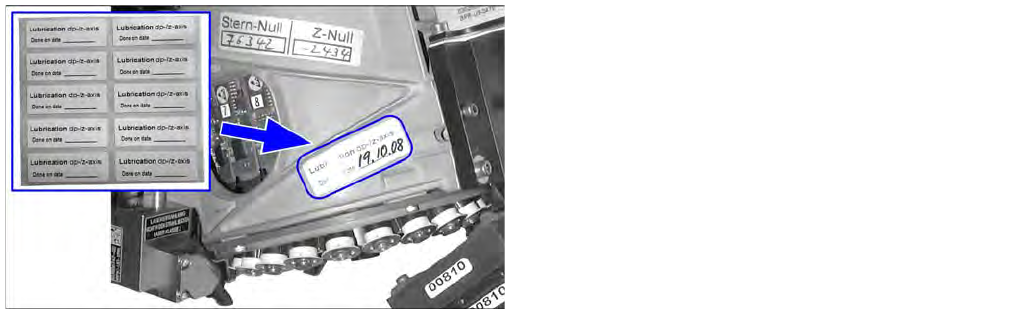
Attaching the maintenance label
Fitting the placement head
► Fit the placement head back onto the gantry. Read the service manual for the respective machine
first.
► Remove the protective hose for the component sensor.
► Switch the placement machine on at the main switch.
► Calibrate the placement head, preferably using the FHE function. Read the service manual for the
respective machine first.
► For SW704 and higher only: Reset the maintenance cycle counter for the corresponding assemblies.
► Remove any label which may still be present from the
placement head.
► Remove any adhesive residues and clean the area.
► Attach the label and enter the date and, if required,
the meter count, depending on how you determine
your maintenance intervals.

Major Maintenance
Consumables, Spare and Wear Parts, Tools Maintenance Tasks for CPP Head
Maintenance Manual SIPLACE X Series 93
Maintenance Tasks for CPP Head
5.6 Maintenance Tasks for CPP Head
Consumables, Spare and Wear Parts, Tools
5.6.1 Consumables, Spare and Wear Parts, Tools
▪ Starter kit for maintenance CPx and TwinHead [03071171-03]
▪ Universal placement head mounting rack [03056231-xx]
▪ Set of Allen wrenches
▪ Set of open-jawed spanners
▪ Cotton wool buds [00352931-xx]
▪ Second multipette, if required [00386154-xx]
▪ Vacuum hose DP/CPP, if required [03015920Sxx]
▪ Silencer for CPP, if required [03061440-xx]
▪ Component sensor protective cap [03080984-xx]
▪ Service manual for your maschine:
SX1/SX2/DX1/DX2: [00196496-xx] (German), [00196497-xx] (English) or
SX4/DX4: [00196712-xx] (German), [00196713-xx] (English) or
X-Serie: [00194439-xx] (German), [00194440-xx] (English)
You will find all key tools and consumable materials for maintenance work on the TwinHead, CPP and
C&P20(A) heads in the "Starter kit for maintenance CPx and TwinHead" [03071171-03].
Preparatory Steps
5.6.2 Preparatory Steps
Assembling the head mount
► Assemble the head mount. Read the head mount manual (German and English: [00196371-xx]).
► Connect the assembly mount ESD connection to an ESD connection at the workplace.
Vacuum test
► Set the nozzles for the current nozzle configuration down in the nozzle changer.
► Before you begin maintenance work, perform a vacuum test. Use the calibration nozzles 2057 for
this. If vacuum value irregularities occur at certain segments, take a closer look at these during
maintenance work. Note down the numbers of the problematic segments for later reference.
CAUTION
ESD regulations!
► Always observe the ESD regulations described in the user manual.