X-Series-Maintenance-Manual(1).pdf - 第99页
Major Maintenance Performing Maintenance Tasks Maintenance Tasks for CPP Head Maintenance Manual SIPLACE X Series 99 Oiling the Support Roller 5.6.4.2 Oiling the Support Roller ► For this maintenance ta s k, use the yell…
Major Maintenance
Maintenance Tasks for CPP Head Performing Maintenance Tasks
98 Maintenance Manual SIPLACE X Series
Performing Maintenance Tasks
5.6.4 Performing Maintenance Tasks
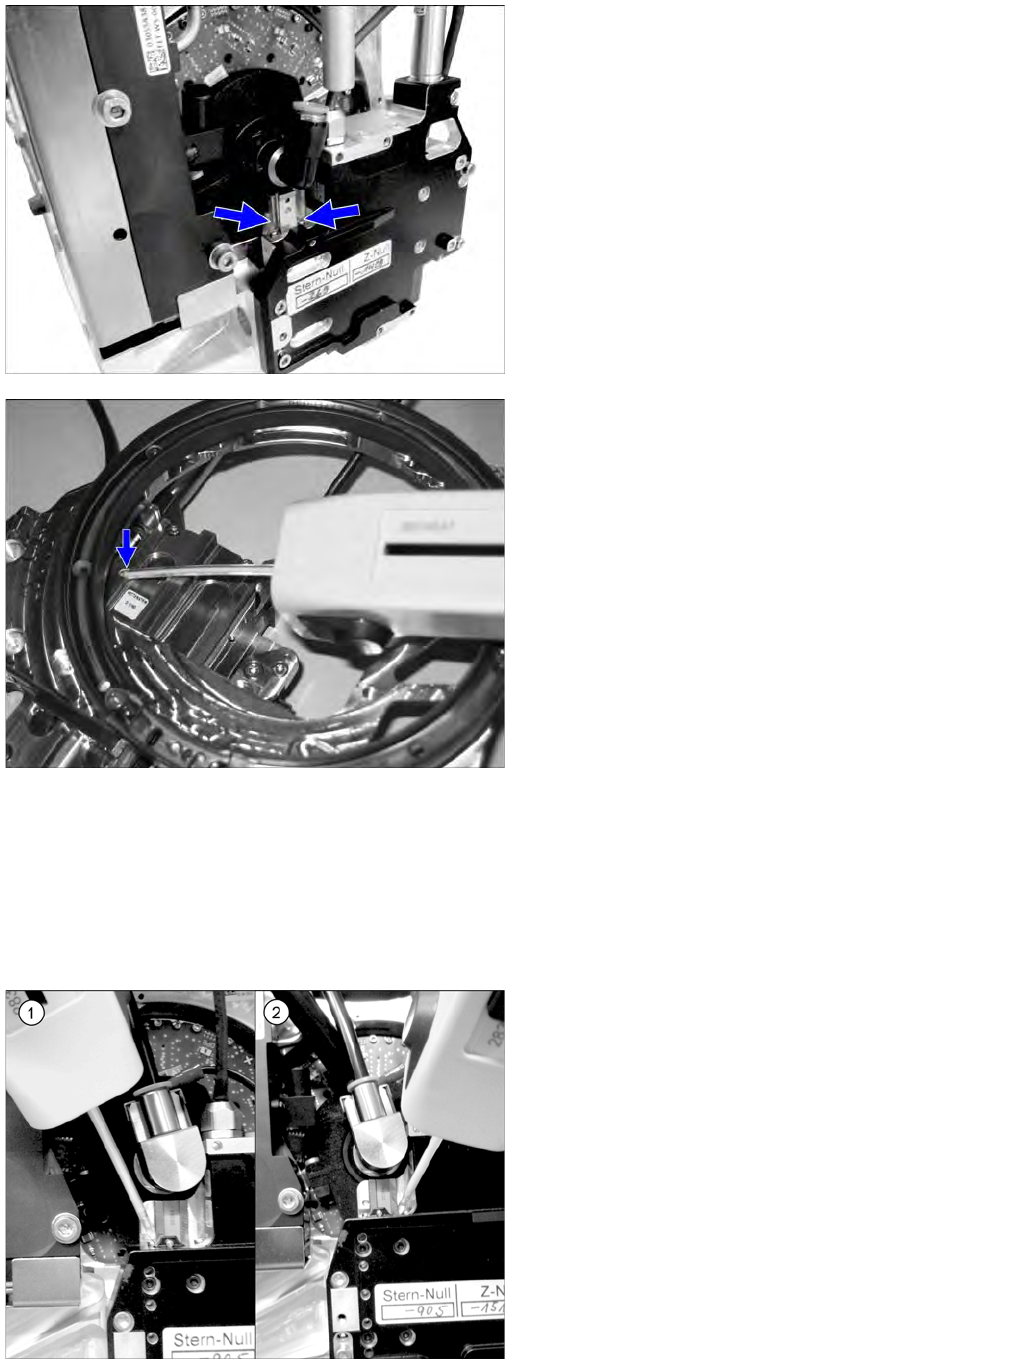
Oiling th e Z Axis Lin ear Guidance
5.6.4.1 Oiling the Z Axis Linear Guidance
► For this maintenance task, use the blue combitip with Thermoplex ALN 1001/00.
► Set the multipette to 4 µl.
Z linear guide
2 x 4 µl Lubcon Thermoplex ALN 1001/00 (blue combitip)
per ball groove
Support roller
1 x 1 µl Klüber oil GEM 1 220 N (yellow combitip) on the
supporting roller
► Apply 4 µl of lubricant to the left and right sides of the
guide track and move the Z axis approx. 5 times
manually in and out.
► Apply another 4 µl of lubricant to the left and right
sides of the guide track and move the Z axis approx.
another 5 times manually in and out.
► A total of 2 x 4 µl must be applied to each guide track.
Major Maintenance
Performing Maintenance Tasks Maintenance Tasks for CPP Head
Maintenance Manual SIPLACE X Series 99
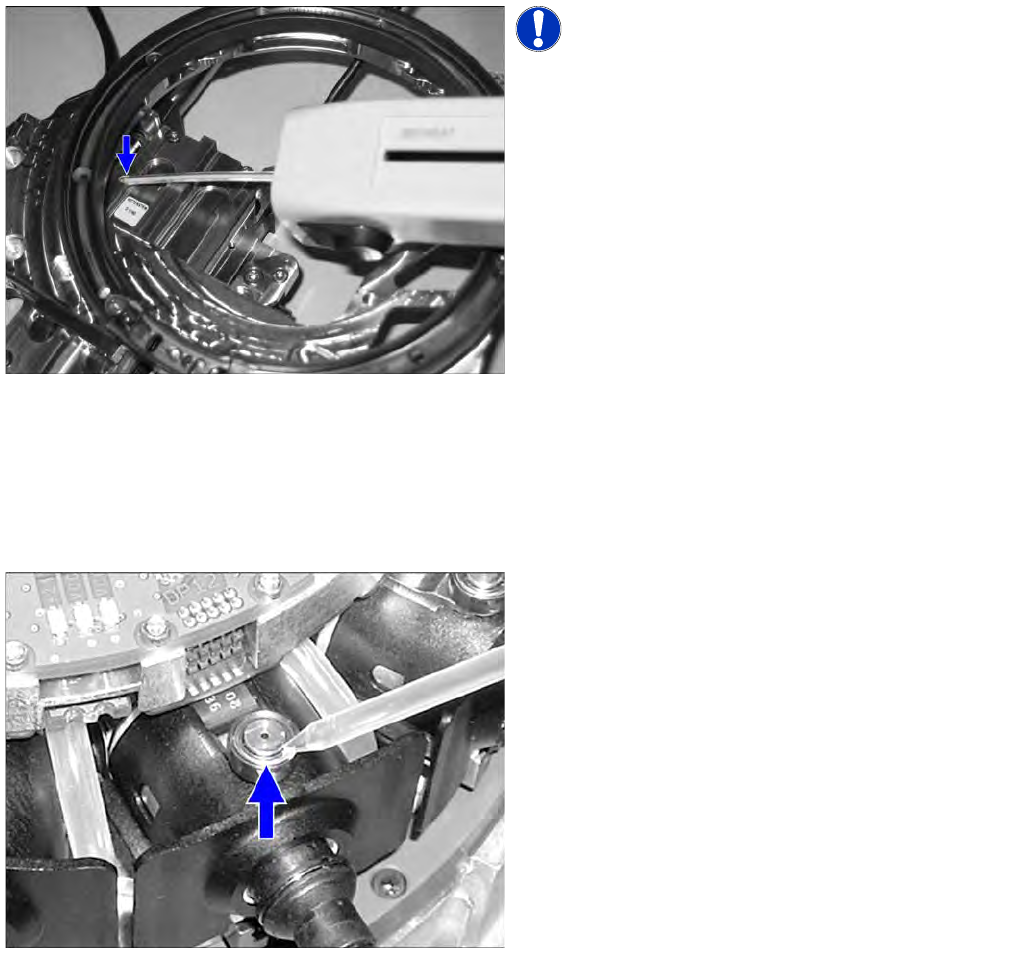
Oiling the Support Roller
5.6.4.2 Oiling the Support Roller
► For this maintenance task, use the yellow combitip with Klüber oil GEM 1 220 N.
► Set the multipette to 1 µl.
Oiling the DP Driver Bearing
5.6.4.3 Oiling the DP Driver Bearing
► For this maintenance task, use the black combitip with Klüberalfa DH 3-100.
► Set the multipette to 1 µl.
► Mark the first segment by removing a nozzle.
NOTICE! Lubricate via the service hole n the
back of the front plate. The front plate needs to be
removed for this.
► Press the Z axis up to the top stop. This gives you
access to the service hole.
► Insert the multipette into the service hole and apply
1 µl of lubricant to the supporting roller.
► Move the Z axis manually in and out approx. 5 times.
► Position the multipette on the top edge of the locking
pin and apply 1 µl of lubricant.
► Oil all driver bearings as described above.
► Fit the removed nozzle back into place.
Major Maintenance
Maintenance Tasks for CPP Head Performing Maintenance Tasks
100 Maintenance Manual SIPLACE X Series
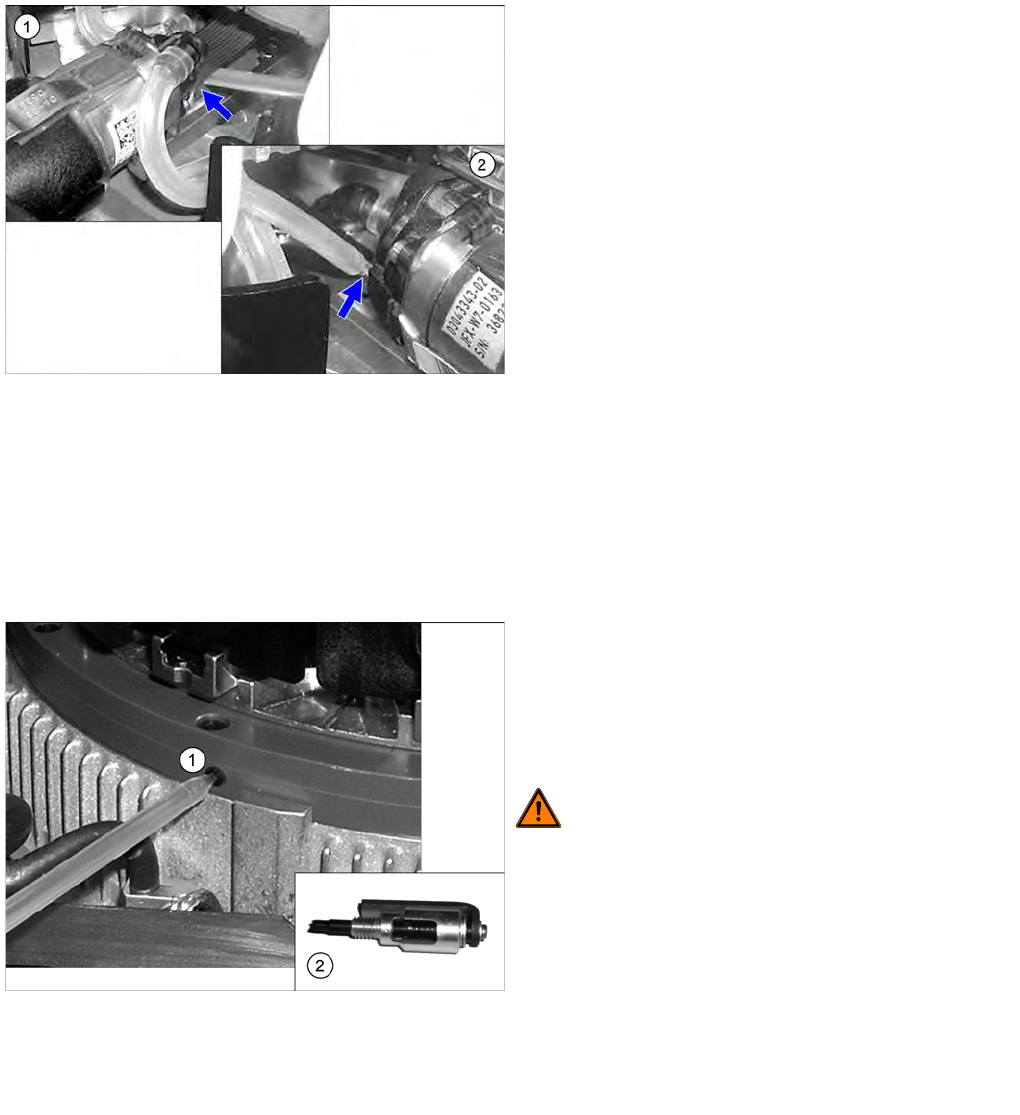
Oiling the DP Segment Guide
5.6.4.4 Oiling the DP Segment Guide
► For this maintenance task, use the blue combitip with Thermoplex ALN 1001/00.
► Set the multipette to 2 µl.Set the multipette to 2 µl.
► Mark the first segment by removing a nozzle.
Oiling th e Star Bearing
5.6.4.5 Oiling the Star Bearing
► For this maintenance task, use the green combitip with CPP Isoflex Topas NCA 5051.
► Set the multipette to 2 µl.Set the multipette to 2 µl.
► Loosen the grub screw on the left side of the star bearing.
► Mark the first segment by removing a nozzle.
► Pull the segment out as far as the stop.
► Apply 2 µl of lubricant to the center of each guide
track (left (2) and right side (1)) and then move the
segment manually approx. 5 times in and out.
► Apply another 2 µl of lubricant to the center of each
guide track (left (2) and right side (1)) and then move
the segment again manually approx. 5 times in and
out.
A total of 2 x 2 µl must be applied to each guide track.
► Move the segment back in again.
► Turn the star on to the next segment.
► Repeat these steps on all segments.
► Fit the removed nozzle back into place.
► Position the combitip in the opening (1) and apply 2 µl
of lubricant. Remove the multipette from the service
opening and turn the star by 30° (= one segment)
onwards. Repeat this step 24 times so that the star
moves two full rotations. A total of 24 x 2 μl lubricant
must be applied.
WARNING! If the star is turned on while the
multipette tip is still in the bearing, the multipette could
break off and damage the bearing.
► Screw the lubricant distributor (2) into the opening in
the star bearing. This tool is used to evenly distribute
the lubricant.
► Rotate the star 3x by 360 degrees.
► Remove the lubricant distributor.
► Screw the grub screw back in.
► Fit the removed nozzle back into place.