X-Series-Maintenance-Manual(1).pdf - 第80页
Major Maintenance Maintenance Tasks for C&P2 0A Head Preparatory Steps 80 Maintenance Manual SIPLACE X Series Preparator y Steps 5.5.3 Preparatory Steps Assembling the head mount ► Assemble the head mount. Read t he …
Major Maintenance
Consumables, Spare and Wear Parts, Tools Maintenance Tasks for C&P20A Head
Maintenance Manual SIPLACE X Series 79
Consumables, Spare and Wear Parts, Tools
5.5.2 Consumables, Spare and Wear Parts, Tools
▪ "Starter kit for maintenance CPx and TwinHead" [03071171-03].
▪ Universal placement head mounting rack [03056231-xx]
▪ Set of Allen wrenches
▪ Open-jawed spanner, 10 mm
▪ Brush (free of grease and solvent)
▪ Lint-free cloths [03082092-xx]
▪ Optics cloth/lens cloth
▪ Hold circuit assembly, if required [03005123-xx]
▪ Silencer for C&P20, if required [03043707-xx]
▪ Second multipette, if required [00386154-xx]
▪ Cotton wool buds [00352931-xx]
▪ Service manual for your maschine:
SX1/SX2/DX1/DX2: [00196496-xx] (German), [00196497-xx] (English) or
SX4/DX4: [00196712-xx] (German), [00196713-xx] (English) or
X-Serie: [00194439-xx] (German), [00194440-xx] (English)
▪ User manual "insertion and extraction tool for filter disks, C&P20A" (item no.: 00195378-xx).
You will find all key tools and consumable materials for maintenance work on the TwinHead, CPP and
C&P20(A) heads in the "Starter kit for maintenance CPx and TwinHead" [03071171-03].
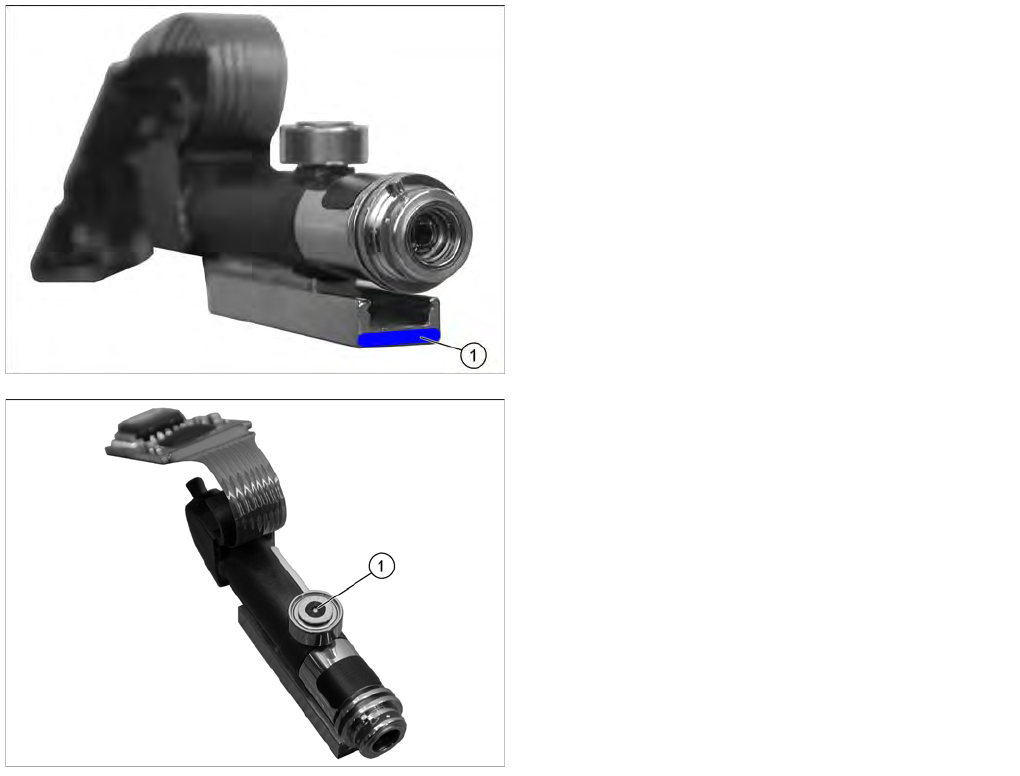
Segment guide
The C&P20A head has a blue line on the segment
guide (1).
▪ Segment guide on DP drive for C&P20 [03005109-xx]
▪ Segment guide on DP drive for C&P20A [03058627-
xx]
Driver bearing
The driver bearings (1) have different item numbers:
▪ DP drive driver bearing for C&P20 [03005109-xx]
▪ DP drive driver bearing for C&P20A from version 02
[03058627-xx]
Major Maintenance
Maintenance Tasks for C&P20A Head Preparatory Steps
80 Maintenance Manual SIPLACE X Series
Preparatory Steps
5.5.3 Preparatory Steps
Assembling the head mount
► Assemble the head mount. Read the head mount manual (German and English: [00196371-xx]).
► Connect the assembly mount ESD connection to an ESD connection at the workplace.
Vacuum test
► Set the nozzles for the current nozzle configuration down in the nozzle changer.
► Before you begin maintenance work, perform a vacuum test. Use the calibration nozzles 2057 for
this. If vacuum value irregularities occur at certain segments, take a closer look at these during
maintenance work. Note down the numbers of the problematic segments for later reference.
Removing the placement head
► Dismantle the placement head and remove it from the placement machine. Read the service manual
for the respective machine first.
► Fit the placement head onto the head mount.
Multipette
► Prepare the multipette. (See below)
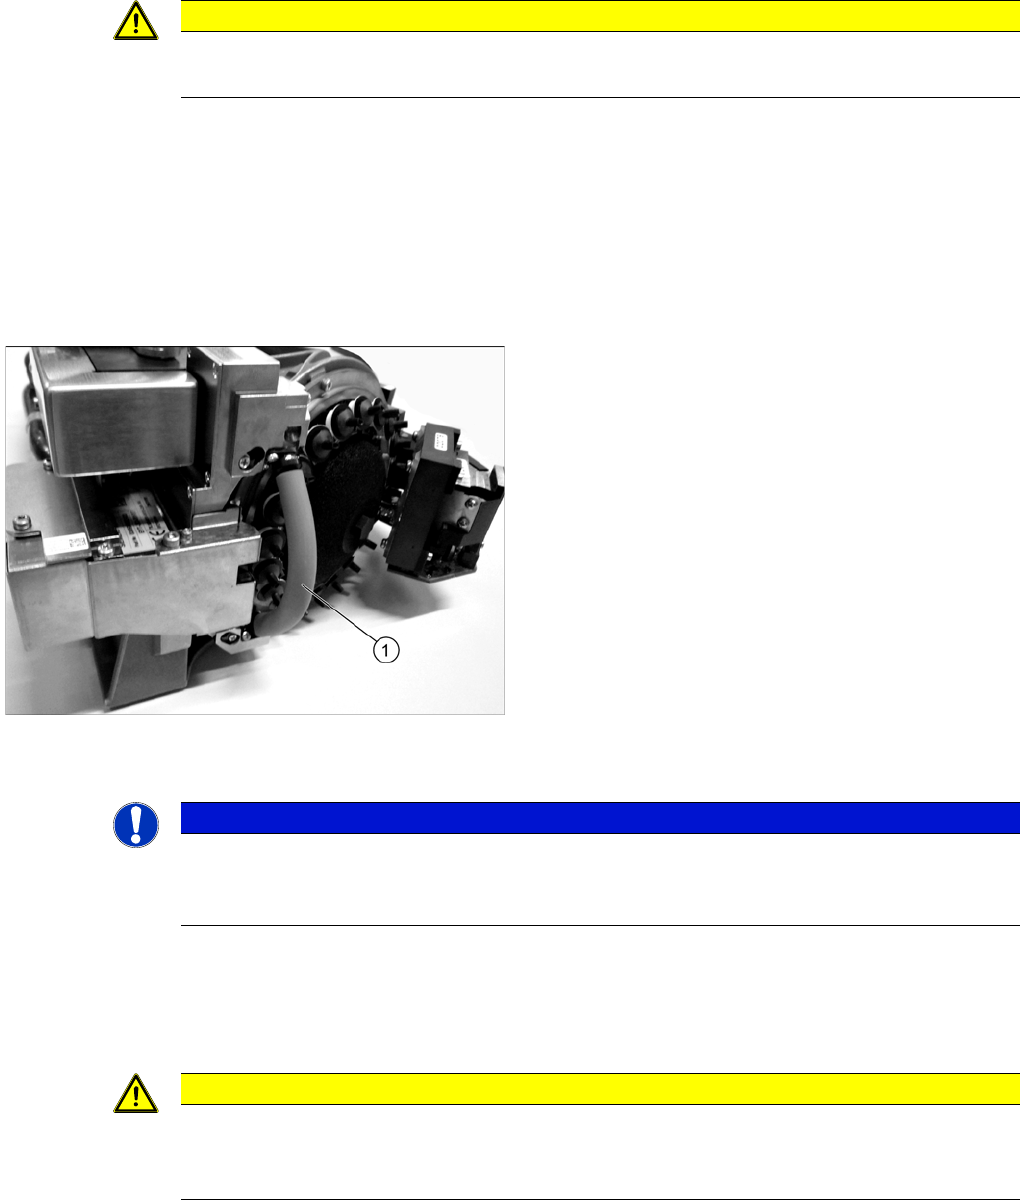
CAUTION
ESD regulations!
► Always observe the ESD regulations described in the user manual.
► Fit the protective hose (1) onto the component
sensor.
NOTICE
Fast Head Exchange
► If possible, use the FHE function. This enables you to perform a brief calibration during the
subsequent installation.
CAUTION
Do not combine!
Only use the combitip specifically marked for each lubricant, to avoid combining the lubricants.
Contamination (combination) of lubricants can affect the service life of the bearings!
Major Maintenance
Preparatory Steps Maintenance Tasks for C&P20A Head
Maintenance Manual SIPLACE X Series 81
Color-coding of dosage devices and lubricants
See also
1.2 Preparatory Work... [ ➙ 11]
Overview of M ultipette
5.5.3.1 Overview of Multipette
Assembling the Multipette
5.5.3.2 Assembling the Multipette
Color Lubricant Application
White White combitip
Nye Synthetic Oil 200A 30 ml
Driver bearing (C&P20 only)
Black Black combitip
Klüberalfa DH 3-100
Driver bearing (C&P20A only)
Blue Blue combitip
Lubcon Thermoplex ALN 1001/00 50 ml
Segment guide/Z axis guide (C&P20A)
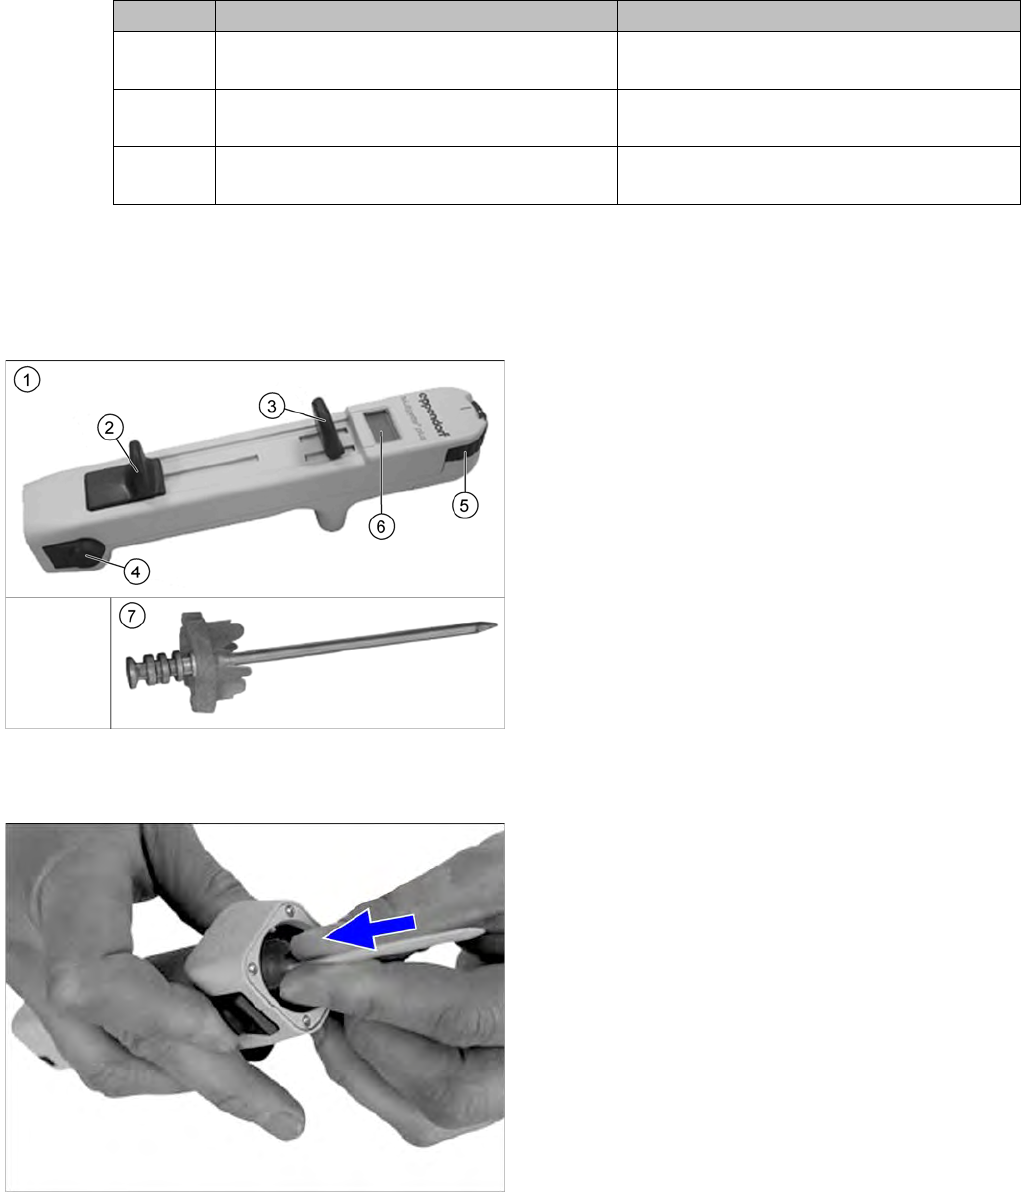
1. Multipette
2. Filling lever
3. Dosage lever
4. Reject button
5. Volume setting
6. Digital display
This shows the application amount. The amount
applied depends on the combitip used and the
current position of the volume setting.
7. Combitip
► Press the filling lever on the multipette right down and
hold in position.
► Press the relevant combitip onto the multipette until it
engages.
► Check whether the combitip is fitted firmly on the
Multipette.
► Set the required dosage on the volume setting.