X-Series-Maintenance-Manual(1).pdf - 第56页
Minor Maintenance Maintenance Tasks for C&P6 /12 Head Performing Maintenance Tasks 56 Maintenance Manual SIPLACE X Series Greasing the Valve Plunger with the Tool Tools available for order ▪ Head maintenance effi cie…
Minor Maintenance
Performing Maintenance Tasks Maintenance Tasks for C&P6/12 Head
Maintenance Manual SIPLACE X Series 55
Cleaning the Val ve Plunge r
4.8.3.3 Cleaning the Valve Plunger
► Make sure that the valve plungers are inserted as far as the stop.
► Insert the cleaned sleeves into the segments. Use a very gentle pressure to engage the sleeves to
avoid damaging the retaining springs.
Greasing the Valve Plunge r with the Tool
NOTICE
Mark cleaned valve plunger
► Distinguish between the dirty and the clean valve plungers by identifying the packages
accordingly, for example.
► Please also observe section "4.8.3.3.1 Greasing the Valve Plunger with the Tool" [ ➙ 56].
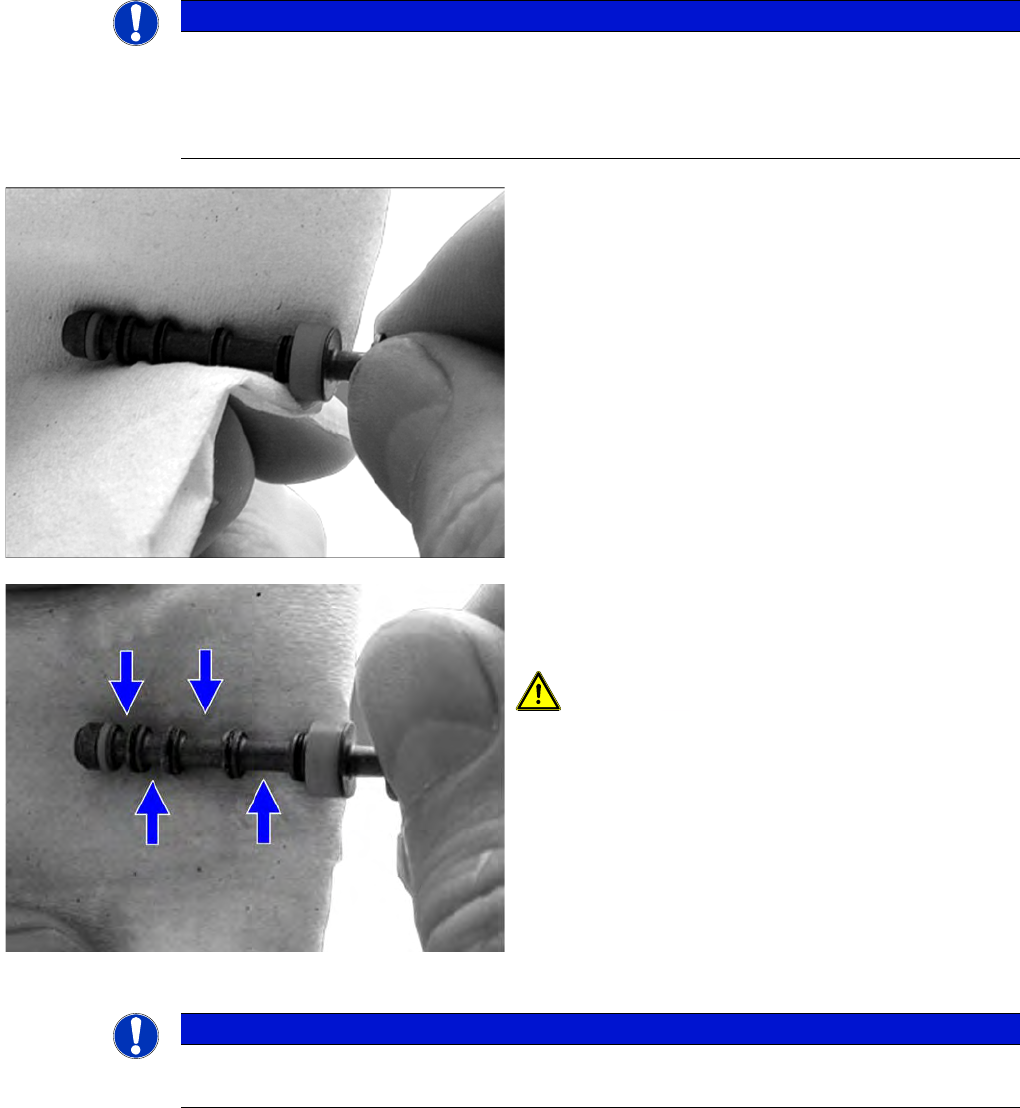
► Remove the valve plungers.
► Wipe the valve plunger using a dry, lint-free cloth.
► Check the sealing lips, the spring O-ring and the
sleeve for damage. If they are damaged, replace the
valve plunger. A loose sleeve can be refitted if it is still
intact.
► Grease the sealing lips extremely sparingly using a
lint-free cloth dipped in ISOFLEX TOPAS NCA 52.
No grease residue may visible.
CAUTION! The grooves shown in the diagram
must be left grease-free. New valve plungers must also
be greased before they are used for the first time.
► Fit the valve plunger back into place.
► Move the valve plungers back and forth several
times. If they move too easily or are stiff to move,
replace the valve plungers concerned.
NOTICE
Error message "Segment leaky"
The "Segment leaking" error message generally indicates a valve plunger that is too loose.
Minor Maintenance
Maintenance Tasks for C&P6/12 Head Performing Maintenance Tasks
56 Maintenance Manual SIPLACE X Series
Greasing the Valve Plunger with the Tool
Tools available for order
▪ Head maintenance efficiency kit 220V [00383601-xx] or
Head maintenance efficiency kit 110V [00385449-xx]
▪ Plunger maintenance tool [03049689-xx]
▪ Cleaning tools for encoder disk [03049704-xx]
▪ Nozzle cleaner 24P [03042652-xx]
▪ Sleeve cleaning device [00377260-xx]
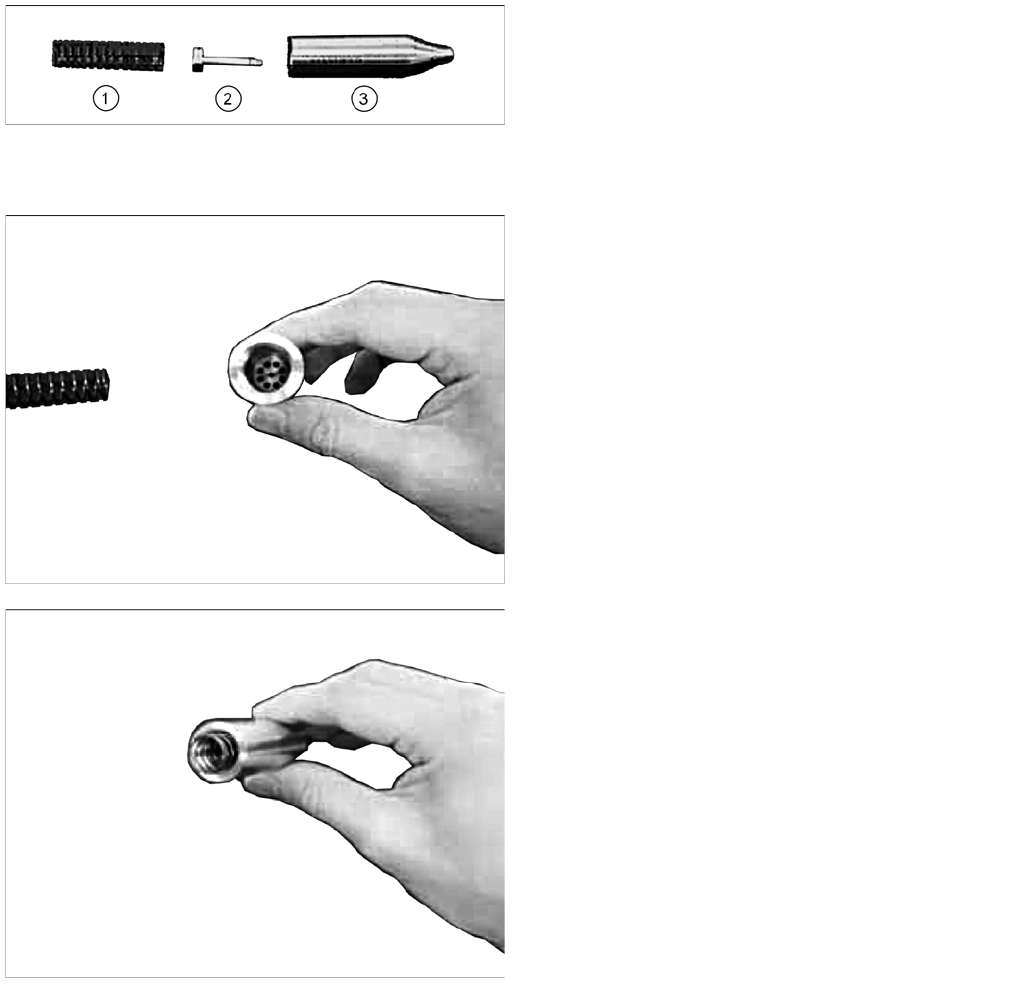
Tool parts
Tool assembly
1. Spring
2. Pistons
3. Cylinder
► Insert the piston into the cylinder.
► Insert the spring into the cylinder.
Minor Maintenance
Performing Maintenance Tasks Maintenance Tasks for C&P6/12 Head
Maintenance Manual SIPLACE X Series 57
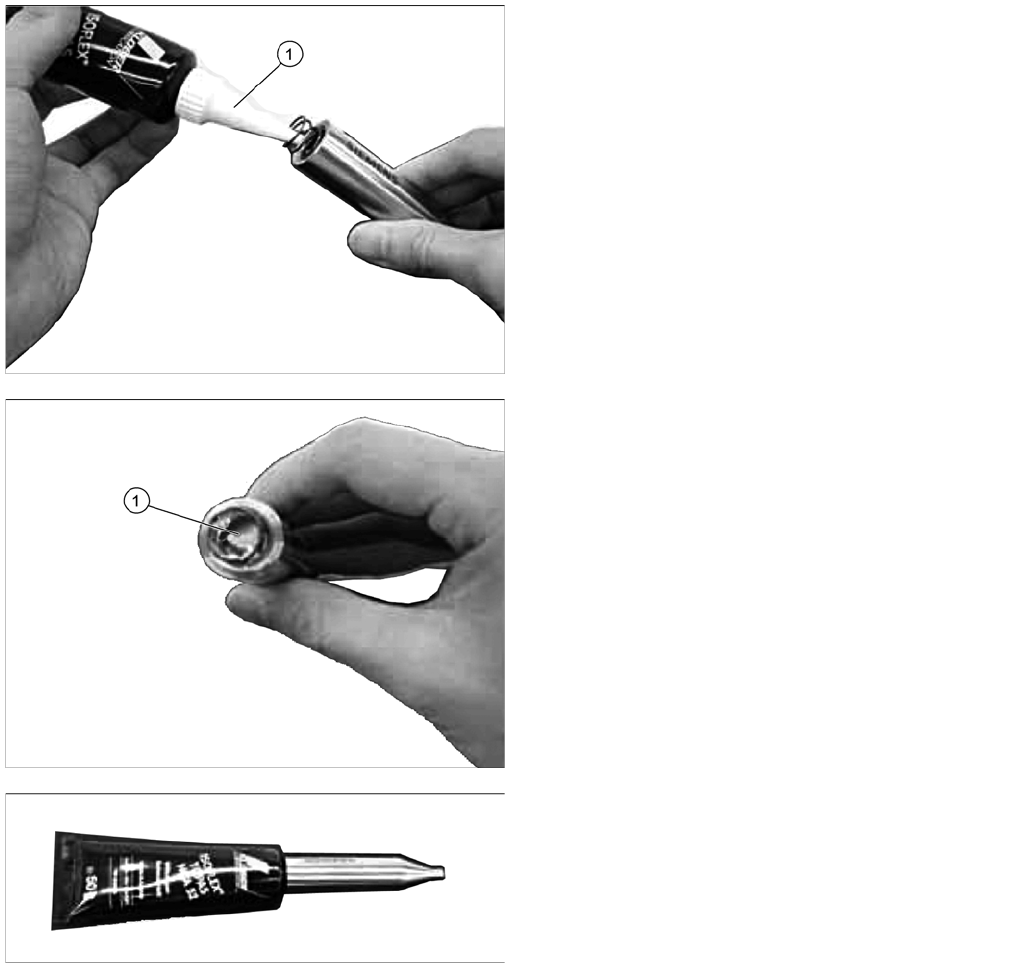
► Fill the cylinder with ISOFLEX TOPAS NCA 52, using
the adapter (1) provided with the TOPAS.
This tool works best without air in the cylinder.
If possible, make sure that no air gets into the cylinder.
If air and ISOFLEX TOPAS NCA 52 gets into the cylinder,
this could impair the quality of the lubrication.
1. ISOFLEX TOPAS, NCA 52
State after filling the cylinder with ISOFLEX TOPAS NCA
52.
► Take the adapter off the TOPAS tube, press the air
out of the TOPAS tube and attach the cylinder with a
rotary movement.