TRS Advanced WB Intel Issue 02.pdf - 第108页
TRS Advanced Maintenance 108 Issue 2, Nov 14 - The Plate has ‘sprung’ edges to the top and right side. Push 187128 into the top right side corner and maintain a diagonal pressure while pressing the boar d flat to the VAP…
Issue 2, Nov 14
TRS Advanced Maintenance
107
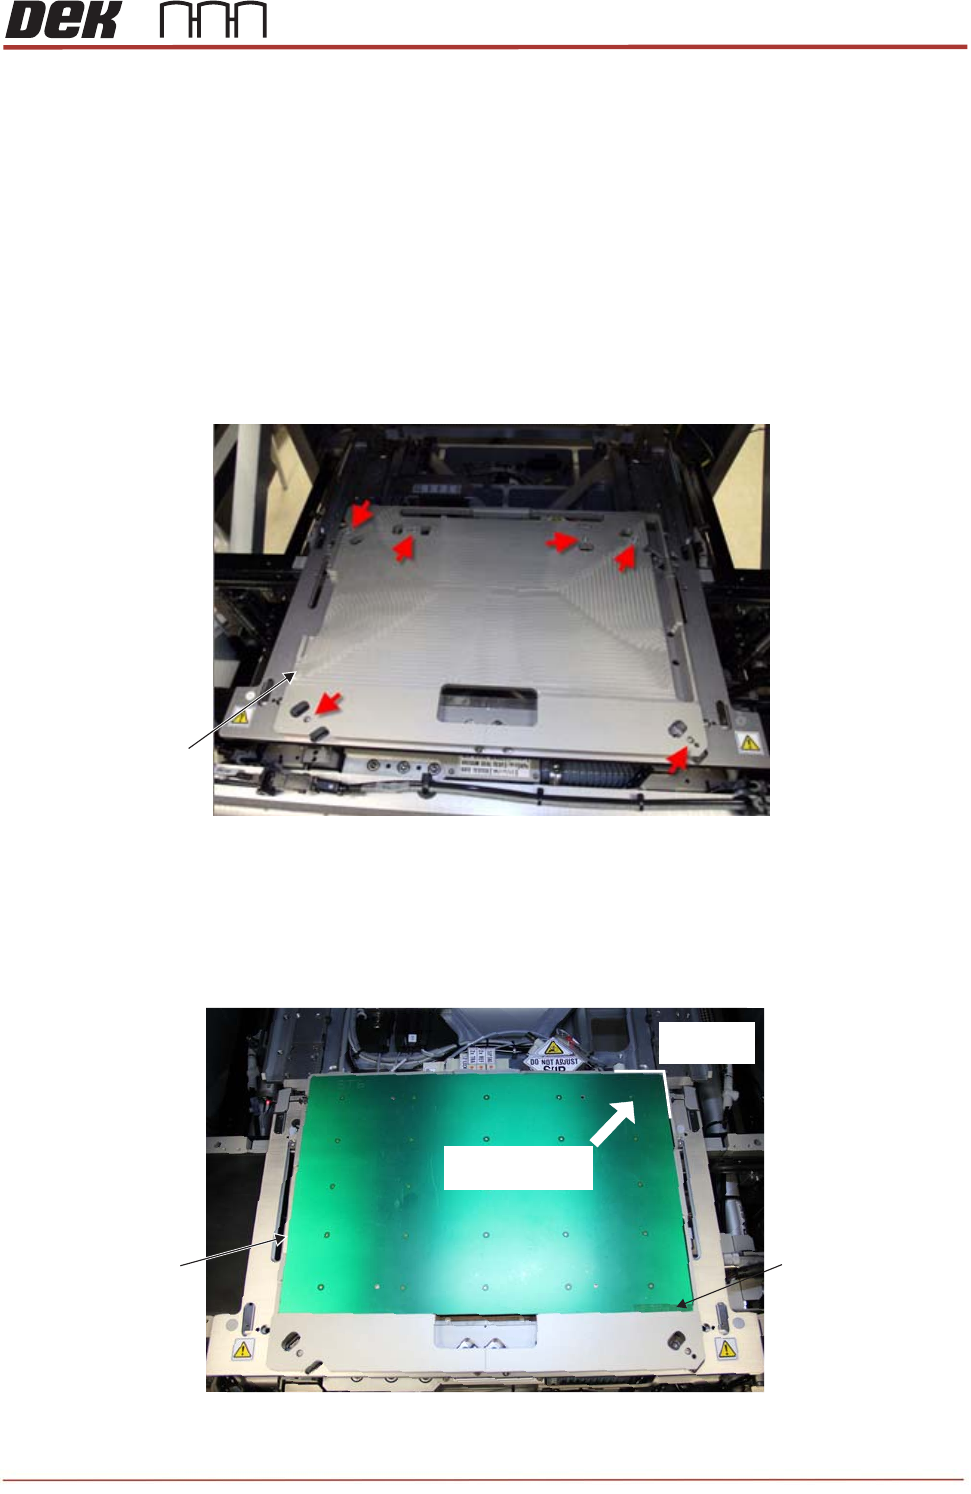
- Fit the vision alignment plate (VAP) (212808). Carefully align and locate the dowels on the
underside of the VAP with the holes in each of the rail cap bearings.
NOTE
The VAP locates in one position only. Holes are provided in the plate to aid visual location
of the bearings.
1. Care must be taken not to damage the rail cap bearings.
2. Check for flatness and position before tightening the screws.
- Tighten the 6 off captive screws to secure the VAP in place as shown above.
- Load the 187128 calibration PCB onto the VAP as shown below.
VAP
(212808)
View on Rail Cap (VAP Fitted)
DEK Part Number
Location
Locate this
corner rst.
Push this way and
press board at
Calibration Board xed in the Vision Alignment Plate
Calibration Board
(187128)

TRS Advanced Maintenance
108
Issue 2, Nov 14
- The Plate has ‘sprung’ edges to the top and right side. Push 187128 into the top right side
corner and maintain a diagonal pressure while pressing the board flat to the VAP.
NOTE
Make sure DEK Part Number is located to front right.
- In Maintenance set the TRS Tooling to Not Fitted.
- Select Screen.
- Manually feed the SPC board (212277) onto the centre rails during “Auto Board”.
- Carry out a standard Vision Calibration procedure: (Ref. Technical Reference Manual)
• Locate 4 screen fiducials
• Learn board fiducials ( Score 850+)
• Learn screen fiducials (Score 850+)
• Automatic 25 fiducials check
• Automatic 50 fiducials check
• Configuration data save.
Carry out the following Offset Calibration procedure.
- Clean the SPC Board (212277), vision alignment plate (212808) and small calibration
board (187128) with isopropyl prior to use.
- Select Maintenance / Calibration / Offset.
- Select Change Screen and remove the calibration screen.
- Replace the calibration board with the fiducials downward (copper side up) into the
calibration platen.
Calibration Board xed in the Vision Alignment Plate (Copper side up)

Issue 2, Nov 14
TRS Advanced Maintenance
109
- Re-load the calibration screen.
- Manually feed the SPC board (212277) onto the centre rails during “Auto Board”.
- Carry out a standard Offset Calibration procedure:
• Locate 4 screen fiducials
• Paste the 25 stencil positions
• Learn 25 paste fiducials (adjust the size and the positions if required)
• Save configuration data when test passes.
NOTE
Ensure that the calibration screen is cleaned with IPA impregnated lint free wipe on
completion of the offset calibration.
If for any reason the camera cannot locate the board or screen fiducial (except for poor
prints), select Fiducial Setup and relearn the fiducial, (refer to Technical Reference
Manual).
Select Retry, the sequence continues and does not have any detrimental effect to the
calibration.
- Remove, clean and store the calibration screen (212251) and calibration PCB
(187128).
- Carefully remove the VAP (212359).
- In Maintenance set the TRS Tooling to Fitted.
(Vision and Offset Calibration completed.)