TRS Advanced WB Intel Issue 02.pdf - 第61页
Issue 2, Nov 14 TRS Advanced Maintenance 61 66. Ensure that the rail cap sits flat onto both rails and tighten 6 off M5x16 clamping block screws to lock guide rods into position (3 for each side) as shown below. 67. Tigh…
TRS Advanced Maintenance
60
Issue 2, Nov 14
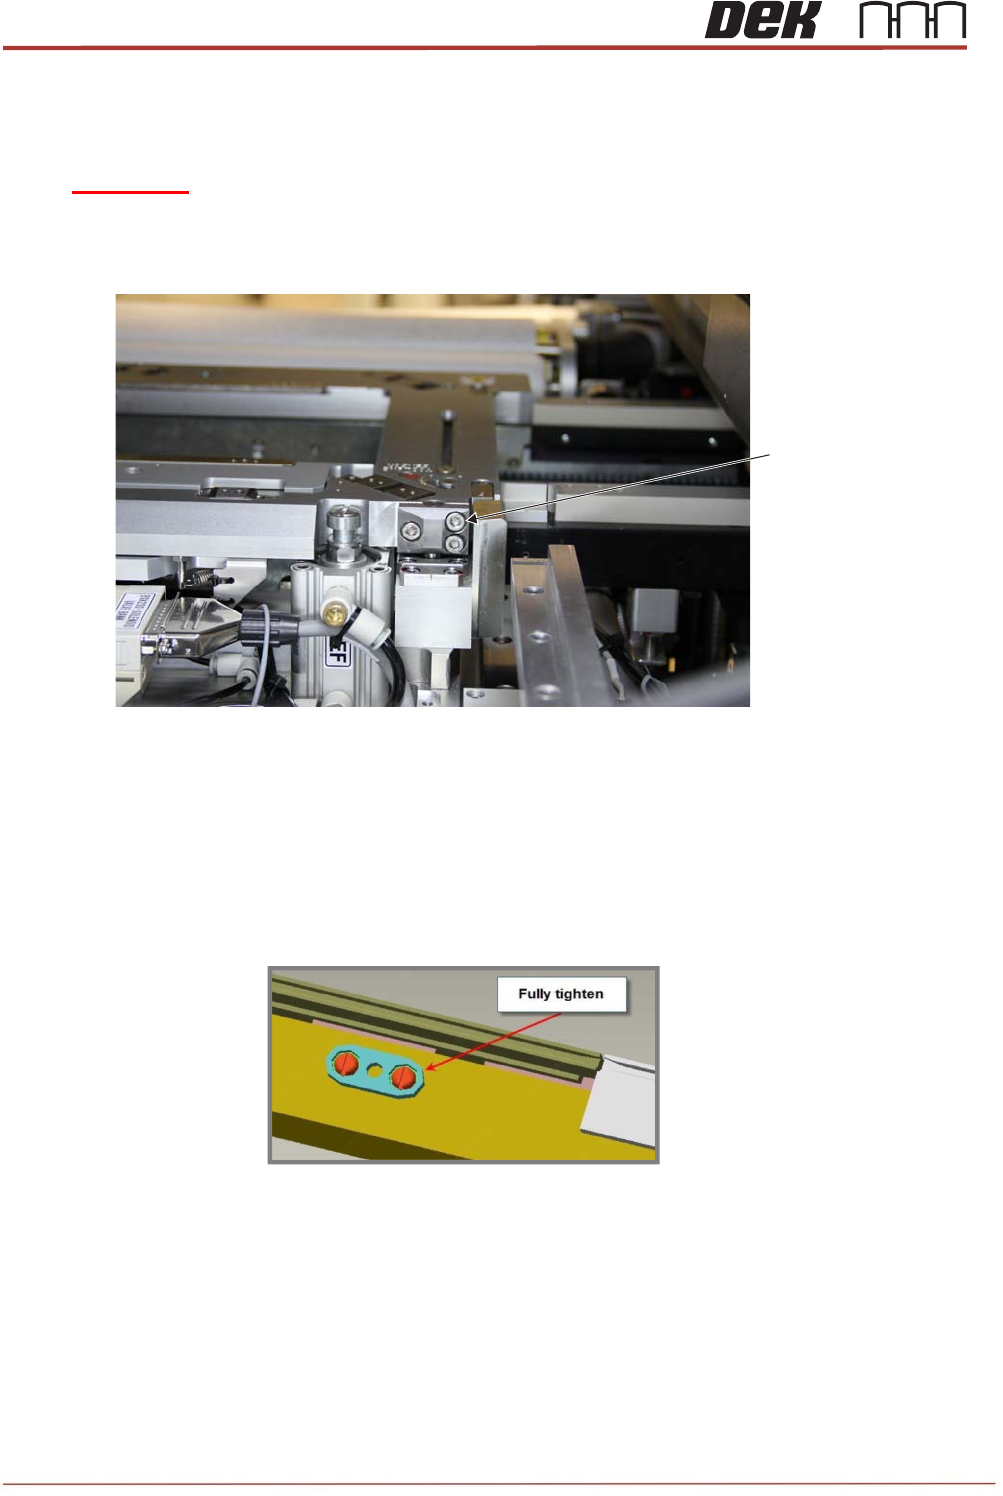
60. Undo 6 off M5x16 cap head screws at the rear of the rail cap to release alignment
bearing guide rods.
WARNING
Do not ever remove the guide rods from the bearing assemblies in
any circumstance.
61. Remove the rail cap by loosening the 4 off center screws fitted earlier and removing all
other rail cap fixing screws, lift it away from the MEK.
62. Taking care NOT to disturb the location of the (now exposed) locating plates, fully
tighten the 8 off pan-head screws, then remove one screw at a time to apply Pink
Loctite to each screw and fully re-tighten.
63. Carefully place the rail cap onto the rails, move the sliding section towards you, this will
enable you to fit the snugger pipes and allow you to push the slide forward and engage
the sensor vane into the sensor without damaging it.
64. Connect the short snugger pipe (on the right side of the rail cap) in to the single inlet of
the “Y” fitting behind the rear rail.
65. Connect the other snugger pipe (on the left side of the rail cap) in to the one of the
outlet on the “Y” fitting.
M5x16 Cap
Head screws
Viewed from the Rear of the Machine
Issue 2, Nov 14
TRS Advanced Maintenance
61
66. Ensure that the rail cap sits flat onto both rails and tighten 6 off M5x16 clamping block
screws to lock guide rods into position (3 for each side) as shown below.
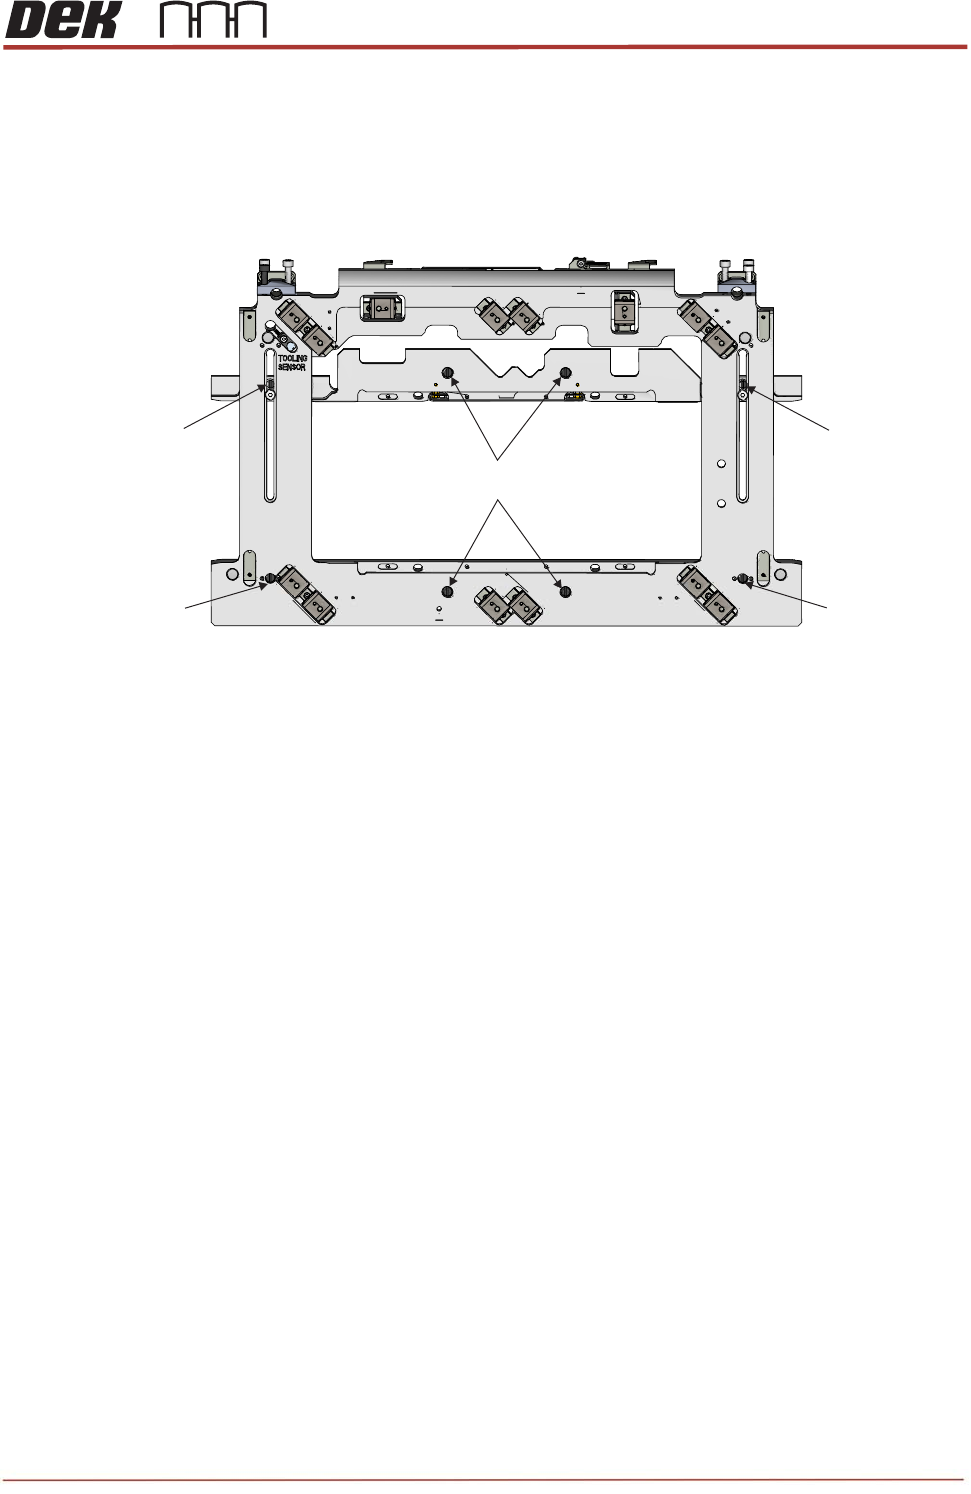
67. Tighten all 8x Rail Cap fasteners shown below.
68. Confirm the rail parallelism tolerances of 0.05mm and belt guide clearance gaps of
0.3mm +/-0.05 are still being maintained.
69. Go back & make further adjustments using previous methods if required.
70. Wind the Moving Rail manually to the HOME position (or until the rail clears the edge
of the Rail Alignment Jig).
71. Unscrew and remove the Rail Alignment Jig (212405) from the MEK base.
72. Bring the Rear Moving Rail manually FORWARD as far as possible to gain access to
the back of the TRS snugging rail.
M4x8 Countersunk
Screws
M4x8 Countersunk
Screws
M4x25 Pan Head Screws
(4 Positions)
M4x16 Pan
Head Screws
M4x16 Pan
Head Screws
View on Rail Cap Assembly

TRS Advanced Maintenance
62
Issue 2, Nov 14
73. Re-locate the 2x rear Height Setting Pins behind the rail as it comes forward.
74. Using a 0.05mm feeler gauge, check that all four of the height setting pins are fully in
contact with the rail rap and MEK Base.
NOTE
The feeler gauge should be NOGO.