TRS Advanced WB Intel Issue 02.pdf - 第55页
Issue 2, Nov 14 TRS Advanced Maintenance 55 46. When adjusted OK, tighten the 2x fr ont center screws as shown below. 47. Tighten the 4 off front locating plates screws through the access holes provided in the rail cap a…
TRS Advanced Maintenance
54
Issue 2, Nov 14
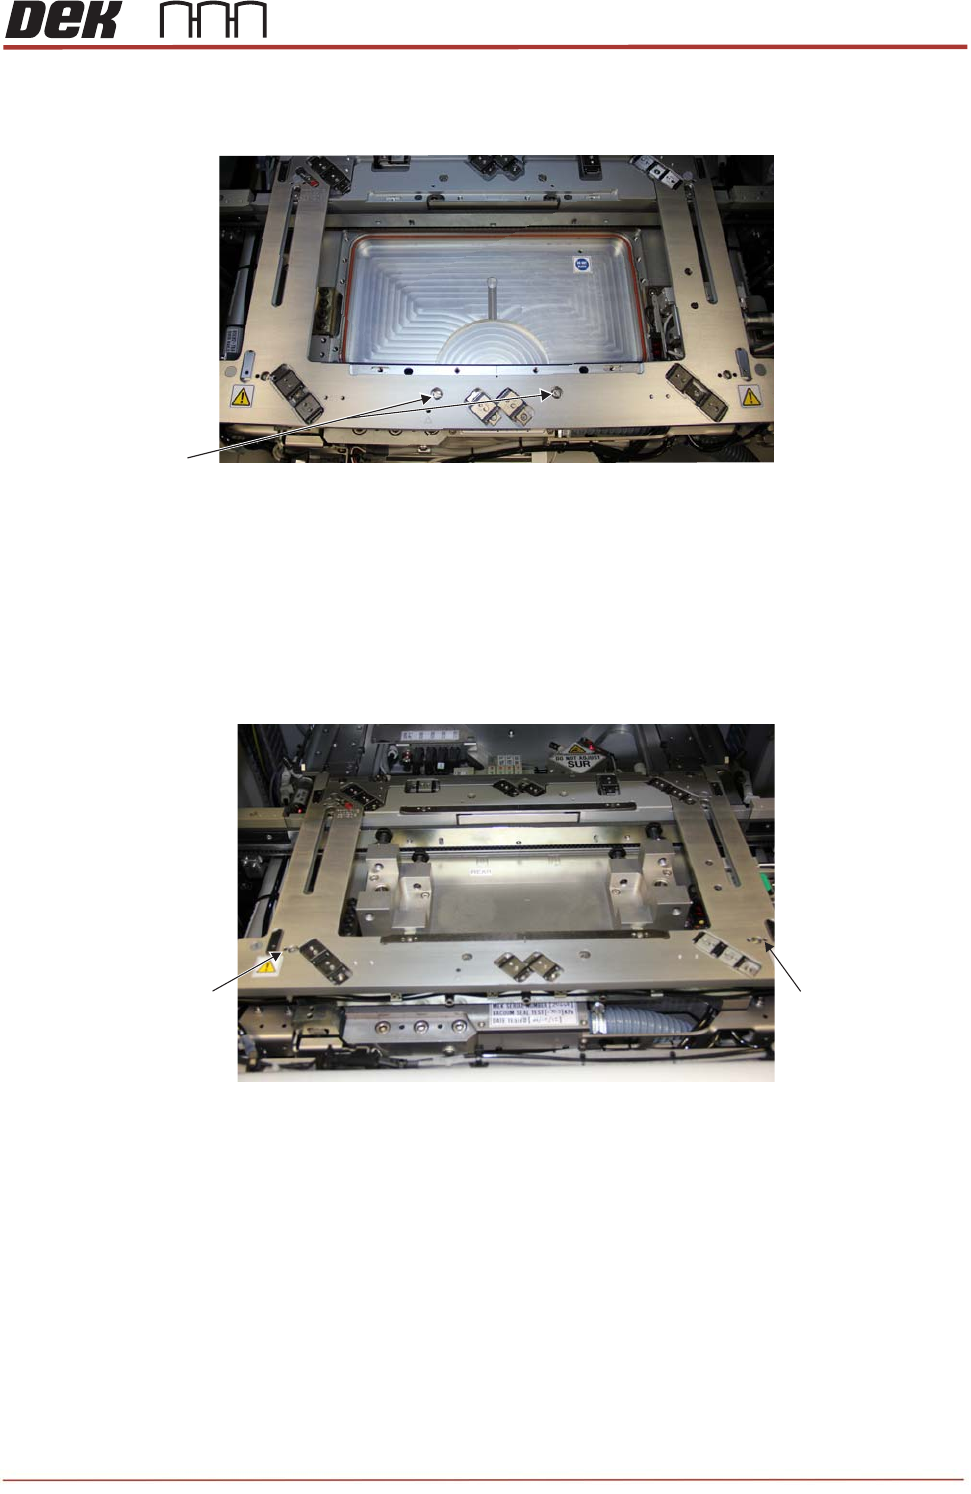
43. Adjust the front rail position using equal amounts of feeler gauge as a GO / NOGO, as
shown picture below.
44. The rail must be parallel to the buttons with an overall tolerance of 0.05mm.
45. At the same time, adjust the gap between the inside face of the front belt guide and
the front vertical faces of the rail cap to 0.3mm +/-0.05mm.
View on Rear of the Transport Rail and the Rail Cap
Issue 2, Nov 14
TRS Advanced Maintenance
55
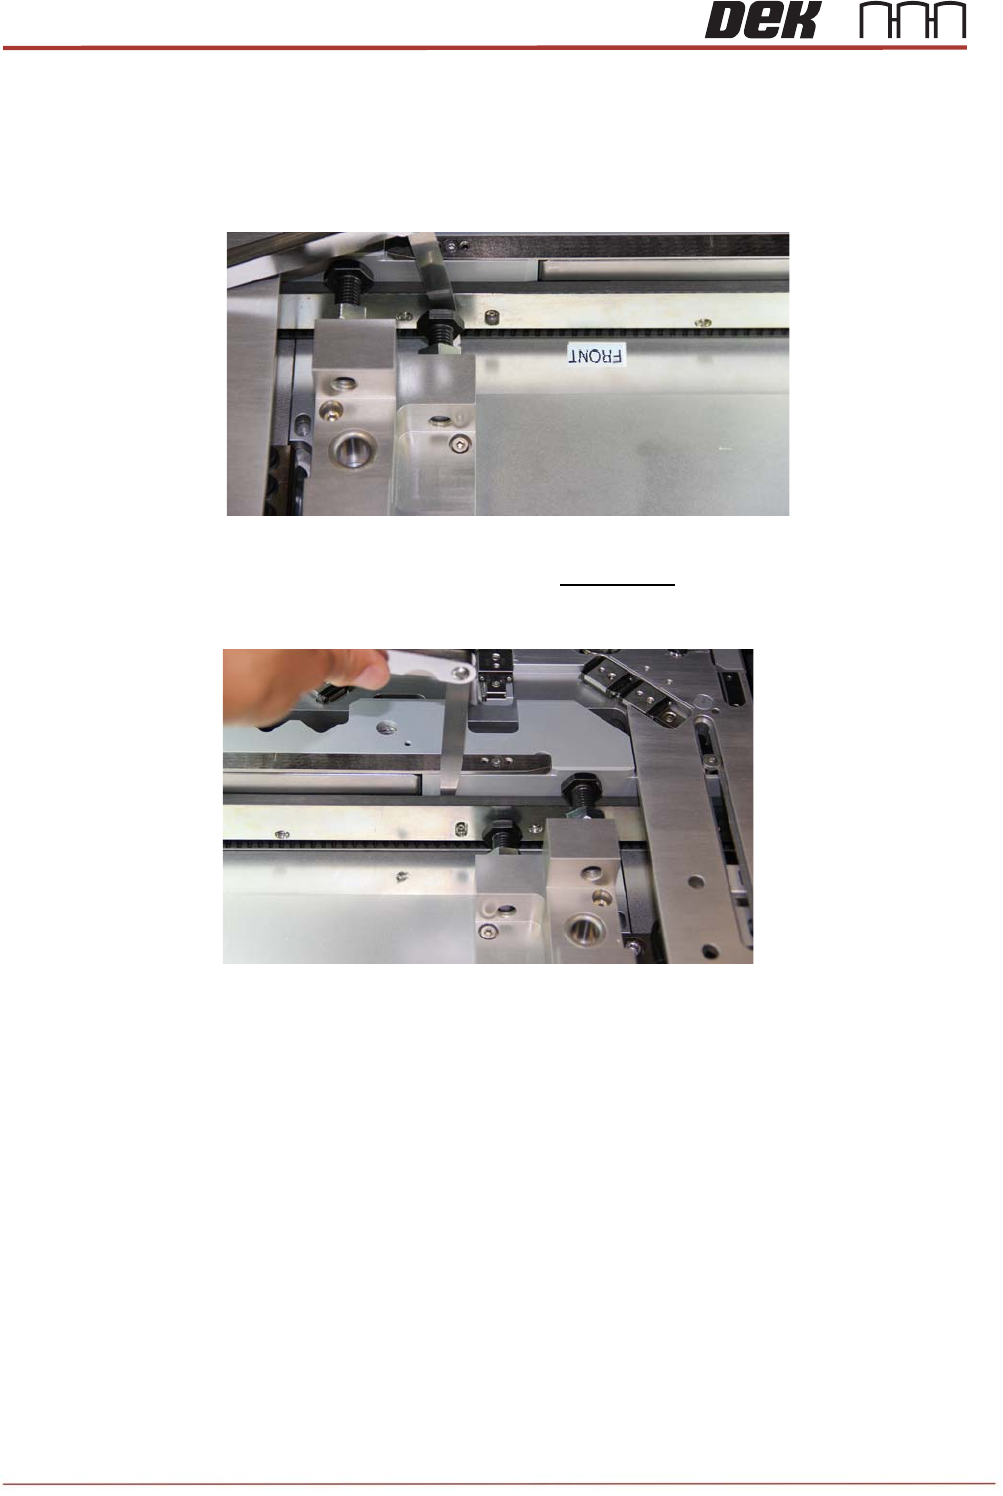
46. When adjusted OK, tighten the 2x front center screws as shown below.
47. Tighten the 4 off front locating plates screws through the access holes provided in the
rail cap as shown below. A small flat bladed screwdriver will be required for this.
CAUTION: Do NOT over tighten. Damage can occur to screwdriver / screws.
View on Rail Cap (No RAJ Fitted)
M4x25 Pan
Head Screws
Access Holes
(for M3x8 Screws)
(2 Positions)
Access Holes
(for M3x8 Screws)
(2 Positions)
View on Rail Cap and RAJ
TRS Advanced Maintenance
56
Issue 2, Nov 14
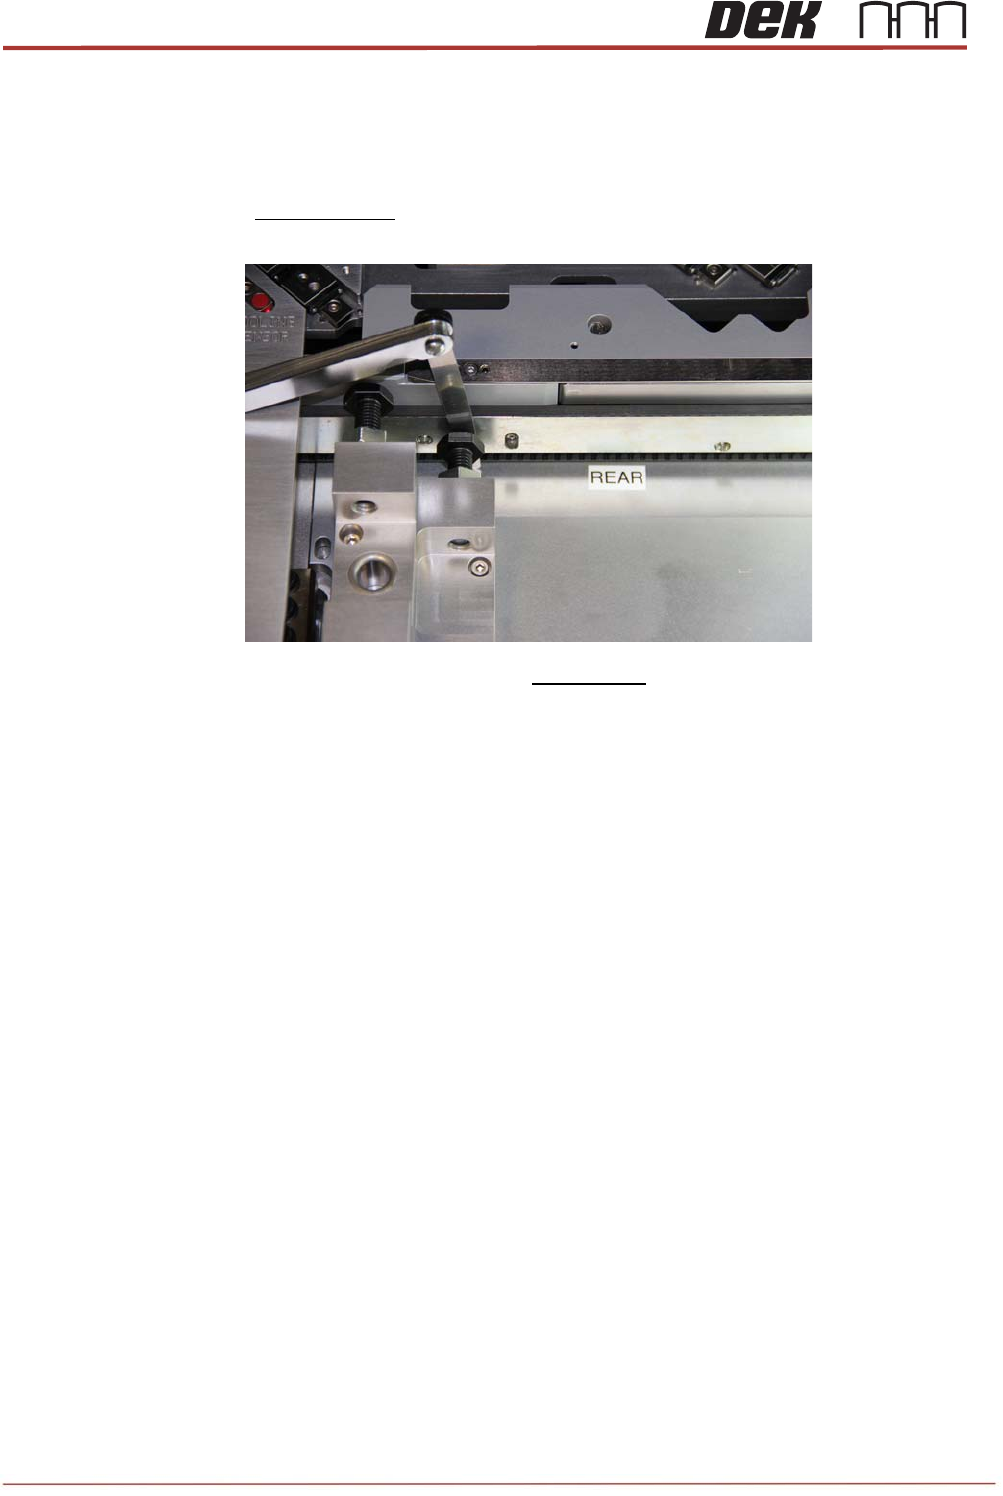
48. By adjusting the rail drive belt manually, move the rear rail into contact with the buttons
on the RAJ and square up.
49. Adjust the rear rail position using equal amounts of feeler gauge as a GO / NOGO.
The gap sizes are not important but the rail must be parallel to the buttons with an
overall tolerance of 0.05mm
50. At the same time, adjust the gap between the inside face of the rear belt guide and the
rear vertical faces of the rail cap to 0.3mm +/-0.05mm.
51. When adjusted OK, tighten the 2 off rear center screws.
52. Tighten the 4 off rear locating plates screws through the access holes provided in the
Rail Cap.
CAUTION: Do NOT over tighten. Damage can occur to screwdriver / screws.