TRS Advanced WB Intel Issue 02.pdf - 第64页
TRS Advanced Maintenance 64 Issue 2, Nov 14 79. The two alignment bearing gui de rods at the rear of t he rail cap need to be adjusted one side at a time. Undo the 3 off M5 cap he ad screws on the rear corner of the rail…
Issue 2, Nov 14
TRS Advanced Maintenance
63
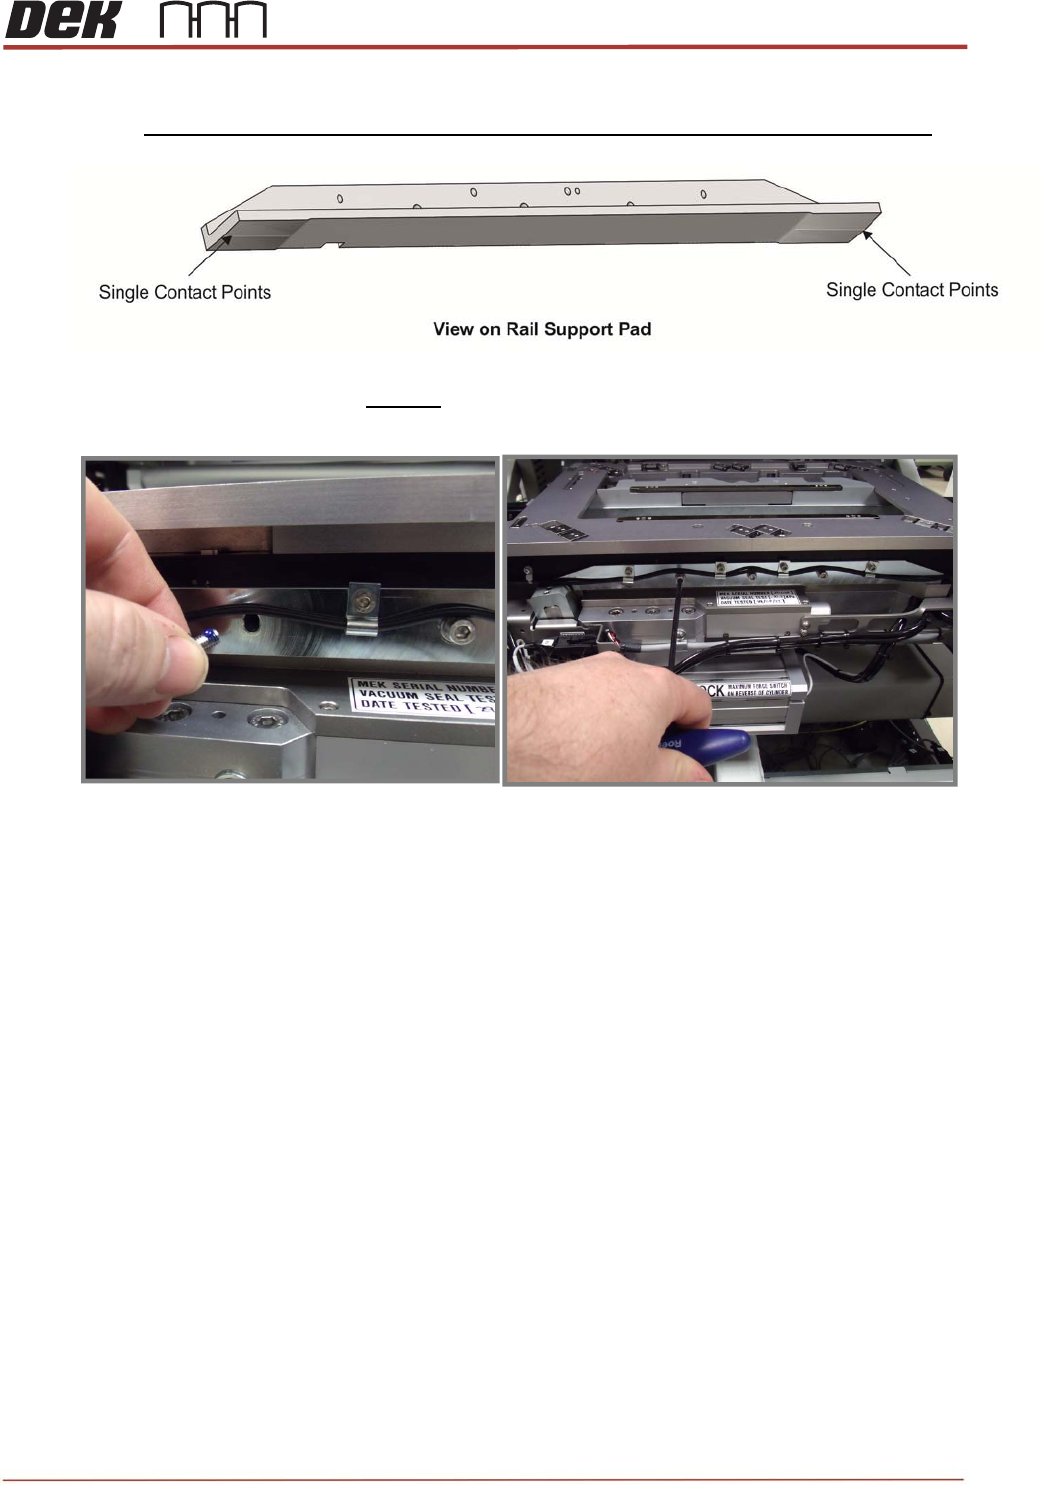
75. Slacken off the M5 rail pad mounting screws (6 off, with spring washers) on the front and
rear rails allowing the rail pads to drop into contact with the MEK reference surfaces. Rail
support pads have a single point contact.
76. Remove each of the 6 screws in turn, apply blue Loctite 243 and replace (on the front
and the rear rails).
77. Keep the rail pads in contact with the MEK reference surfaces and fully tighten all 6 off
screws (3 off on front and 3 off on rear rails).
78. With a 0.05mm feeler gauge, check that the height setting pins are still fully in contact
with the rail cap and MEK base.
TRS Advanced Maintenance
64
Issue 2, Nov 14
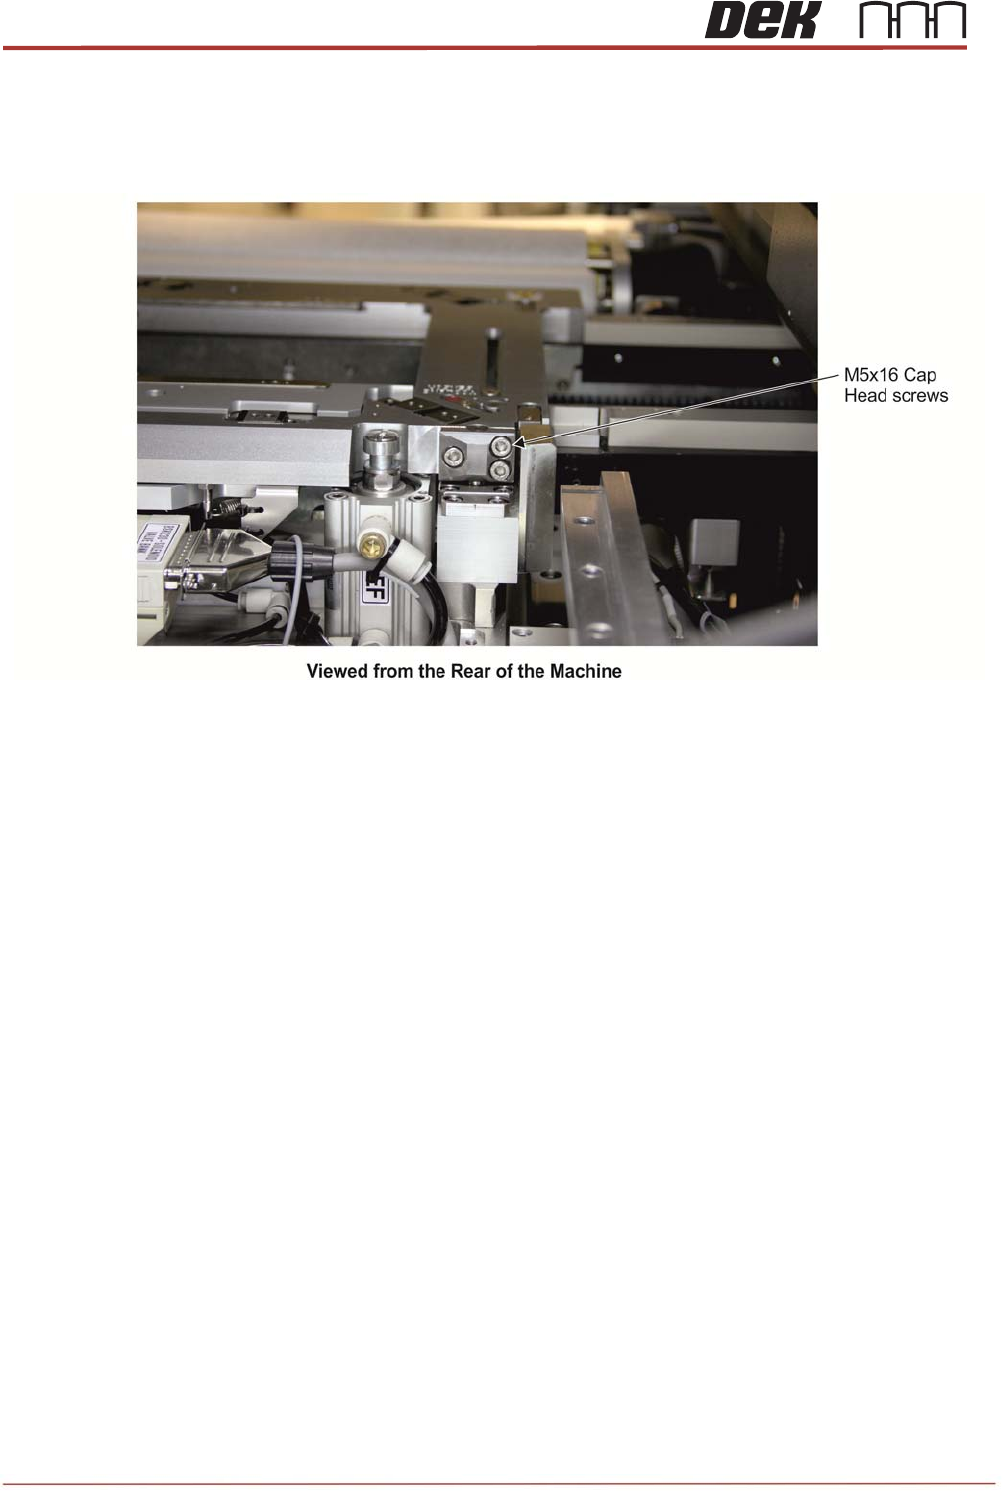
79. The two alignment bearing guide rods at the rear of the rail cap need to be adjusted
one side at a time. Undo the 3 off M5 cap head screws on the rear corner of the rail
cap so that alignment bearing guide rods can move freely.
Issue 2, Nov 14
TRS Advanced Maintenance
65
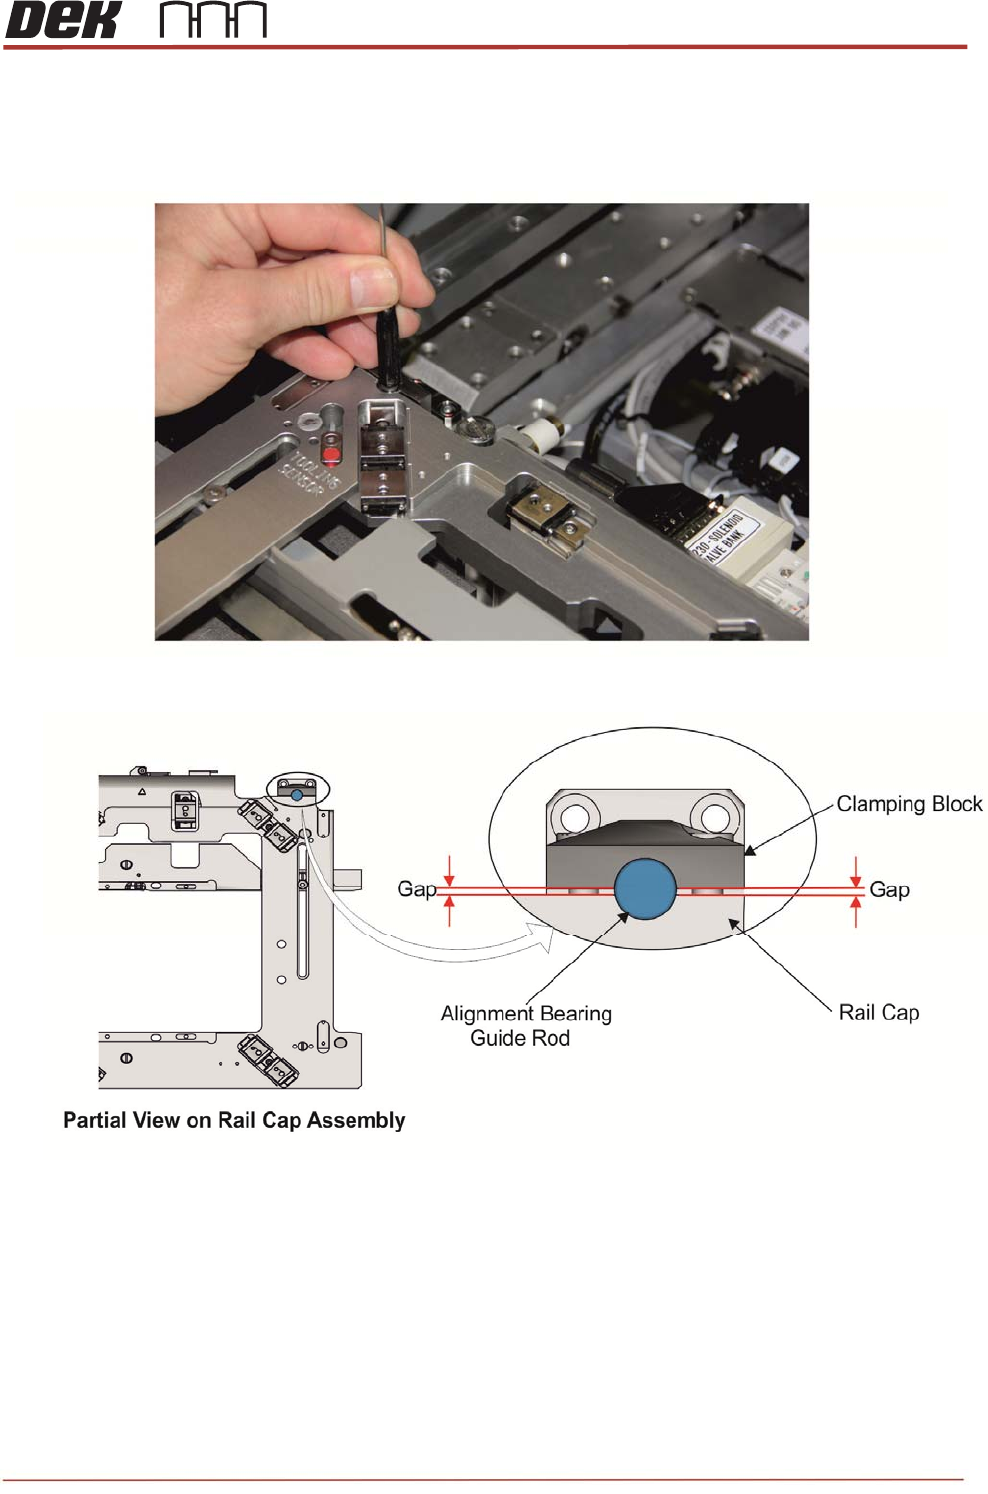
80. Gently push and hold down the alignment bearing guide rod until it bottoms out. Apply
Blue Loctite to the 3 off M5 cap head screws and torque load each screw to 4.9Nm,
ensure an even gap between the clamp and the rail cap.
NOTE
Ensure there is an even gap between clamping block and the rail cap as shown below.
81. With a 0.05mm feeler gauge, re-check that the height setting pins are still fully in
contact with the rail cap & MEK base.