00198628-01_Option_Stationäre-Kamera_TX12_V2_de_en.pdf - 第98页
3 Installation 3.6 Making the Settings in the Software 98 Assembly Instructions / Montageanleitung SIPLACE TX-Series V2 Stationary Camera Type 25/33 Stationäre Kamera Typ 25/33 10/2018
3 Installation
3.6 Making the Settings in the Software
Assembly Instructions / Montageanleitung SIPLACE TX-Series V2 Stationary Camera Type 25/33 Stationäre Kamera
Typ 25/33 10/2018
97
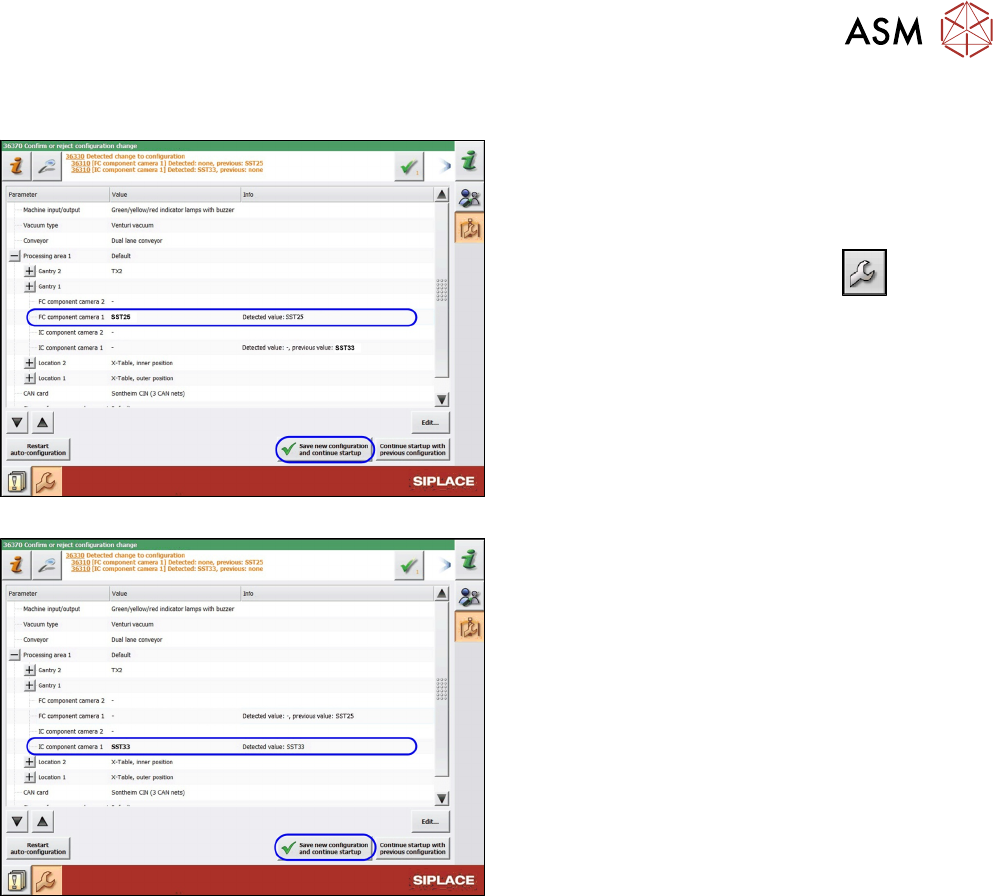
3.6 Making the Settings in the Software
Fig.57: SST25: Saving the configuration
Fig.58: SST33: Saving the configuration
After start-up, the station software notifies you of the
changed hardware. Confirm the change as follows:
► Switch over to the operator level Machine ser-
vice.
►
Switch over to the service menu .
► Go to the Machine Configuration view.
► Check the setting of the PCB camera.
► Confirm the changes with Save new configura-
tion and continue startup.
► Calibrate the camera (see Calibrating the Heads
and Cameras (SW70x)).
The installation is now complete.

3 Installation
3.6 Making the Settings in the Software
98 Assembly Instructions / Montageanleitung SIPLACE TX-Series V2 Stationary Camera Type 25/33 Stationäre Kamera
Typ 25/33 10/2018

4 Appendix
4.1 Excerpts from the Service Manual
Assembly Instructions / Montageanleitung SIPLACE TX-Series V2 Stationary Camera Type 25/33 Stationäre Kamera
Typ 25/33 10/2018
99
4 Appendix
4.1 Excerpts from the Service Manual
The following chapters are excerpts from the service manual. For more information, refer to the full
service manual for your machine.