YAMAHA-YG系列 换螺杆指导书.pdf - 第46页
Service Engineer Service I nformati on SI080 2008 E-000 = YG series: Replacement proc edure for ball screws of each axis 46/65 5. A djustment 5.1. St art up the “A sjutment util ity” Ov erview This utilit…

Service Engineer
Service Information
SI0802008E-000= YG series: Replacement procedure for ball screws of each axis
45/65
4.4. Adjustment after replacing the ball screw
The coordinates of the machine deviate due to the replacement of the parts. Therefore, some works
need to be done in order to restore the coordinates in the simple method.
Caution:
Please make sure to do the necessary work before replacement. Otherwise, you will need to perform
all the adjustment, which requires a great deal of time later on.
<Works to be done>
• Adjust the machine reference and the initial position of the W-axis.
• Check the peak current (With the “Servo utility”).
* Please refer to the relevant section in “5. Adjustment”.
Check if the bolts are tightened properly
1. Press the [Emergency stop] button and check the surrounding area for safety.
2. Check the bolts removed for replacement or loosened are tightened properly.
Check if the bolts are tightened with the appropriate hex wrench and make a mark on the
bolts with the marker pen.
Other items to be checked and done
1. Check if there are any tools used for replacement left in the machine.
2. Check if there are any pieces of cut off cable tie left in the machine.
3. Make sure that all the harnesses are secured properly, and no axes interfere with anything
when they move.
Caution:
Please do not use an air gun for cleaning inside the machine. The blown away dusts may stick to the
moving parts of the axes, which causes the serious problem to the machine.
4. Get ready for the production activity
Put back all the removed parts such as feeders and other supplying equipments to the
original position.
Service Engineer
Service Information
SI0802008E-000= YG series: Replacement procedure for ball screws of each axis
46/65
5. Adjustment
5.1. Start up the “Asjutment utility”
Overview
This utility is designed for the customers to perform a stable production operation with YAMAHA
mounters for a long period. It contains programs for controlling machine performance and adjustment
for maintenance. Please prepare all the necessary tools and equipments beforehand. Also this utility is
intended for users who have participated in an advanced maintenance training session (for
maintenance specialist). Those who have not taken the training are not allowed to use the utility.
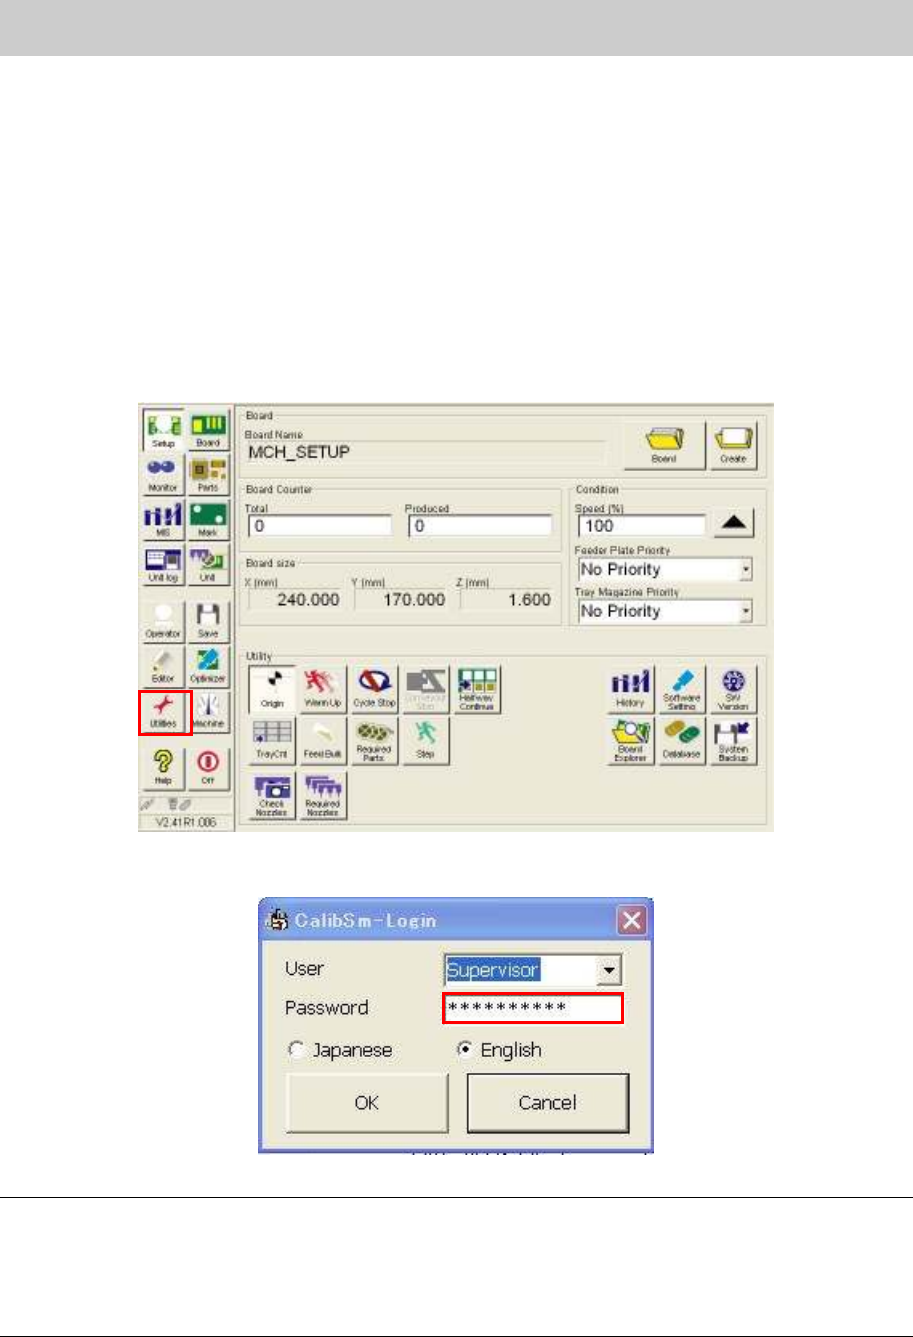
1. Click on the [Utilities] button on the ”Set up” screen.
Figure 64
2. Log in as “Supervisor”.
Figure 65
Caution:
When using this utility, please prepare all the necessary special-purpose adjusting jigs, measuring
instruments, adjusting boards and adjusting parts. Also, please make sure that the users who have
taken the advanced maintenance training always operate the machine. If the person without enough
knowledge performs the adjustment, it could cause a serious problem to the machine. On this account,
the password to log in the adjustment utility is not shown in this manual.
Service Engineer
Service Information
SI0802008E-000= YG series: Replacement procedure for ball screws of each axis
47/65
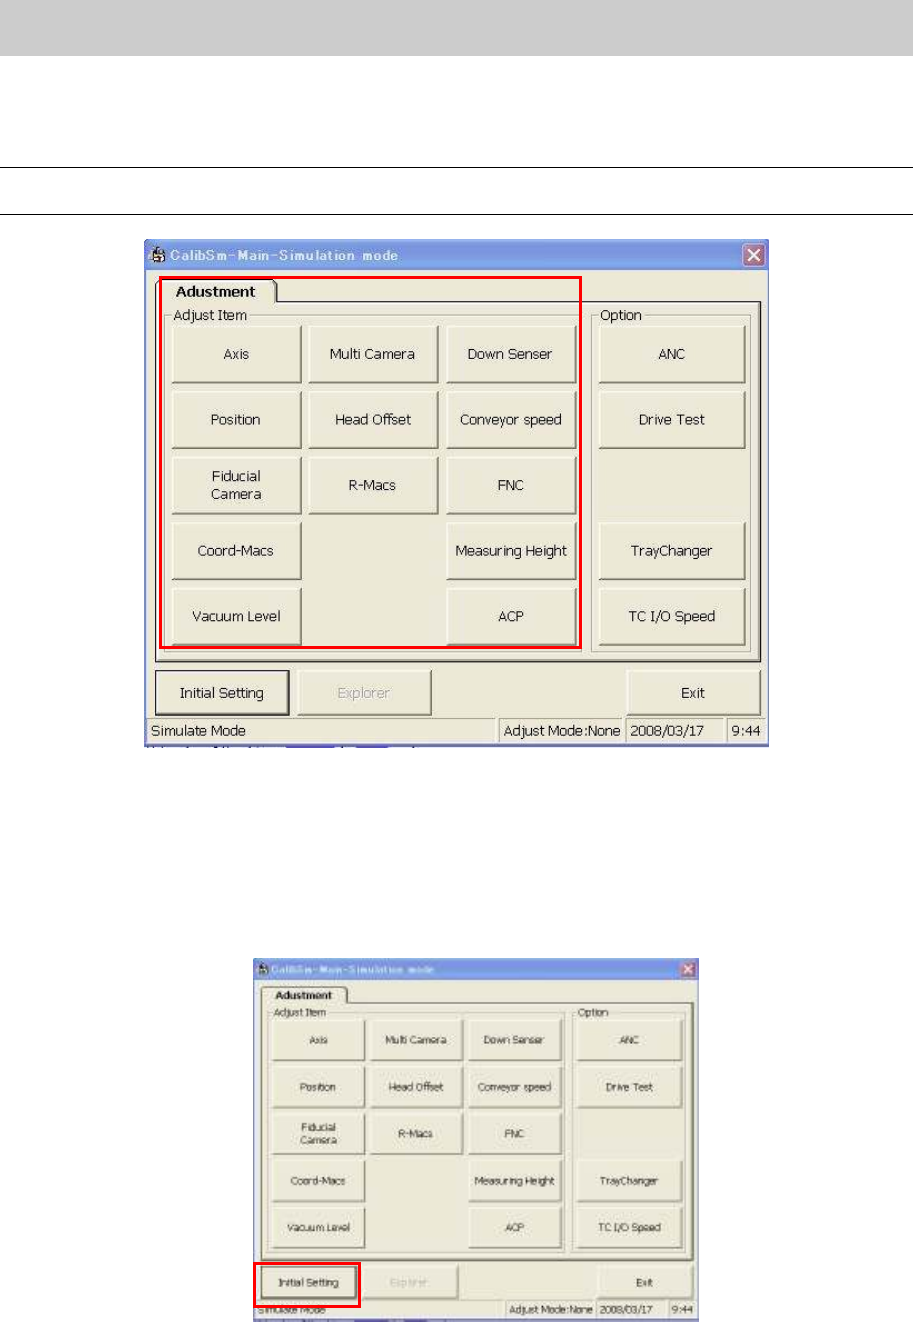
3. Click on the relevant adjustment item on the “Adjustment” tab.
* The main menu of the “Adjustment Utility” (Calib Sm) varies depends on the model and the
application version.
Caution:
The display items on the “Adjustment Utility” screen vary depends on the login user level.
Figure 66
5.2. Initial Setting
(How to switch the mode while the “Adjustment Utility” is running)
1. How to perform initial setting of “Calib Sm”.
Click on the [Initial Setting] button in the “Adjust Item”.
Figure 67