AOI_RS_v85_en.pdf - 第152页
Chap ter3 SPC User Ma nual AOI Repair Station 148 All alarm logs are saved by date. That is to sa y , all alarm logs for one day are saved as one file and named in this format: “alarms”_year- month-day .”xml”. For exam…
Chapter3 SPC User Manual
AOI Repair Station
147
In addition, you can query the Alarms Log. When an alarm (error)
occurs, the system will save a record in the Alarms Log. From the
Main menu, you can click on “
Alarm” and then “Alarms Log” to
display the Alarm Log window as shown below.
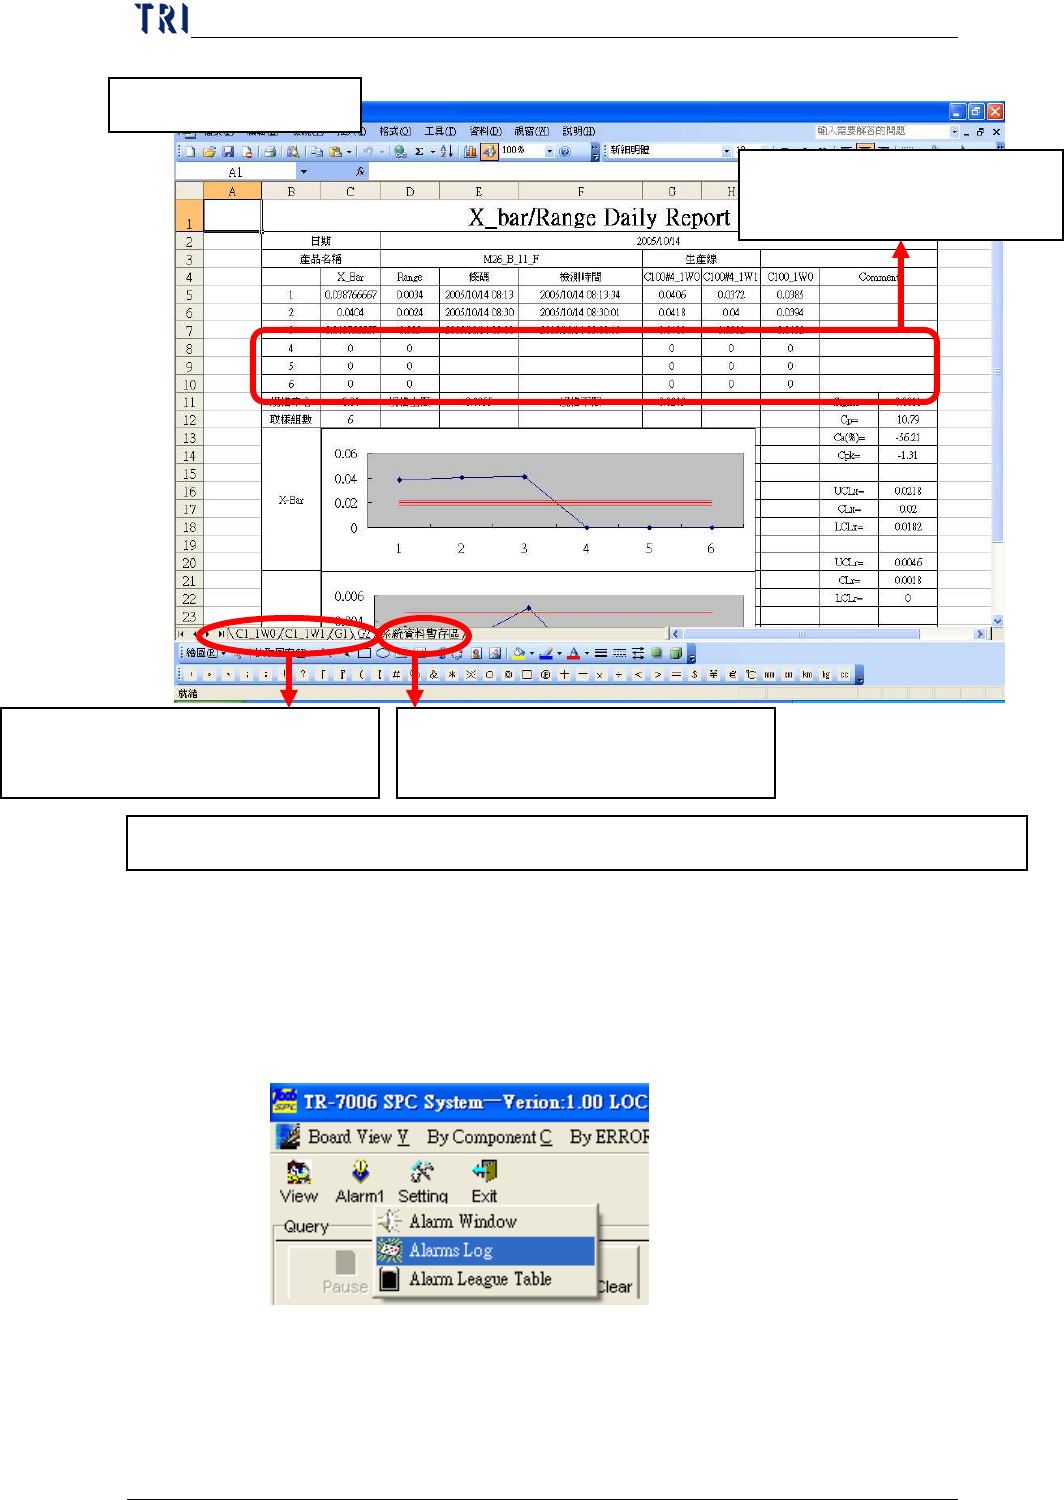
4. Review Excel Data
P.S. If you change a sample data in this report, the relating statistic data and control chart will be changed.
A monitored item uses a sheet to
output data.
The last Sheet is the temporary
zone, don’t delete it.
These rows are reserved for
user to key in data manually.

Chapter3 SPC User Manual
AOI Repair Station
148
All alarm logs are saved by date. That is to say, all alarm logs for one
day are saved as one file and named in this format:
“alarms”_year-month-day.”xml”. For example, the
“alarms_20041209.xml” file stores all alarm logs for December 9,
2004. You can view all alarm log files from the “Alarms Files List”
window on the left side of the “Alarms List” block under the task bar.
Once this window is opened, the system loads today’s alarm log files
by default. You can click on the alarm log file to be viewed to load
the current alarm log anytime and display it in the message list on the
right.
Click on any message in the list and the Alarm Message block on the
lower part of the screen will display all detailed information regarding
this message. Below is the description of each item:
GUID: Message no. The system automatically assigns a unique
ID number for each alarm message.
Time: Time the message occurs.
Click on this icon to open the
window of Alarm Voice Setting.

Chapter3 SPC User Manual
AOI Repair Station
149
Name: Name of component or solder where the message occurs.
Filter: The conditions for query the component.
Machine is the type of machine, 7006 (SPI), 7100 (AOI) or
ICT.
Station means the machine ID.
Feature means the selected feature, it may be V (Volume), A
(Area), H (Height), PX (X shift) or PY (Y shift) for 7006
(SPI); it may be X (X shift), Y (Y shift) or Theta (rotating
angle) for 7100 (AOI) and may be Measure for ICT.
Reason: Reason for the occurrence of this message. You can
find out the type of error through this information.
Data: Relevant statistical data that causes this message to occur.
SPC Data: Displays all sampling and statistical data of the
component or solder when the error occurred.
Comment:
You can key in the remarks for this alarm data for future
tracking. Click on “
Update Comment”
after keying in.
Task bar on top
The task bar on top is used for alarm message operation as
follows:
The “<< First” button allows you skip to the first alarm
message. Click on “< Pre” to go back to the previous alarm
message or click on “Next >” to go to the next alarm message.
The “Last >>” button allows you skip to the last alarm
message. You can also search the message list (on the right of
the “Alarms List” block under the task bar) directly for the
message you want to view.
“Delete” allow you to delete one or more alarm messages.
To delete several messages at the same time, check (
√) the
check boxes in front of the messages you want to delete and
then click on the “
Delete” button. “DeleteAll” allow you to
delete all alarm messages. Note! You cannot delete the
alarm data in to current day’s Alarm Log file.
“Refresh” allows you to get the refreshed alarm data from
the currently selected Alarm Log file.