AOI_RS_v85_en.pdf - 第52页
Chapter 2 Repair Station Main Progr am AOI Repair Station 48 Step3. Go to [Main Program/User T ools/ Manage User Power], and add privileges for the users: Step3-1. Enter the [User ID] Step3-2. Press [QUER Y] to search St…
Chapter 2 Repair Station Main Program
AOI Repair Station
47
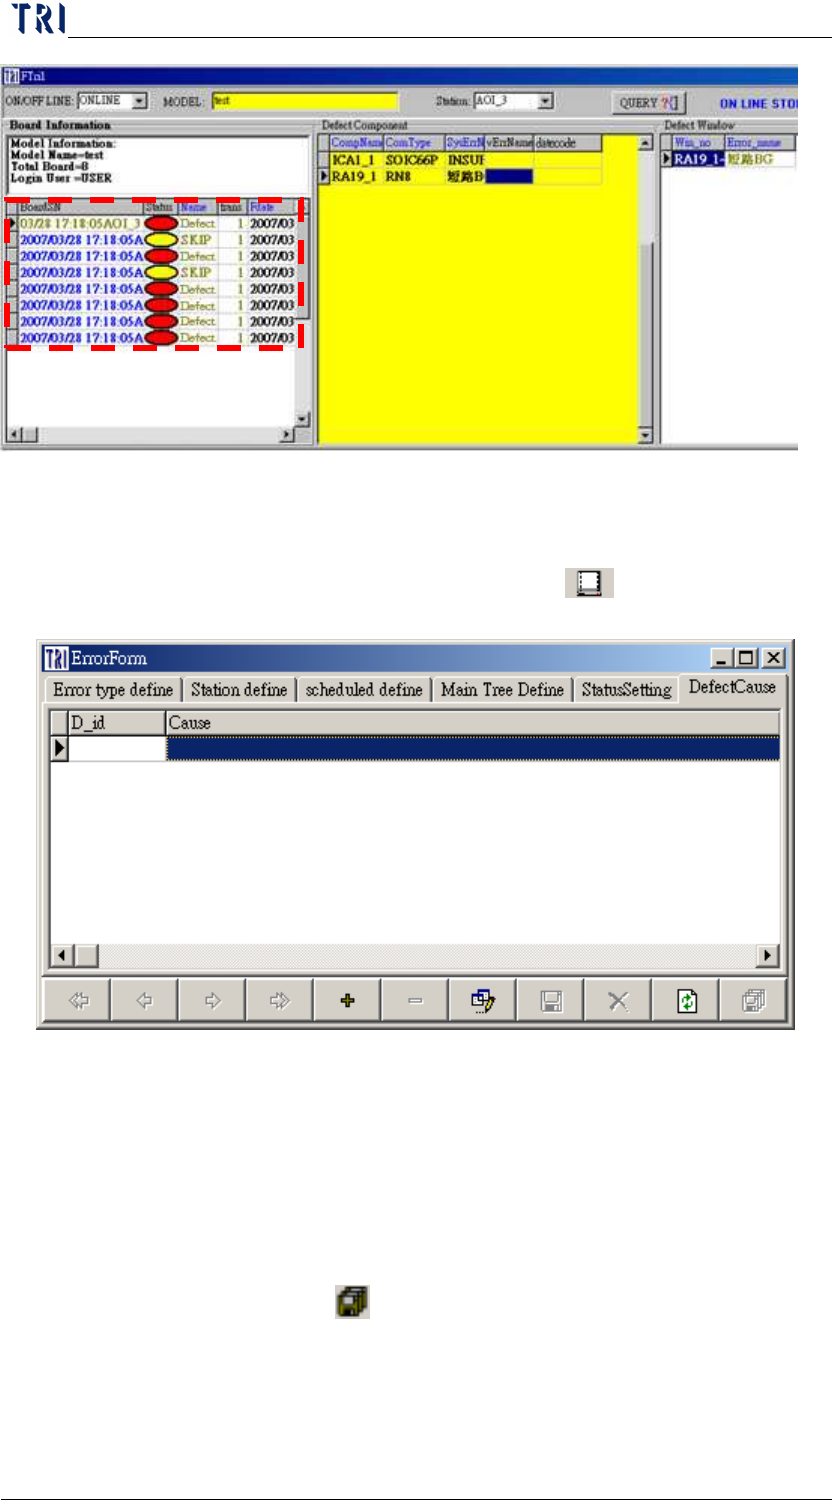
7.6 Defect Cause
User can define the defect ID and the defect cause in this window.
When user confirms a board, he can select [
Key in Defect Cause]
to select a defect cause by a pop-up window.
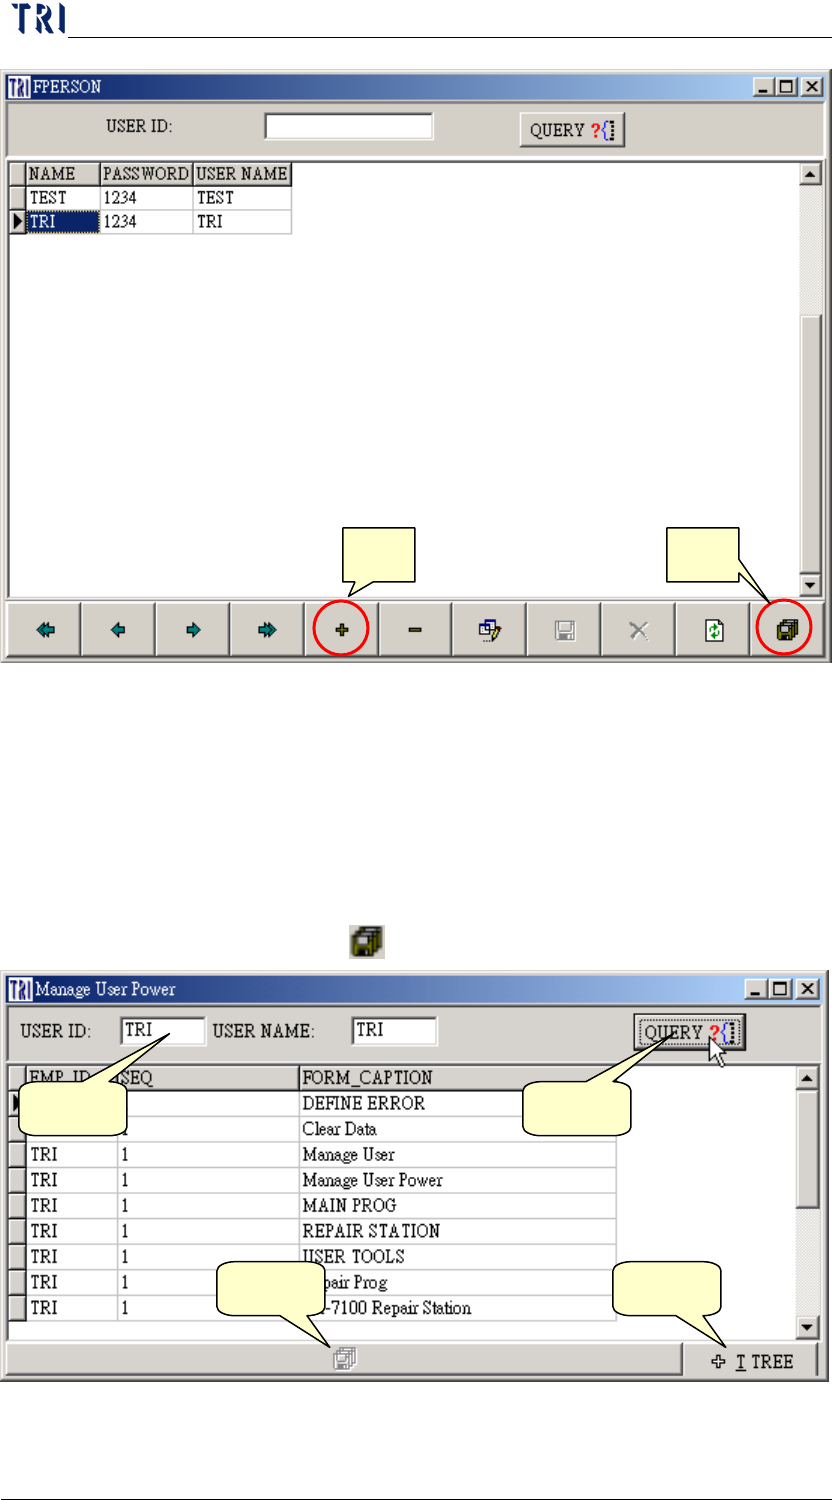
8 Manage User Power/ Manage User
8.1 Setting up the account privileges
Step1. First use [USER] as [User ID], then type [1234] for the password
to enter the REPAIR STATION Main Program.
Step2. Go to [Main Program/User Tools/Manage User], press [+] to add
new user, then enter the [NAME], [PASSWORD], and the [USER
NAME], press [
save] when finished.
Chapter 2 Repair Station Main Program
AOI Repair Station
48
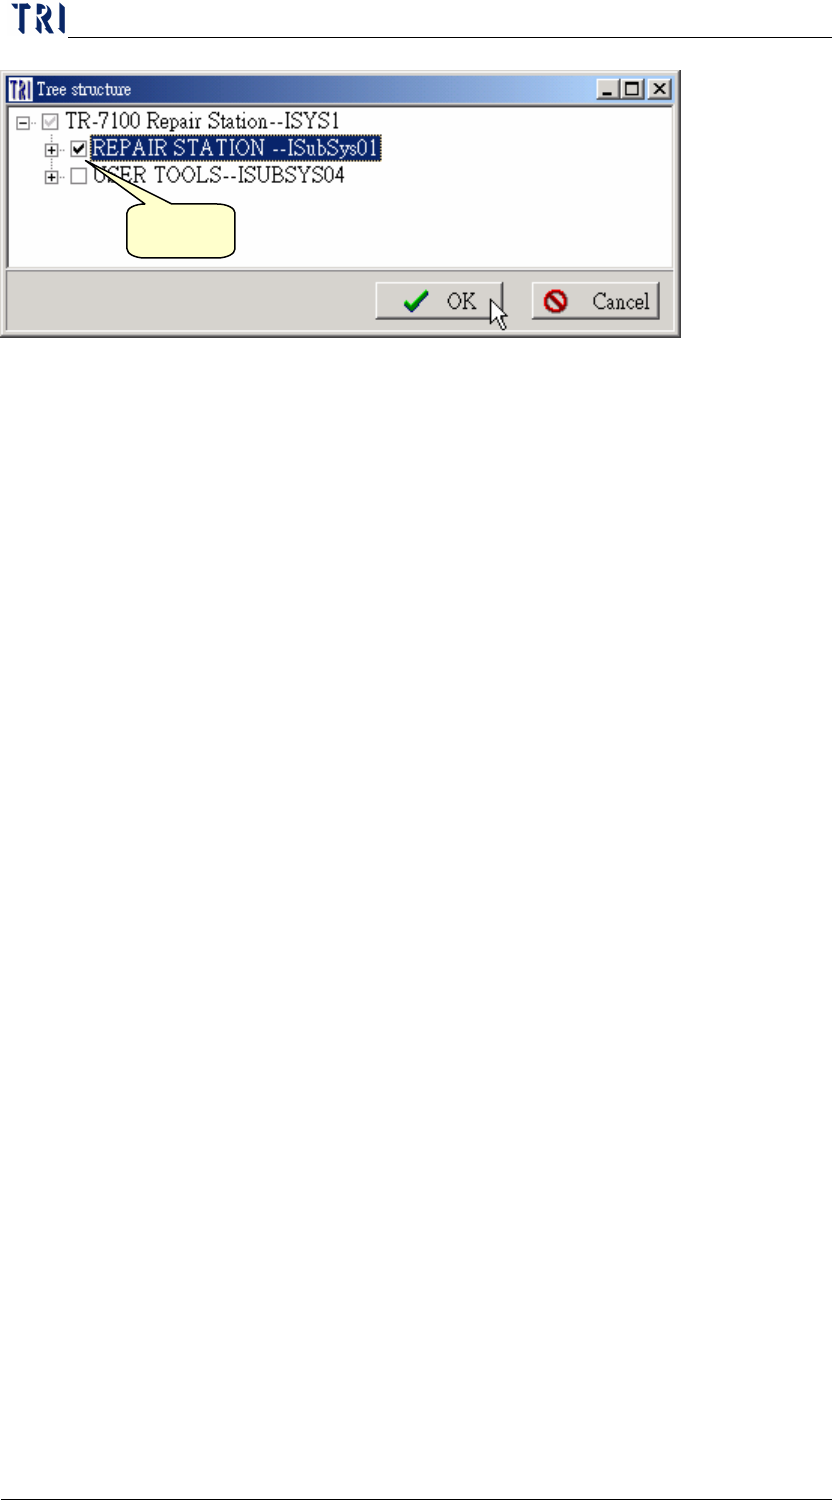
Step3. Go to [Main Program/User Tools/Manage User Power], and add
privileges for the users:
Step3-1. Enter the [User ID]
Step3-2. Press [QUERY] to search
Step3-3. Press [tree structure] button
Step3-4. Grant the privilege
Step3-5. Press [
] to save.
New Save
Step1 Step2
Step3 Step5
Chapter 2 Repair Station Main Program
AOI Repair Station
49
9 Clear Data
Double click on [Clear Data] to open the window. The functions for all
pages are as the followings.
9.1 DATA
Search Type-There are [Board], [Component], [AutoSeq] three items to
be selected as a condition.
Procedure for query
Step1. Select [date], [Status], [Station], [Model Name] then press
[QUERY].
YN-Select this item or not.
cModel-Model Name
BarcodeSN-Barcode number or code of inspection date.
Serial-When you define the serial number by yourself, it
is shown at this column.
TopBtm-Top or bottom.
TestCount-Total test count of this board (with the same
[BarcodeSN].
Imulti-The test times for the board with the same barcode.
Fdate-Inspection time.
idStation-AOI Station ID.
Status-The result that is represented by a code name.
VStatusName-The result.
Company-company
lotno-Lot number.
Step2. Select files that are being deleted, or skip this process to perform
Select all
Step3. Press [SKIP DATA].
Step4