Nordson_EFD_GV_Series_Operating_Manual.pdf - 第17页
GV Series Automated Dispensing Systems 17 www.nordsonefd.com info@nordsonefd.com +1-401-431-7000 Sales and service of Nordson EFD dispensing systems are available worldwide. Operating Featur es (continued) GV Operation B…
GV Series Automated Dispensing Systems
16 www.nordsonefd.com info@nordsonefd.com +1-401-431-7000 Sales and service of Nordson EFD dispensing systems are available worldwide.
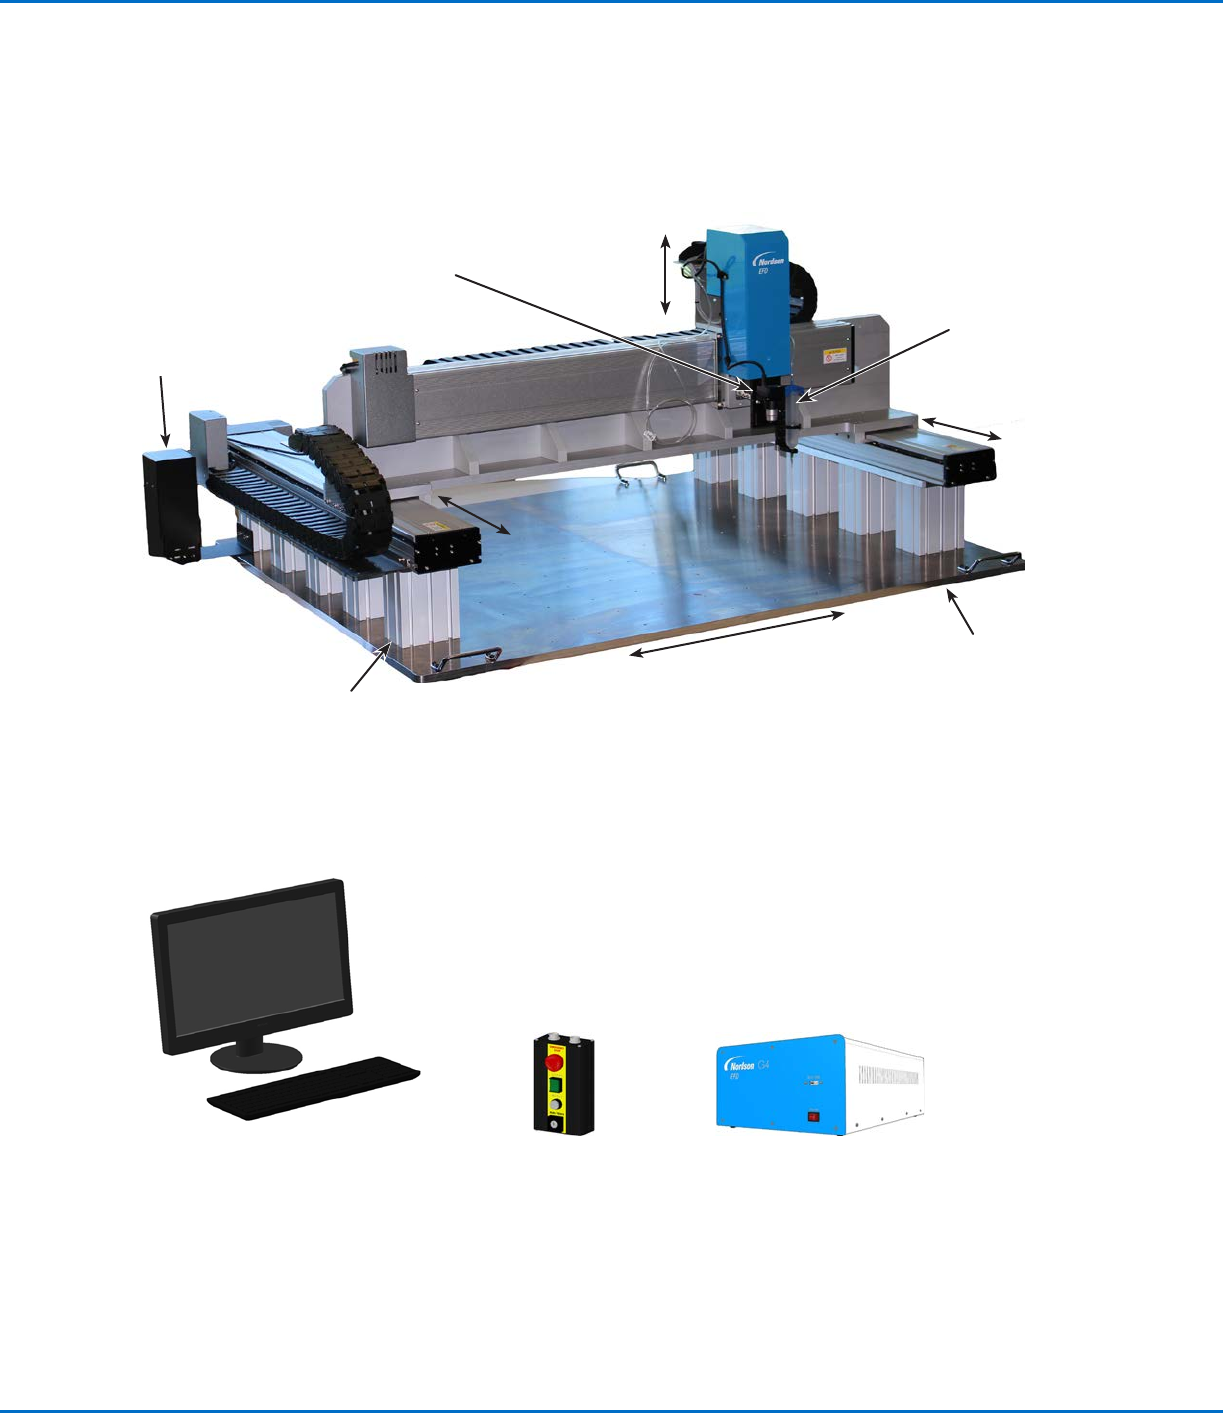
G8V Series System Component Identification
Operating Features (continued)
CCD smart
camera
Syringe barrel for
fluid dispensing
Post (size
varies)
Fixture plate
DispenseMotion
controller
Monitor and keyboard
(mouse not shown)
GV operation boxStart / stop box
X axis
Y1 axis
Y2 axis
Z axis
GV Series Automated Dispensing Systems
17www.nordsonefd.com info@nordsonefd.com +1-401-431-7000 Sales and service of Nordson EFD dispensing systems are available worldwide.
Operating Features (continued)
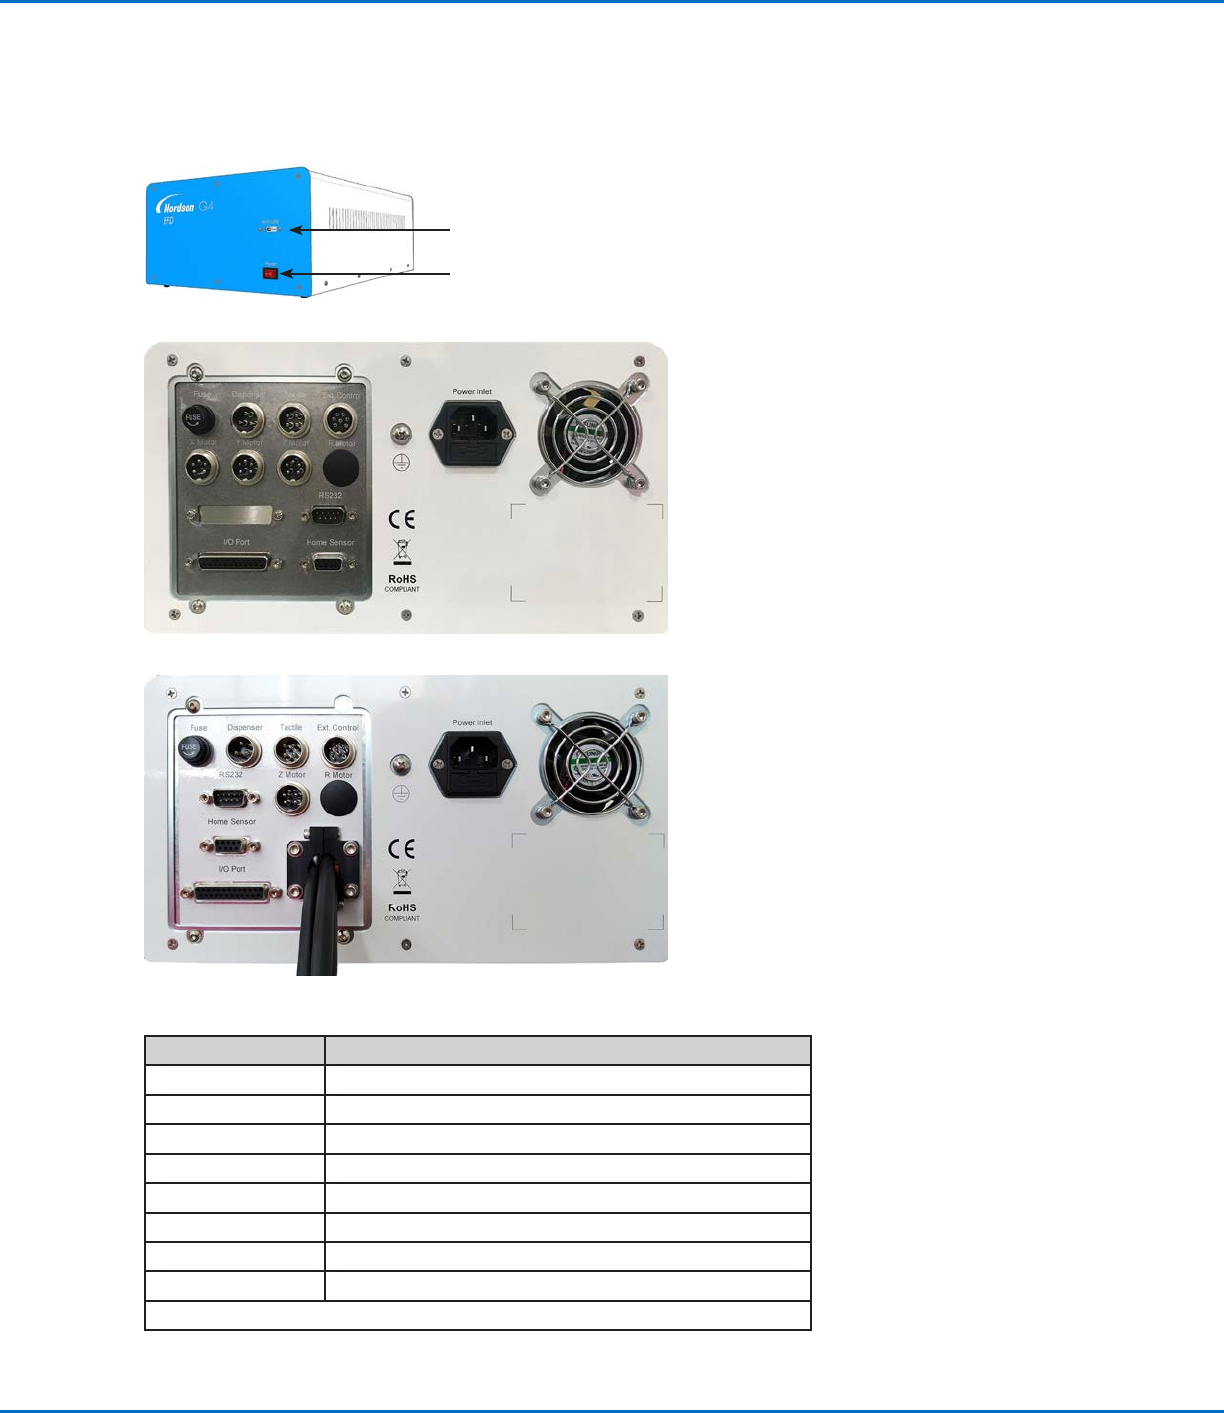
GV Operation Box
SVC USB port (for software upgrades)
Power Switch
Port Function
Dispenser For dispenser / controller initiation
Tactile For the tip detector (if present)
Ext. Control For the start / stop box
Home Sensor Connects to the Home Sensor port on the robot
I/O Port For input / output connections
RS232 Connects to the DispenseMotion controller
Power Inlet Power cord connection
X, Y, or Z Motor Connects to the motor for the respective axis
NOTE: For pin position details, refer to “Wiring Diagrams” on page94.
G4V
G8V
GV Series Automated Dispensing Systems
18 www.nordsonefd.com info@nordsonefd.com +1-401-431-7000 Sales and service of Nordson EFD dispensing systems are available worldwide.
Camera
The system includes a precision-vision camera that allows you to view the fixture plate and to focus.
CCD Smart Camera Features How to Focus
Converts the analog camera image
pixels to digital values for extremely
precise image management
• Move the camera up or down to focus
the image.
• If the optional light accessory is
present, use the light controller dial to
adjust the exposure (how much light is
allowed into the image).
Fixed focal length (must move the
camera up and down to focus it)
Variety of lenses available (for different
focal lengths, fields of view, etc.). Refer
to “Accessories” on page89 for the
optional lens kit part number.
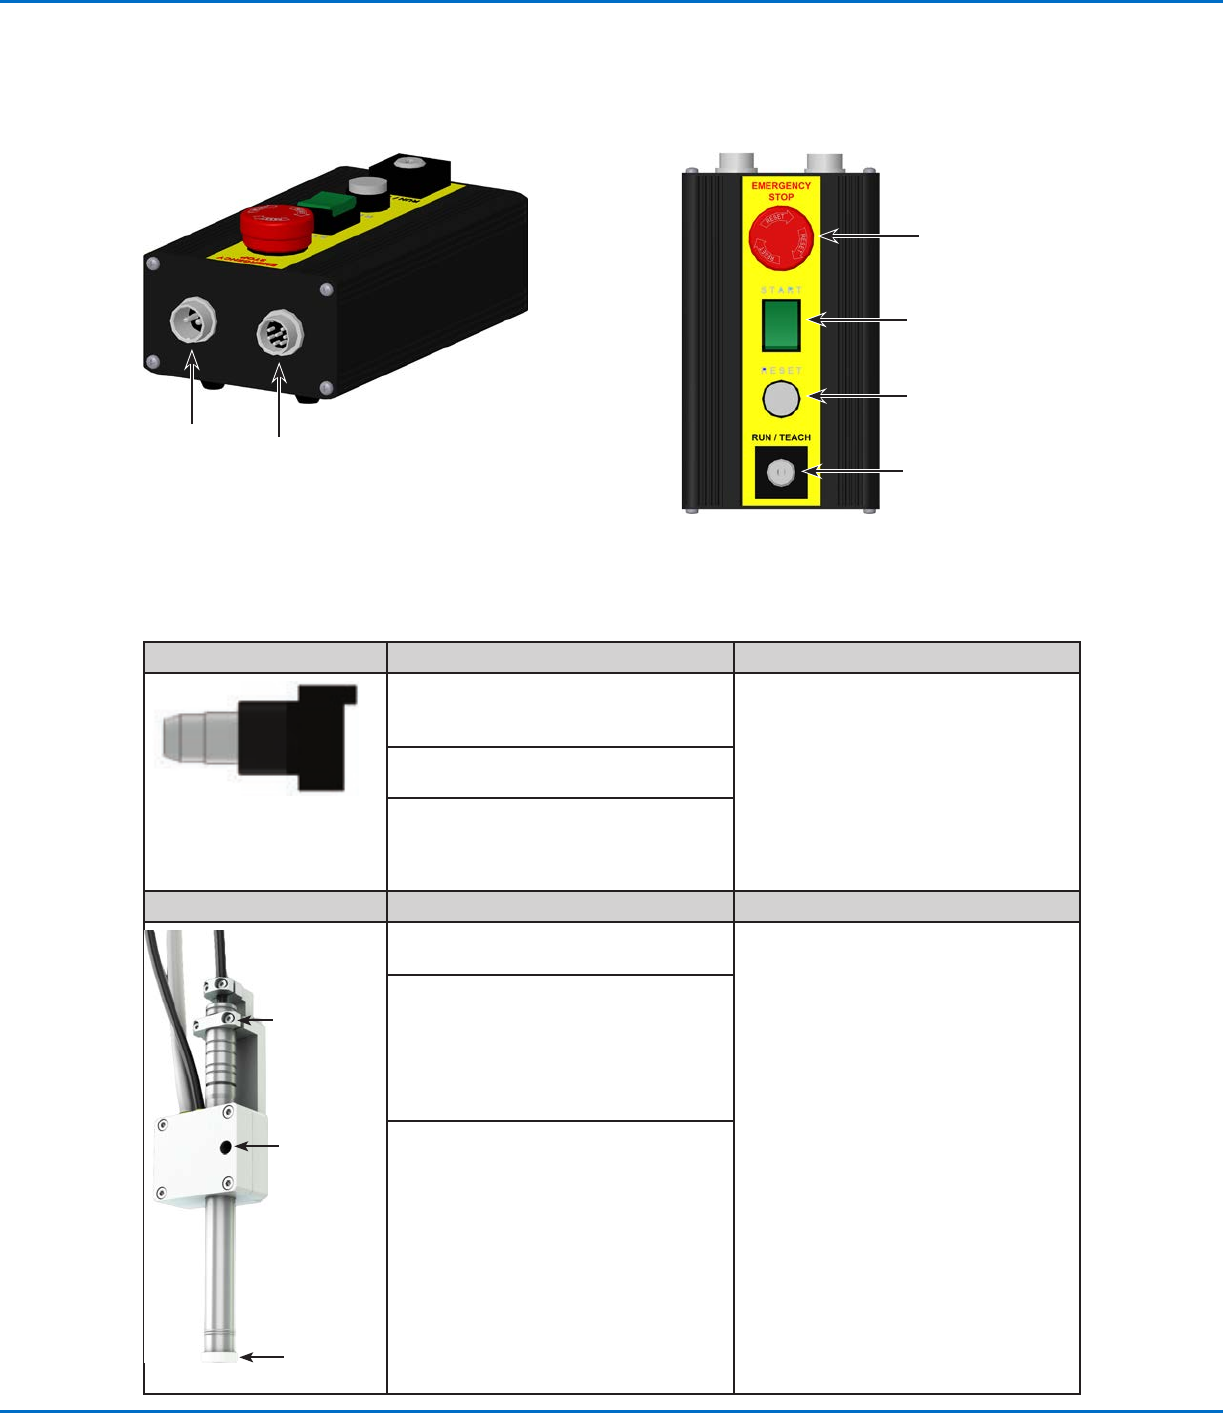
Pencil Camera Features How to Focus
Locking
bracket for
focus dial
Location of
screw used
to adjust light
intensity
White
diffuser cap
Combination of manual focus and on /
off dial
To focus the image:
• Without moving the robot, loosen
the screws that secure the focus dial
bracket.
• Turn the focus dial on the camera until
the sharpest image is obtained.
• Tighten the focus dial bracket screws.
To adjust the exposure:
• Use a small Phillips screwdriver to
adjust the camera light such that the
light setting will make the workpiece
surface visible regardless of any
changes in the ambient light.
NOTE: The screw is located inside the
camera housing.
Integrated lighting with an adjustable
light-intensity dial
NOTE: To turn the light off, use a
small flat-blade screwdriver to turn the
screw inside the camera bracket fully
counterclockwise.
White diffuser cap for image
enhancement (can be removed)
Start / Stop Box
Operating Features (continued)
For the
shorted plug
Connects to Ext.
Control on the
GVoperation box
EMERGENCY STOP
button
START button
RESET button
RUN / TEACH key