Nordson_EFD_GV_Series_Operating_Manual.pdf - 第64页
GV Series Automated Dispensing Systems 64 www.nordsonefd.com info@nordsonefd.com +1-401-431-7000 Sales and service of Nordson EFD dispensing systems are available worldwide. # Click Step 8 or • Click VIEW or RUN to test …
GV Series Automated Dispensing Systems
63www.nordsonefd.com info@nordsonefd.com +1-401-431-7000 Sales and service of Nordson EFD dispensing systems are available worldwide.
Programming
This section provides how-to procedures for the most commonly performed programming tasks. Refer to “How to
Create and Run a Program” for an example of how to use the dispensing software to create a complete program. If
you have difficulty creating a program for your application, contact your Nordson EFD representative. Before using
this section:
• Complete all applicable installation tasks. Refer to “Installation” on page19.
• Complete all required setup tasks. Refer to “Setup” on page44.
• Refer to “Concepts” on page26 for important robot programming concepts and for an overview of the
dispensing software screens and icons.
How to Create and Run a Program
The procedure provides the basic steps for creating and running a program. Every program is different. Use these
basic steps and refer to “How to Create Patterns” on page66 and “AppendixA, Command Function Reference”
on page98 to create the desired application pattern for the workpiece or group of workpieces.
PREREQUISITES
The system is properly set up. Refer to “Setting Up and Calibrating the System (Required)” on page48.
If the tip or any element of the Zaxis head was changed, repeat system setup and calibration using the Robot
Initial Setup wizard. Refer to “Setting Up the System Using the Robot Initial Setup Wizard” on page49.
The system is in the correct mode (Tip or CCD).
A workpiece is properly positioned on the fixture plate.
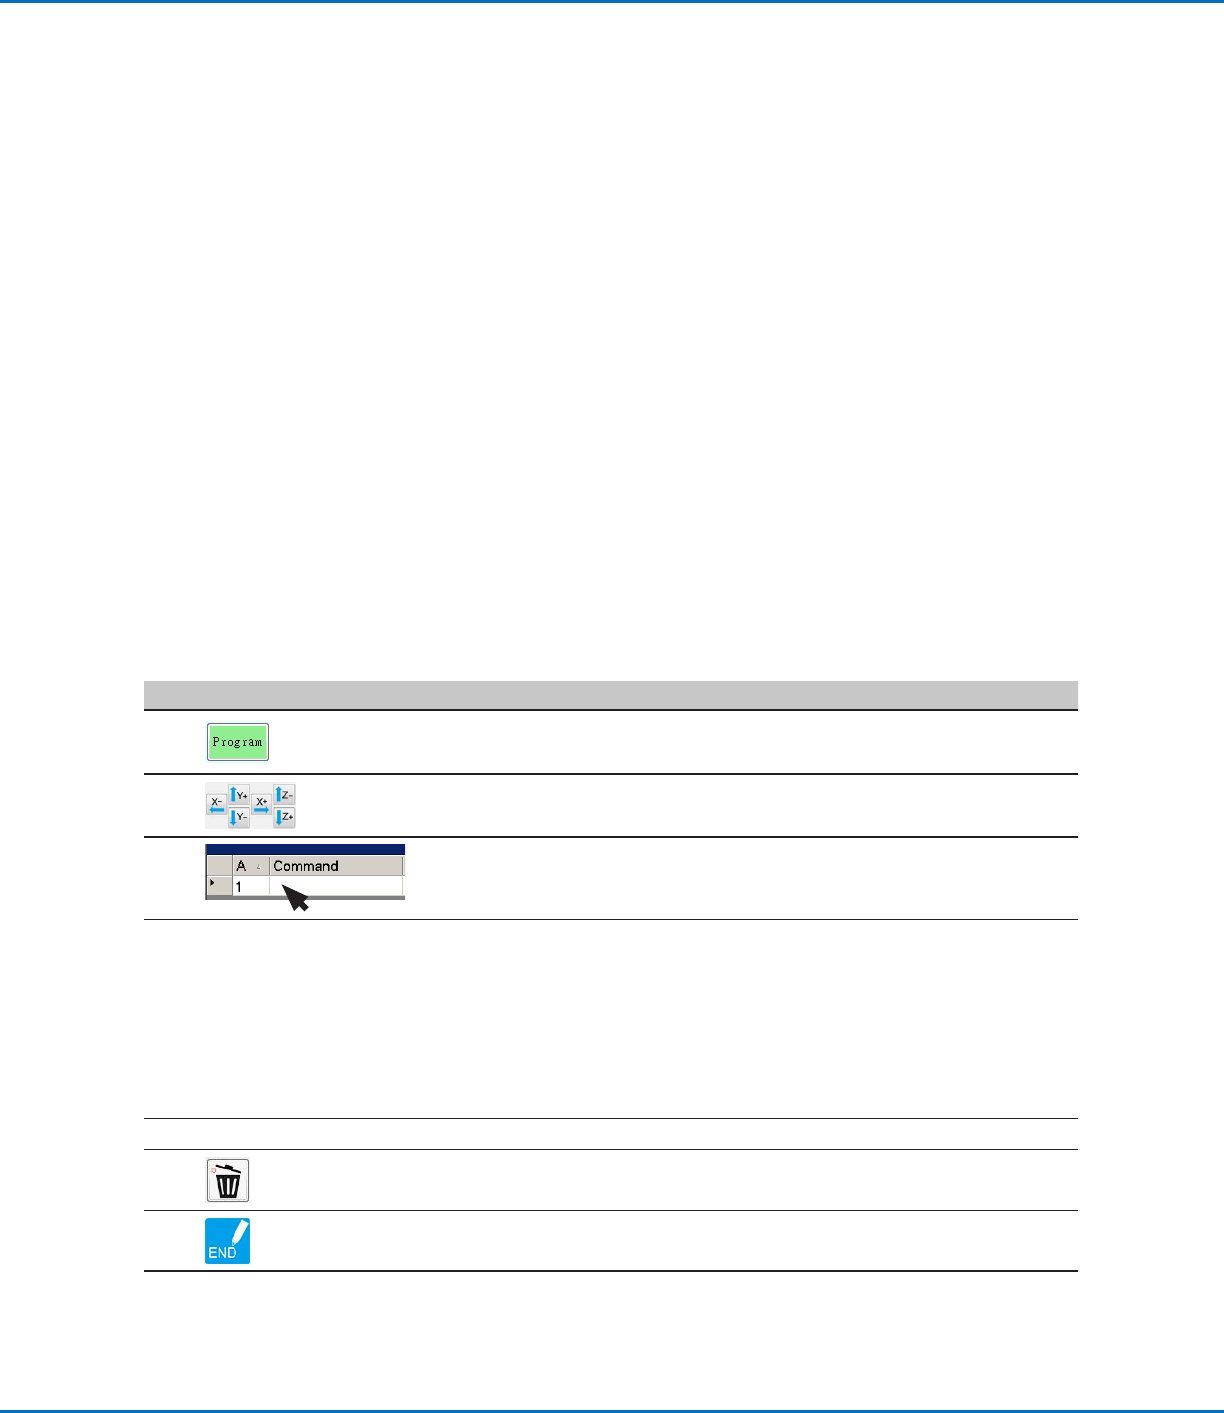
# Click Step
1
• Click the PROGRAM tab.
Address 1 is available to insert a command.
2
• Jog the dispensing tip to a desired XYZ location by clicking the navigation
icons.
3
• Insert a setup or dispense command that tells the robot what to do. Click
a command icon, or double-click anywhere in the address line to select a
command from the drop-down menu.
4
• Edit the command parameter settings. Refer to the following sections of this
manual for information to help you create programs:
- “About Programs and Commands” on page26 (includes best practices)
- “How to Create Patterns” on page66
- “How to Create a Mark” on page70
- “AppendixA, Command Function Reference” on page98 (provides
detailed information on all commands)
5
• Repeat steps 2 through 4 until the program is complete.
6
• To delete a command, click the command and then click the Delete icon.
7
• Click END PROGRAM to end the program.
Continued on next page
GV Series Automated Dispensing Systems
64 www.nordsonefd.com info@nordsonefd.com +1-401-431-7000 Sales and service of Nordson EFD dispensing systems are available worldwide.
# Click Step
8
or
• Click VIEW or RUN to test the program and make adjustments until the
program runs correctly.
NOTE: VIEW runs a program by tracing it with the camera, without
dispensing fluid. RUN runs the actual program, including dispensing.
9
>
• Click A NEW FILE.
• Click SAVE. If the file is not already named, enter a name for the file.
• Click YES/OK when prompted for confirmations.
How to Create and Run a Program (continued)
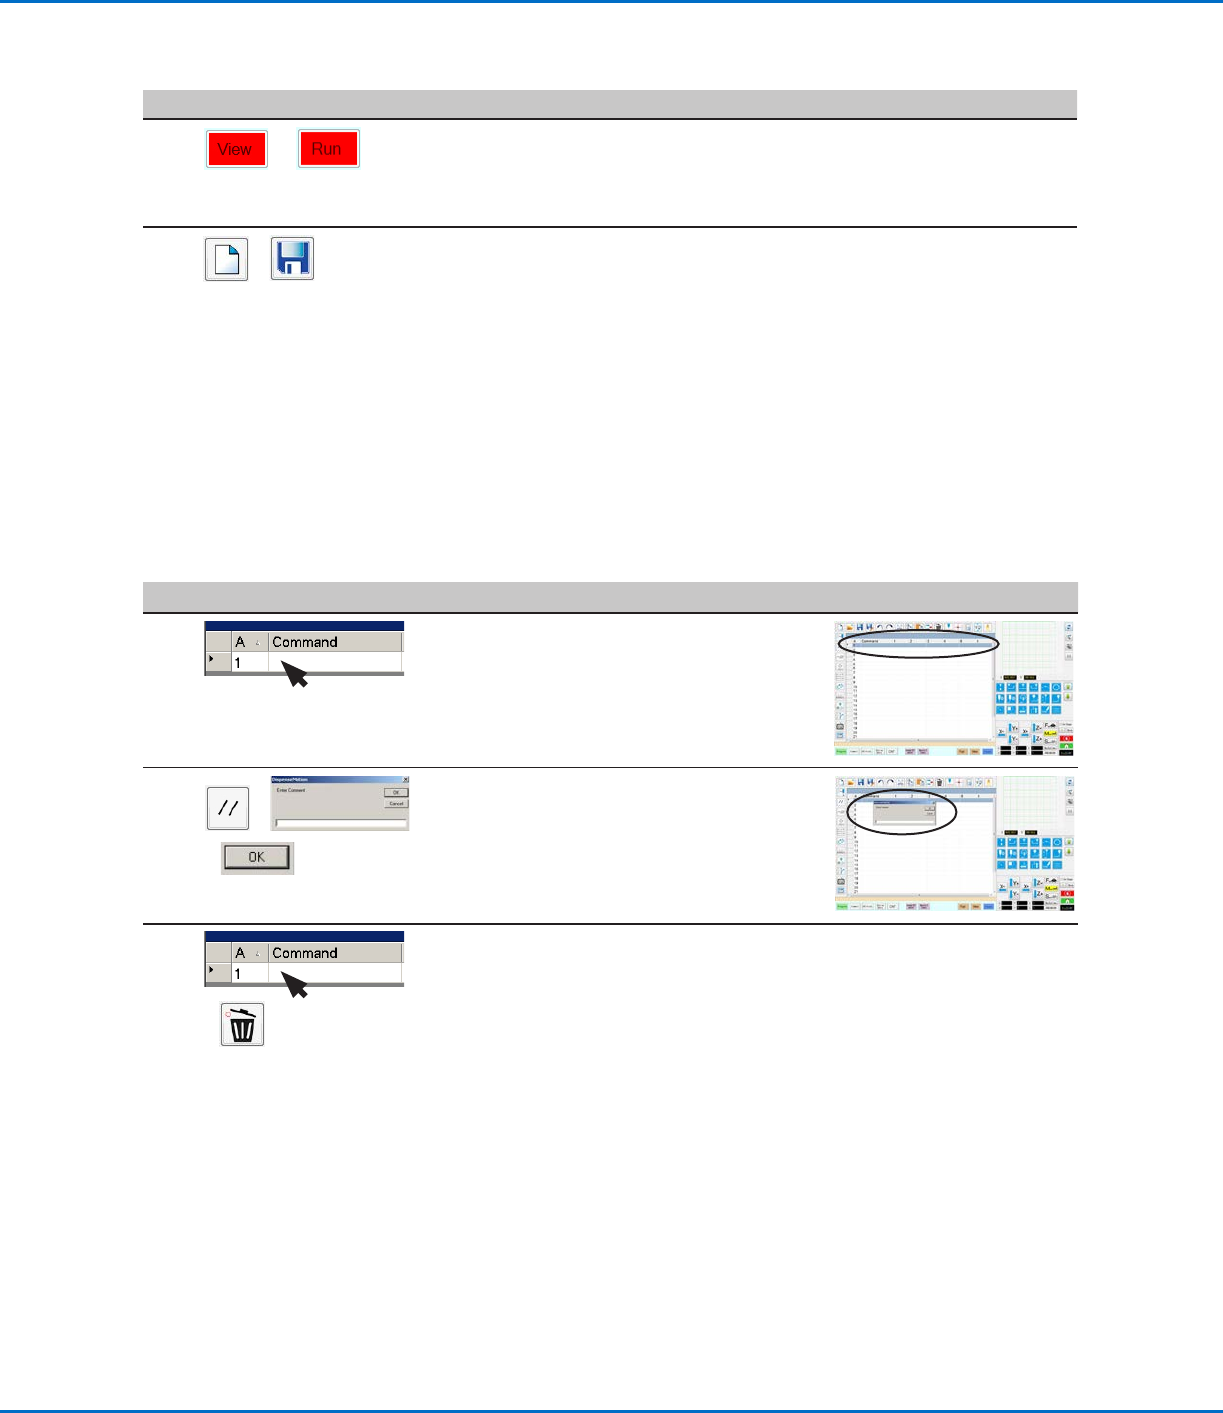
How to Add Comments to a Program
You can add your own comments to any command address line in a program.
PREREQUISITES
The program you want to add comments to is open.
#
Click Step Reference Image
1
• Select a blank command address line.
NOTE: Comments must be entered on a
blank line. If you try to enter a comment on a
line that includes a command, you will disable
the command.
2
>
>
• Click DISABLE ADDRESS.
• Enter your comment in the Enter Comment
window.
• Click OK to save.
3
>
• To delete a comment, select the comment
and then click DELETE.

GV Series Automated Dispensing Systems
65www.nordsonefd.com info@nordsonefd.com +1-401-431-7000 Sales and service of Nordson EFD dispensing systems are available worldwide.
How to Measure a Path or Circle on a Workpiece
The system can measure the distance between two points or the diameter of a circle on a workpiece.
#
Click Step Reference Image
1
• Click CAMERA to go to the camera screen.
2
• Jog the camera until the area on the workpiece
to be measured is in the camera view and then
focus the camera if needed.
3
• To measure a line, click the MEASURE
LENGTH icon.
• To measure the diameter of a circle, click the
MEASURE CIRCLE DIAMETER icon.
4
• To remove the measuring tool, right click the
center of Measure Length or Measure Circle
and then click DELETE.
How to Lock or Unlock a Program
Use the Lock Program checkbox on the System Setup screen to protect a program from unauthorized editing. When
Lock Program is checked, operators can only RUN, VIEW, or PAUSE the currently open program.
#
Click Step
1
• Open the program you want to lock. It should be visible when the Program
tab is selected.
2
>
• Click SYSTEM SETUP > OPEN. If requested, enter the password.
3
• Under Password, check LOCK PROGRAM to lock or unlock a program:
- If LOCK PROGRAM is checked, the currently open program will be locked
from editing and cannot be changed.
- If LOCK PROGRAM is NOT checked, the currently open program will be
unlocked and can be changed.
- If ENABLE FILE SWITCH is checked, the operator can switch programs
when LOCK PROGRAM is checked.