Nordson_EFD_GV_Series_Operating_Manual.pdf - 第53页
GV Series Automated Dispensing Systems 53 www.nordsonefd.com info@nordsonefd.com +1-401-431-7000 Sales and service of Nordson EFD dispensing systems are available worldwide. Setting Up the System Using the Robot Initial …
GV Series Automated Dispensing Systems
52 www.nordsonefd.com info@nordsonefd.com +1-401-431-7000 Sales and service of Nordson EFD dispensing systems are available worldwide.
Setting Up the System Using the Robot Initial Setup Wizard (continued)
Robot Initial Setup (Step3 Tab): Setting the Camera-to-Tip Offset (continued)
# Click Step Reference Image
7
>
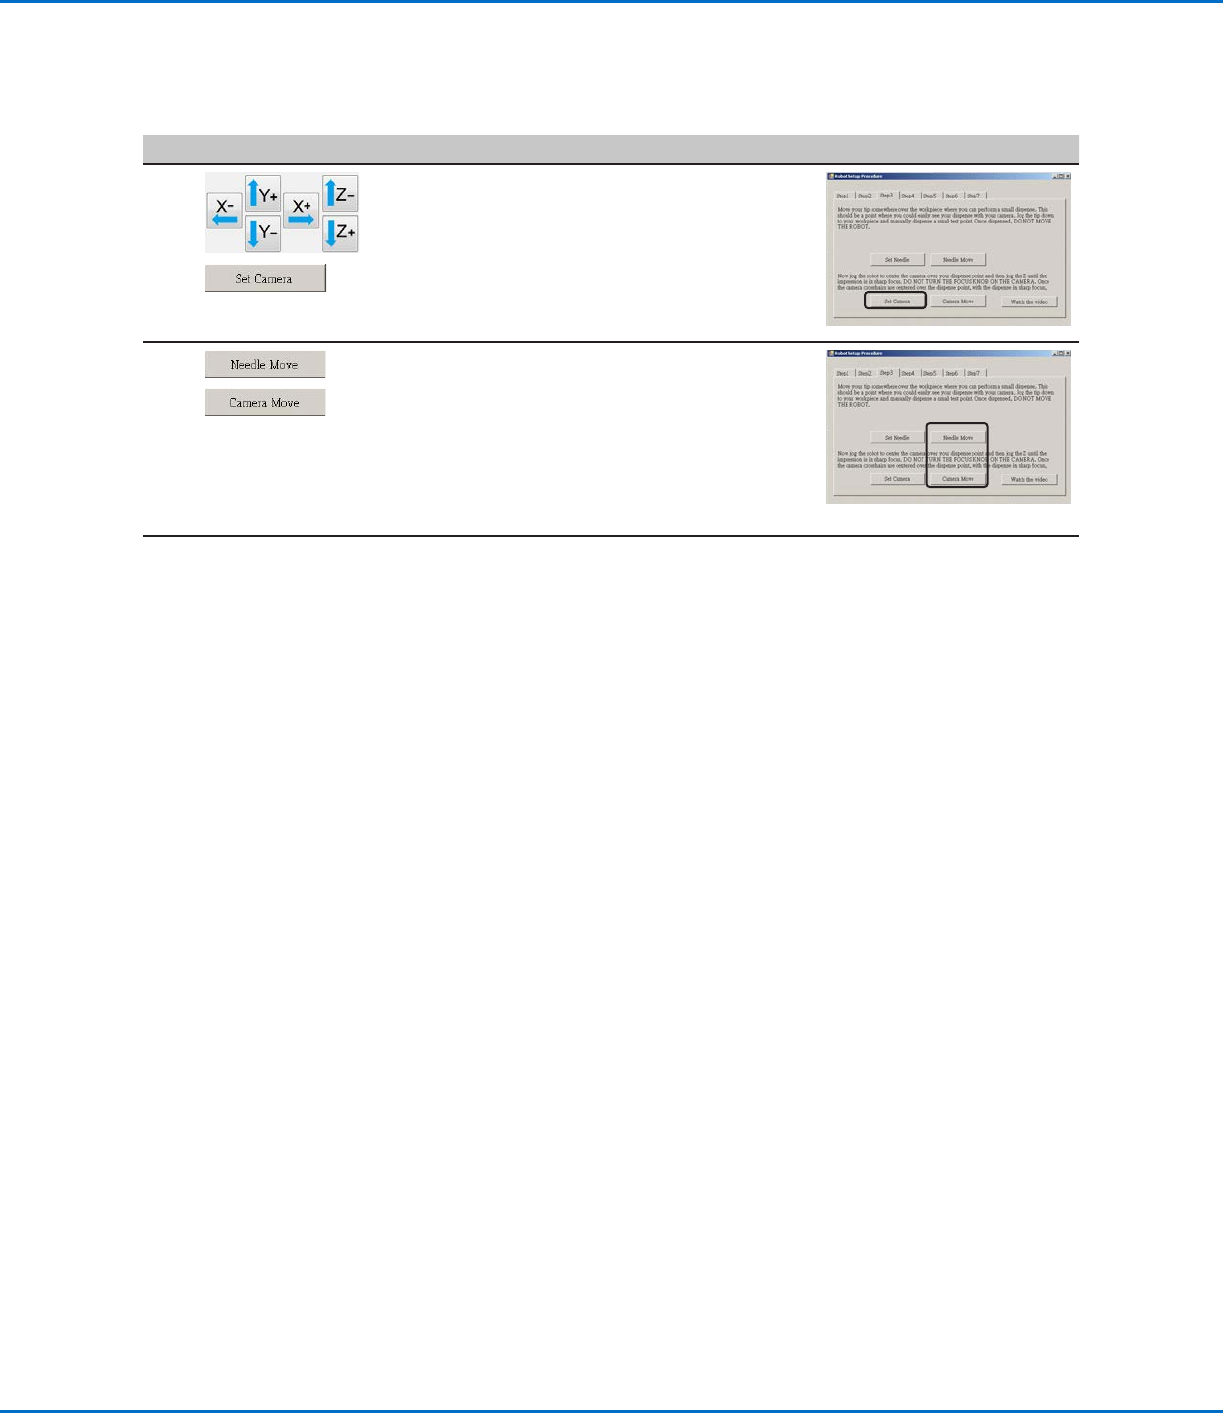
• Jog the camera until the camera crosshairs
are centered over the dispense dot.
• Focus the camera until the image of the
dispense dot is clear. Refer to “Camera” on
page18 as needed for instructions on
focusing the camera.
• Click SET CAMERA.
8
>
• Click NEEDLE MOVE to test the setup.
The system should center the tip over the
test dot dispensed in step 5.
• Click CAMERA MOVE to further test the
setup.
The camera should center its crosshairs over
the test dot dispensed in step 5.
9
• Continue to “Robot Initial Setup (Step4
Tab): Setting a Mark” on page53.
GV Series Automated Dispensing Systems
53www.nordsonefd.com info@nordsonefd.com +1-401-431-7000 Sales and service of Nordson EFD dispensing systems are available worldwide.
Setting Up the System Using the Robot Initial Setup Wizard (continued)
Robot Initial Setup (Step4 Tab): Setting a Mark
# Click Step Reference Image
1
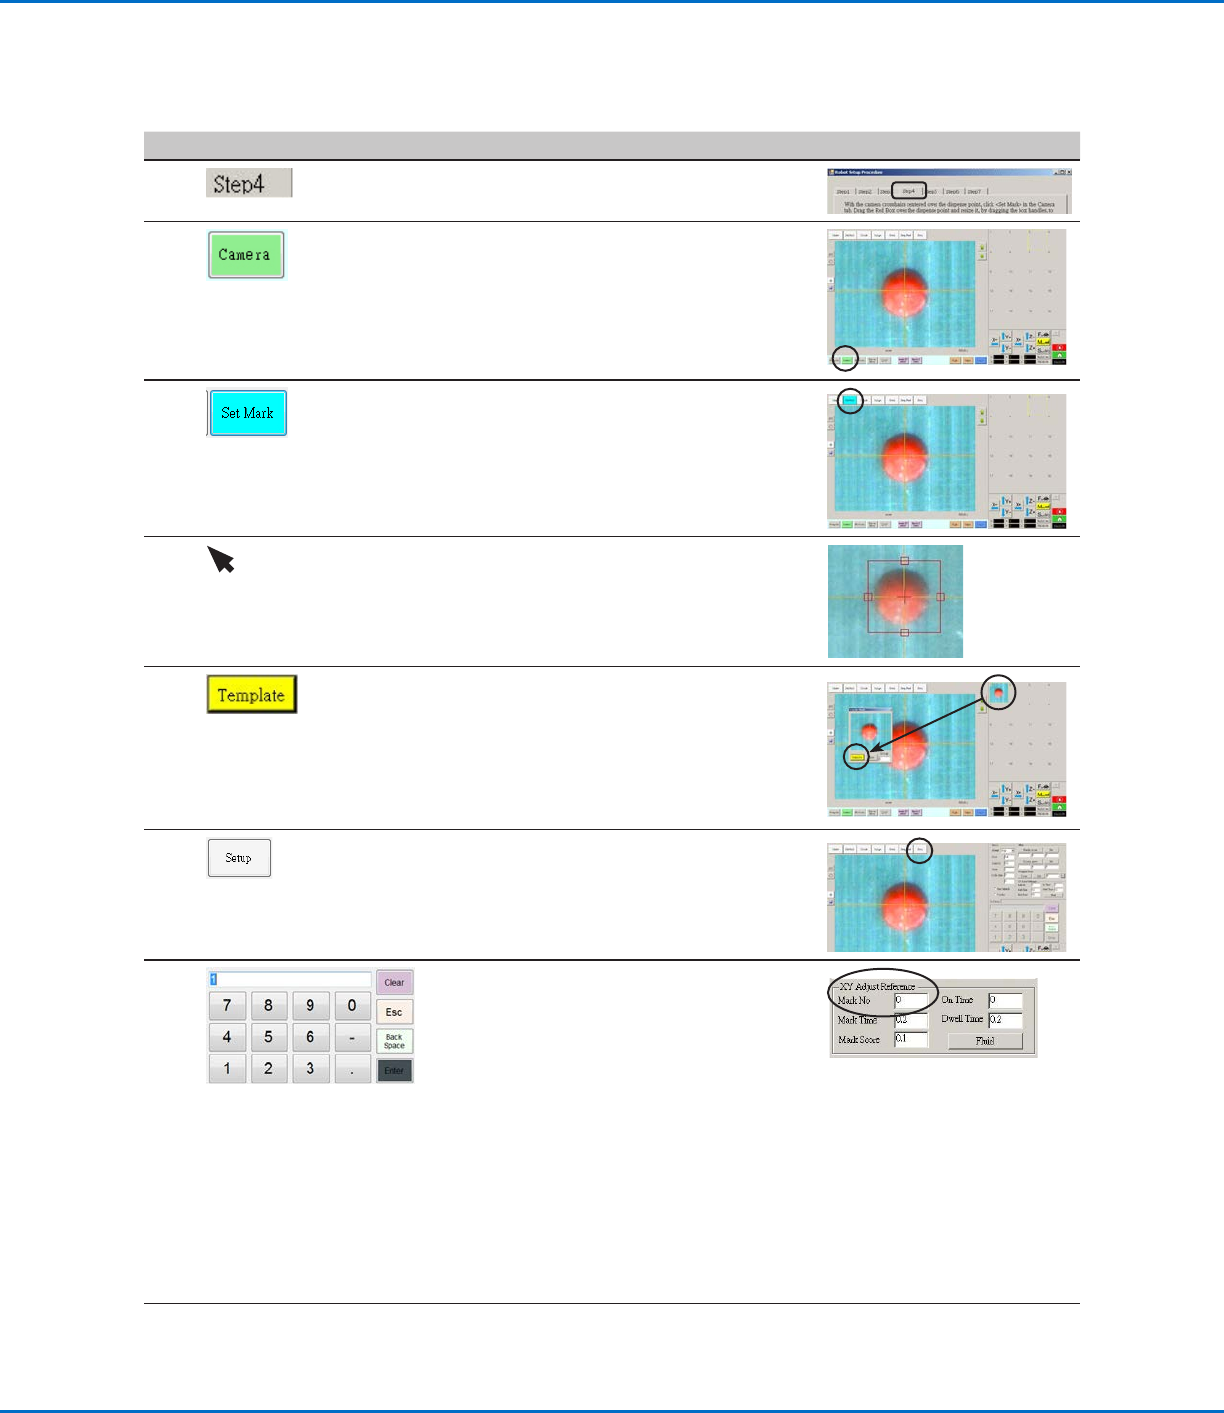
• Click the STEP4 tab.
2
• Click the CAMERA tab.
The actual camera view appears in the
Primary View screen and the Mark Library
appears in the Secondary View screen.
3
• Click SET MARK.
A red box appears.
4 • Click and hold the center of the red box,
drag it over the dispense dot, and then click
and drag the four box handles such that
they outline the dot.
5
• Click a socket in the Mark Library to save the
mark as a Mark No., then click TEMPLATE
when the Template Match window appears.
The system saves the image in the Mark
Library.
NOTE: Be sure to remember the Mark No.
6
• Click SETUP to go back to the Camera
window Offset fields.
7
• Use the keypad to enter the Mark number
in the Mark No field under XY Adjust
Reference.
NOTES:
- Make sure you click ENTER on the keypad
to enter the Mark number.
- Mark Time sets the time allowed for the
system to find the mark.
- Mark Score specifies how accurately the
camera finds a mark based on a value
from 0.1 to 1. A higher value results in
more precise matching. A lower value
results in less precise matching.
8
• Continue to “Robot Initial Setup (Step5
Tab): Setting the Camera Scale” on
page54.
GV Series Automated Dispensing Systems
54 www.nordsonefd.com info@nordsonefd.com +1-401-431-7000 Sales and service of Nordson EFD dispensing systems are available worldwide.
Setting Up the System Using the Robot Initial Setup Wizard (continued)
Robot Initial Setup (Step5 Tab): Setting the Camera Scale
# Click Step Reference Image
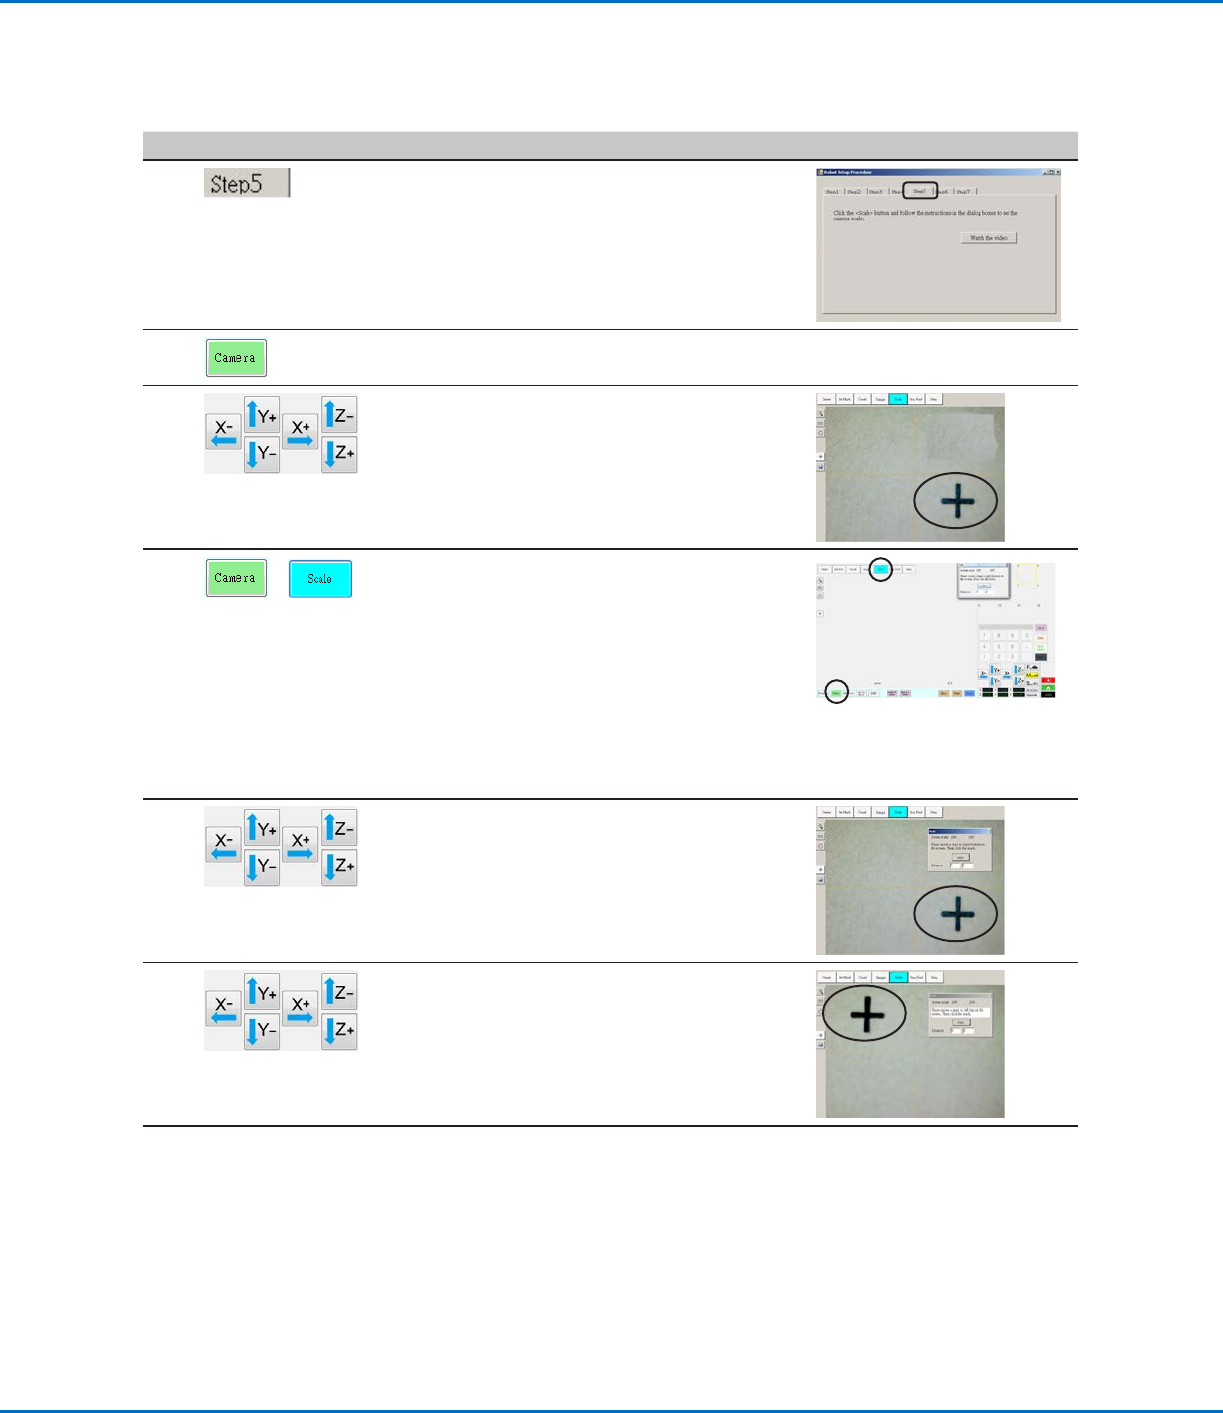
1
• Click the STEP5 tab.
2
• Click the CAMERA tab.
3
• Jog the camera to a point of reference that
is located on the lower right corner of the
workpiece.
• Bring the reference point into focus. Refer
to “Camera” on page18 as needed for
instructions on focusing the camera.
4
>
• Click the CAMERA tab and then click
SCALE.
The Scale window opens.
NOTE: When the camera views an object, it
converts the pixels to a true measurement.
For the camera to make this conversion
accurately, you must “teach” the camera
what the size of an object is in comparison
to pixels per inch by setting the camera
scale.
5
• Choose a point of reference on the
workpiece and jog the camera so that the
reference point is located in the lower right
quadrant of the camera screen, then click
the point.
6
• Jog the camera again until the same
reference point is located in the upper left
quadrant of the camera screen, then click
the point.
The camera scale is now set.
7
• Continue to “Robot Initial Setup (Step6
Tab): Setting the Tip-to-Workpiece Offset”
on page55.