Nordson_EFD_GV_Series_Operating_Manual.pdf - 第87页
GV Series Automated Dispensing Systems 87 www.nordsonefd.com info@nordsonefd.com +1-401-431-7000 Sales and service of Nordson EFD dispensing systems are available worldwide. Operation After the system is installed and pr…
GV Series Automated Dispensing Systems
86 www.nordsonefd.com info@nordsonefd.com +1-401-431-7000 Sales and service of Nordson EFD dispensing systems are available worldwide.
To Use the PicoTouch Parameter Update Command in a Program
PREREQUISITES
A PICO Toµch Controller is properly installed and connected to the automated dispensing system.
The PICO Toµch parameters are saved in a *.PICO file as described in the previous two procedure.
# Click Step Reference Image
1
>
PICOTOUCH
PARAMETER
UPDATE
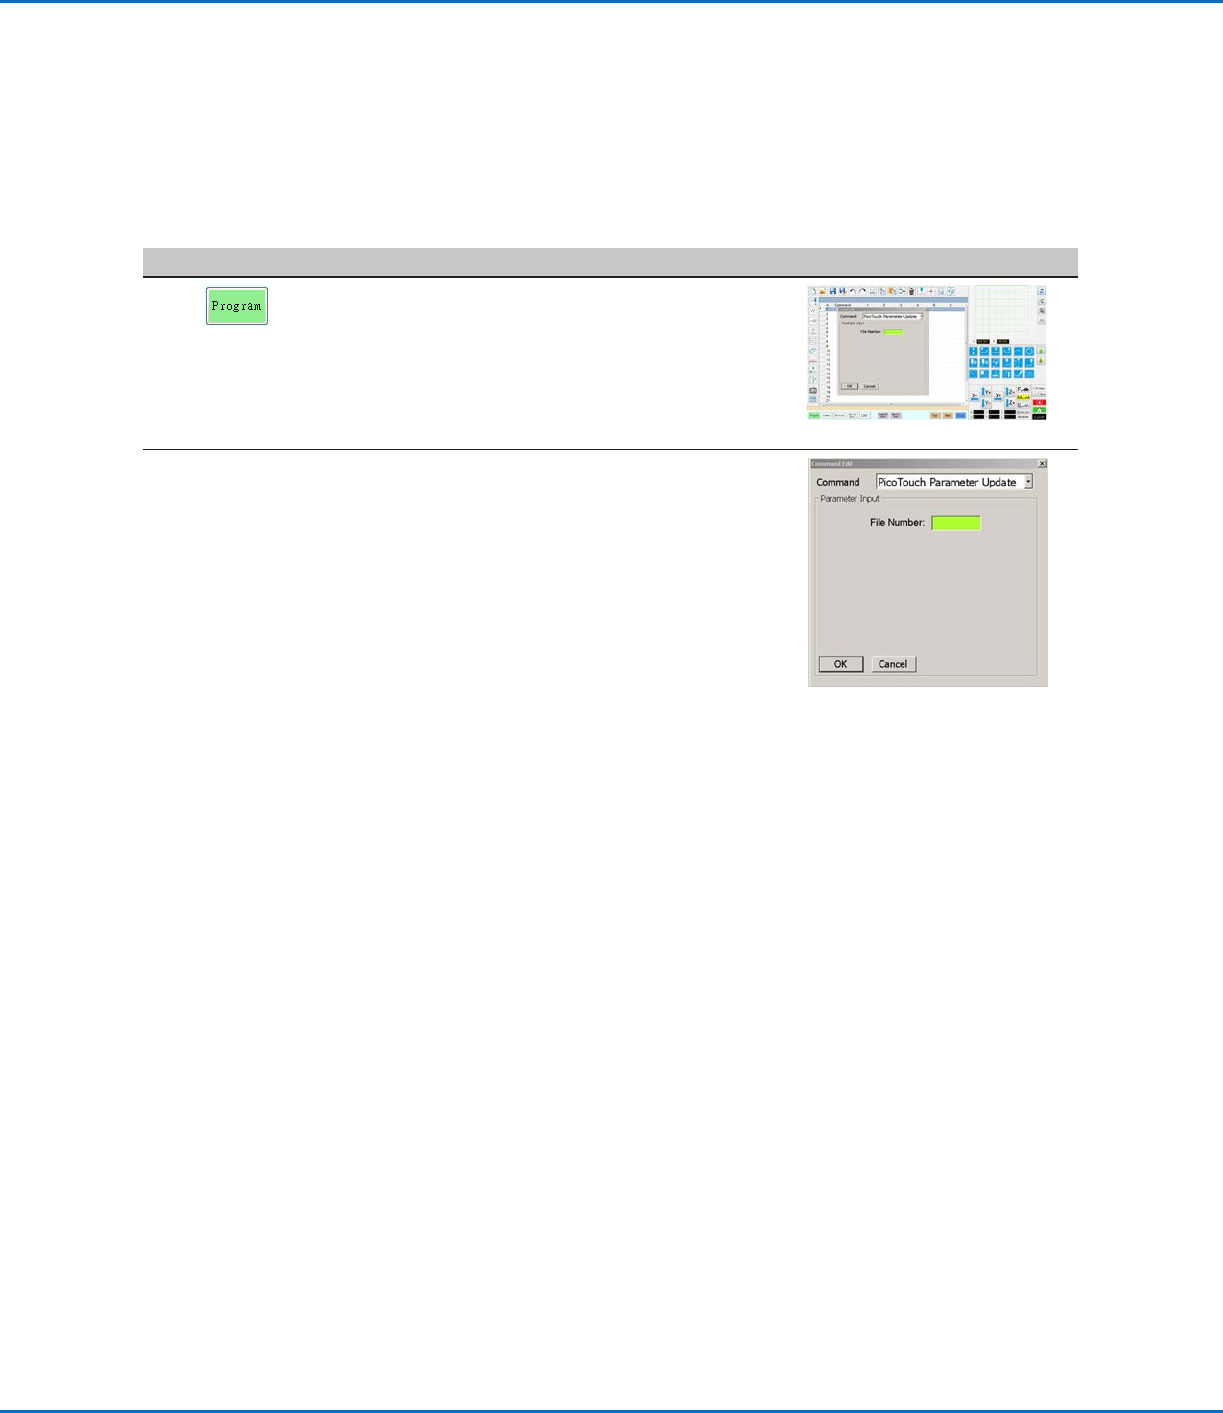
• Click the PROGRAM tab
• Double-click the address row where you want
to implement the saved PICO Toµch Controller
settings and select PICOTOUCH PARAMETER
UPDATE.
2 xxxxxxxx • In the FILE NUMBER field, enter the *.pico file
name that contains the PICO Toµch parameters
you want the system to use.
NOTE: The data entered for File Number must
exactly match the *.pico file name.
• Click OK to save.
NOTE: Multiple PicoTouch Parameter Update
commands can exist in the same program. When
the system switches to a new update command,
the Toµch Controller screen updates as well.
Note that delays can occur when switching
programs, for both the running program and the
update of the Toµch Controller screen.
How to Adjust PICO Parameters Using DispenseMotion (continued)
GV Series Automated Dispensing Systems
87www.nordsonefd.com info@nordsonefd.com +1-401-431-7000 Sales and service of Nordson EFD dispensing systems are available worldwide.
Operation
After the system is installed and programmed, the only actions
required from the operator are to switch on the system, run the
program for the workpiece, and shut down the system at the end of
the work period.
Starting the System and Running a
Program
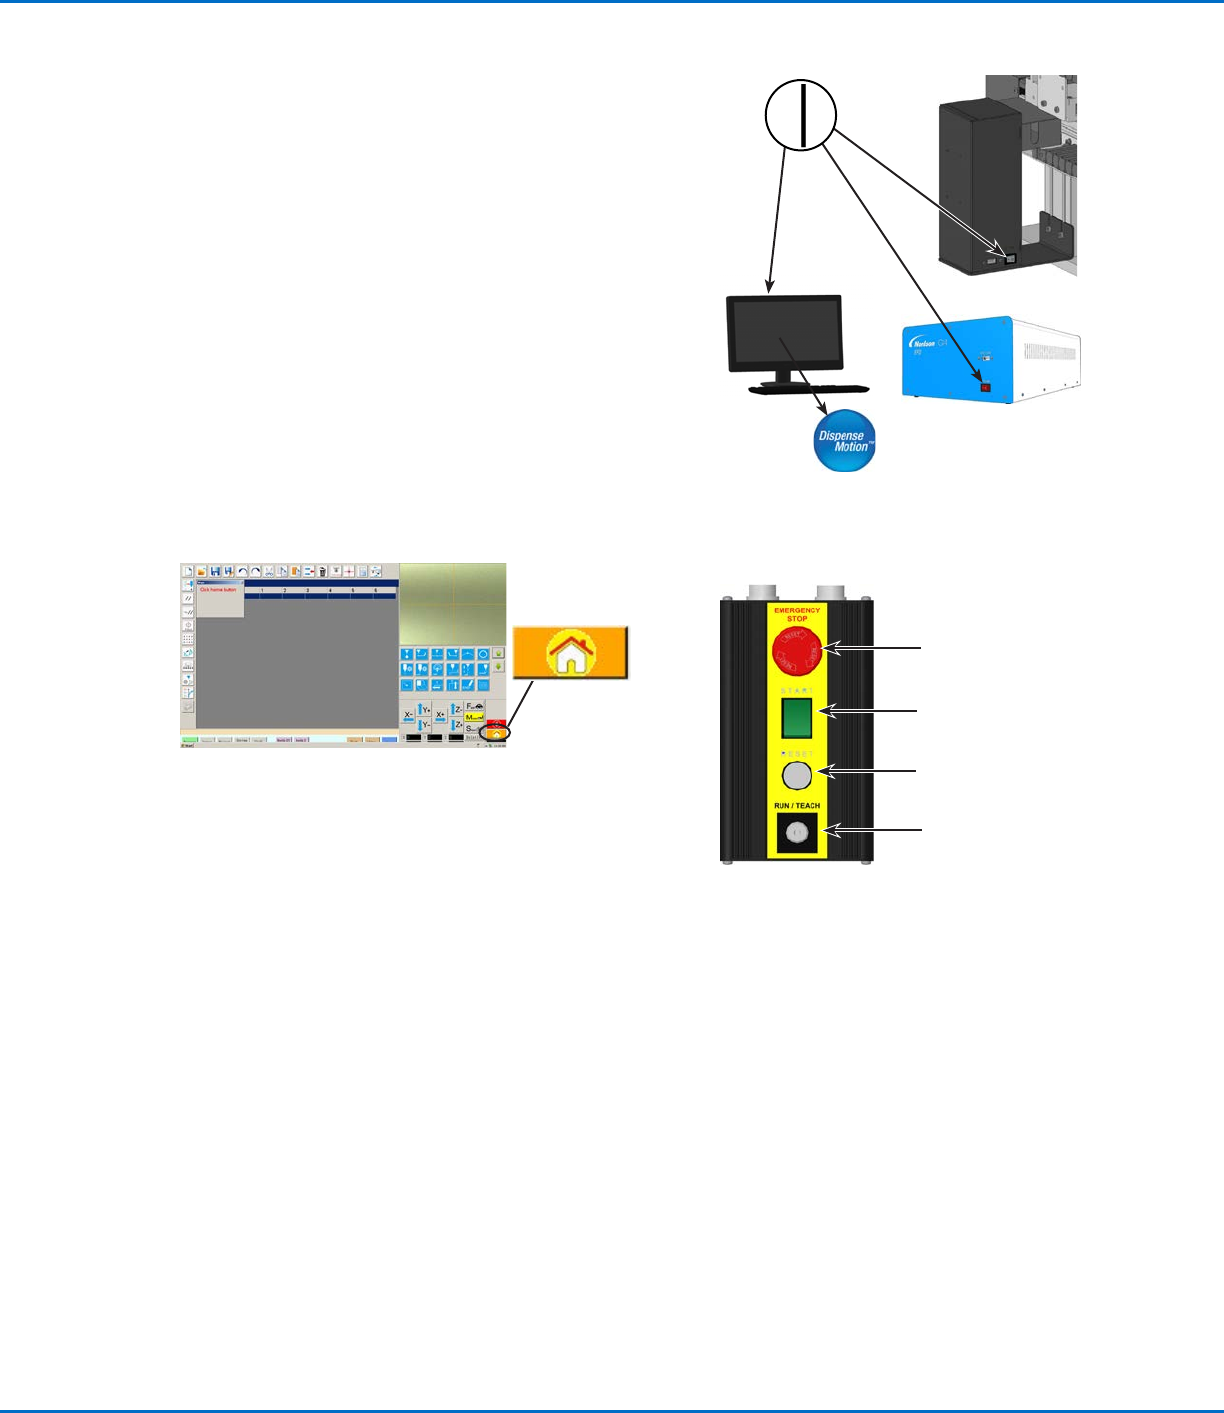
1. Switch on the DispenseMotion controller, monitor, and
GVoperation box.
2. On the start / stop box:
a. Ensure that the EMERGENCY STOP button is not depressed.
b. Turn the RUN / TEACH key to the RUN position.
3. Double-click the DispenseMotion icon to open the dispensing
software.
4. Click HOME.
The robot moves the camera to the home position (0, 0, 0) and
the system is ready.
5. Enable the dispensing system, including the valve controller.
Refer to the dispensing equipment manuals as needed.
6. Open the program file for your application.
7. Place the workpiece in the correct location on the fixture plate.
8. Press the START button on the start / stop box, or click RUN on
the monitor.
9. When necessary, refer to the dispensing system manuals to refill
the dispenser.
Performing an Emergency Stop
1. Press the EMERGENCY STOP button on the start /stop box.
2. Press the RESET button on the start / stop box to reset the
motor power.
About the RUN / TEACH Switch
The start/stop box includes a RUN/TEACH switch that affects
system operation. When the RUN / TEACH switch is in the TEACH
position, the system will run a dispense cycle, but will not dispense
material. When the switch is in the RUN position, programs run
normally.
Start / stop box
EMERGENCY STOP
button
START button
RESET button
RUN / TEACH key
GV Series Automated Dispensing Systems
88 www.nordsonefd.com info@nordsonefd.com +1-401-431-7000 Sales and service of Nordson EFD dispensing systems are available worldwide.
Running a Program by Scanning a QR Code
PREREQUISITES
QR code scanning is enabled. Refer to “AppendixD, QR Code Scanning Setup” on page134 to enable QR
code scanning.
A QR code is present on the robot work surface and is associated with a program. Refer to “AppendixD, QR
Code Scanning Setup” on page134 to associate a QR code with a program.
1. Position the workpiece on the fixture plate.
2. Press the START button on the start / stop box, or click RUN on the monitor.
The system jogs to the predefined location where a QR code is located, scans the QR code, opens the
associated program, and executes the program.
Pausing During a Dispense Cycle
Press START on the start / stop box at any time to pause the system during a dispense cycle; the system pauses at
its current position.
NOTE: If the system is paused when the dispenser is open, pattern integrity will be compromised.
Purging the System
As needed, use either of the following methods to purge the system:
• Click SYSTEM SETUP > IO, then click the output that is set as the dispense port for your system. Click the
dispense port output again to stop the purge.
• Click CAMERA > SETUP, enter a value for ON TIME, and then click FLUID. The valve purges for the amount of
time entered for On Time.
NOTE: You can set up the system to purge automatically. Refer to “How to Set Up Auto Purge, Program Cycle
Limits, or Fluid Working Life Limits” on page82.
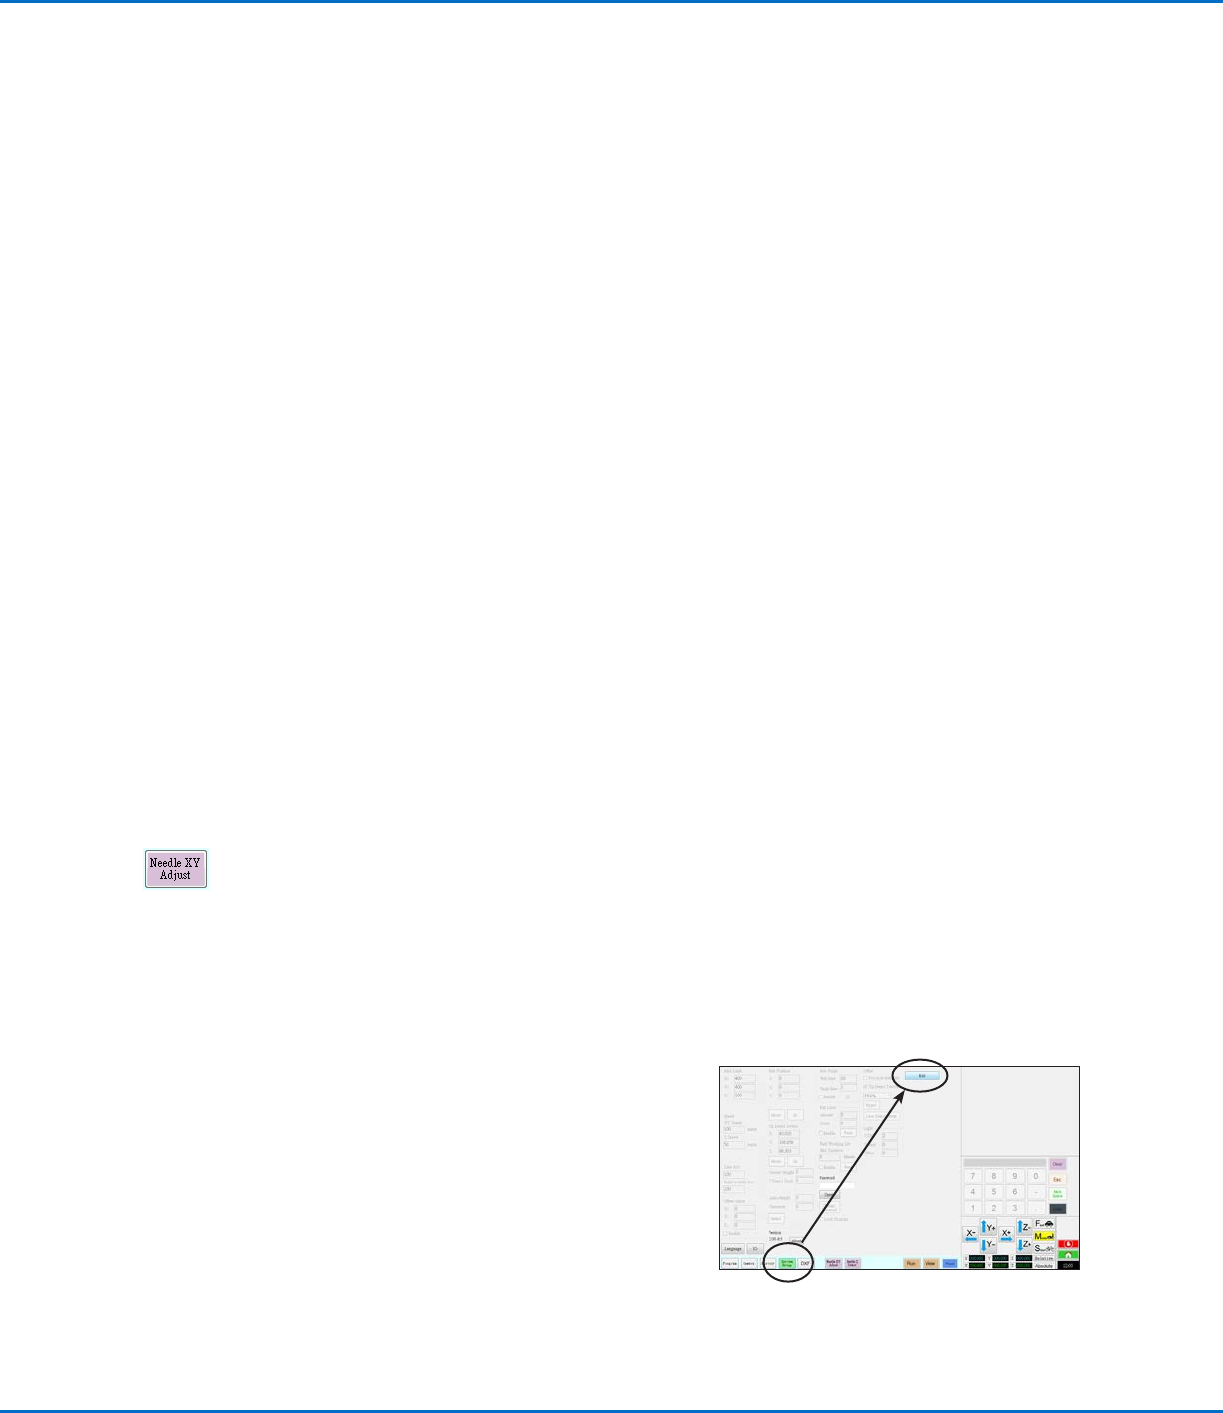
Updating Offsets
After running a program repeatedly for several hours, click NEEDLE Z DETECT (systems with tip detection)
or NEEDLE XY ADJUST (systems without a tip detection) to update the system to compensate for minute
changes that can occur after long periods of operation.
Refer to “How the System Responds to Needle Z Detect or Needle XY Adjust” on page57 for a detailed
description of the system response to a Needle XY Adjust selection.
Shutting Down the System
1. Click SYSTEM SETUP > EXIT to close the DispenseMotion software. If prompted to save a file, select YES or
NO.
2. Switch off the following components:
• DispenseMotion controller
• Monitor
• GV operation box
3. Refer to the dispensing system manuals for any special
shutdown instructions.