Nordson_EFD_GV_Series_Operating_Manual.pdf - 第30页
GV Series Automated Dispensing Systems 30 www.nordsonefd.com info@nordsonefd.com +1-401-431-7000 Sales and service of Nordson EFD dispensing systems are available worldwide. Command Windows When you double-click a comman…

GV Series Automated Dispensing Systems
29www.nordsonefd.com info@nordsonefd.com +1-401-431-7000 Sales and service of Nordson EFD dispensing systems are available worldwide.
Refer to “Navigation
and Jogging
Window” on
page37.
Refer to “Horizontal
and Vertical Toolbar
Icons” on page35.
Refer to “Setup and
Dispense Command
Icons” on page36.
Refer to “Secondary
View Screen” on
page33.
Overview of the DispenseMotion Software
This section provides an overview of all the DispenseMotion software screens, windows, and icons. This information
is provided for your reference as needed. To set up the system and create dispense programs, refer to “Setup” on
page44 and “Programming” on page63. The software opens at the Program screen.
Refer to “System
Setup Screen” on
page39.
Refer to “Camera
Screen, Tab Bar,
and Icons” on
page40.
Refer to “Primary View
Screen and Tab Bar”
on page31.
Refer to “Primary View
Screen and Tab Bar” on
page31.
Refer to “Horizontal
and Vertical Toolbar
Icons” on page35.
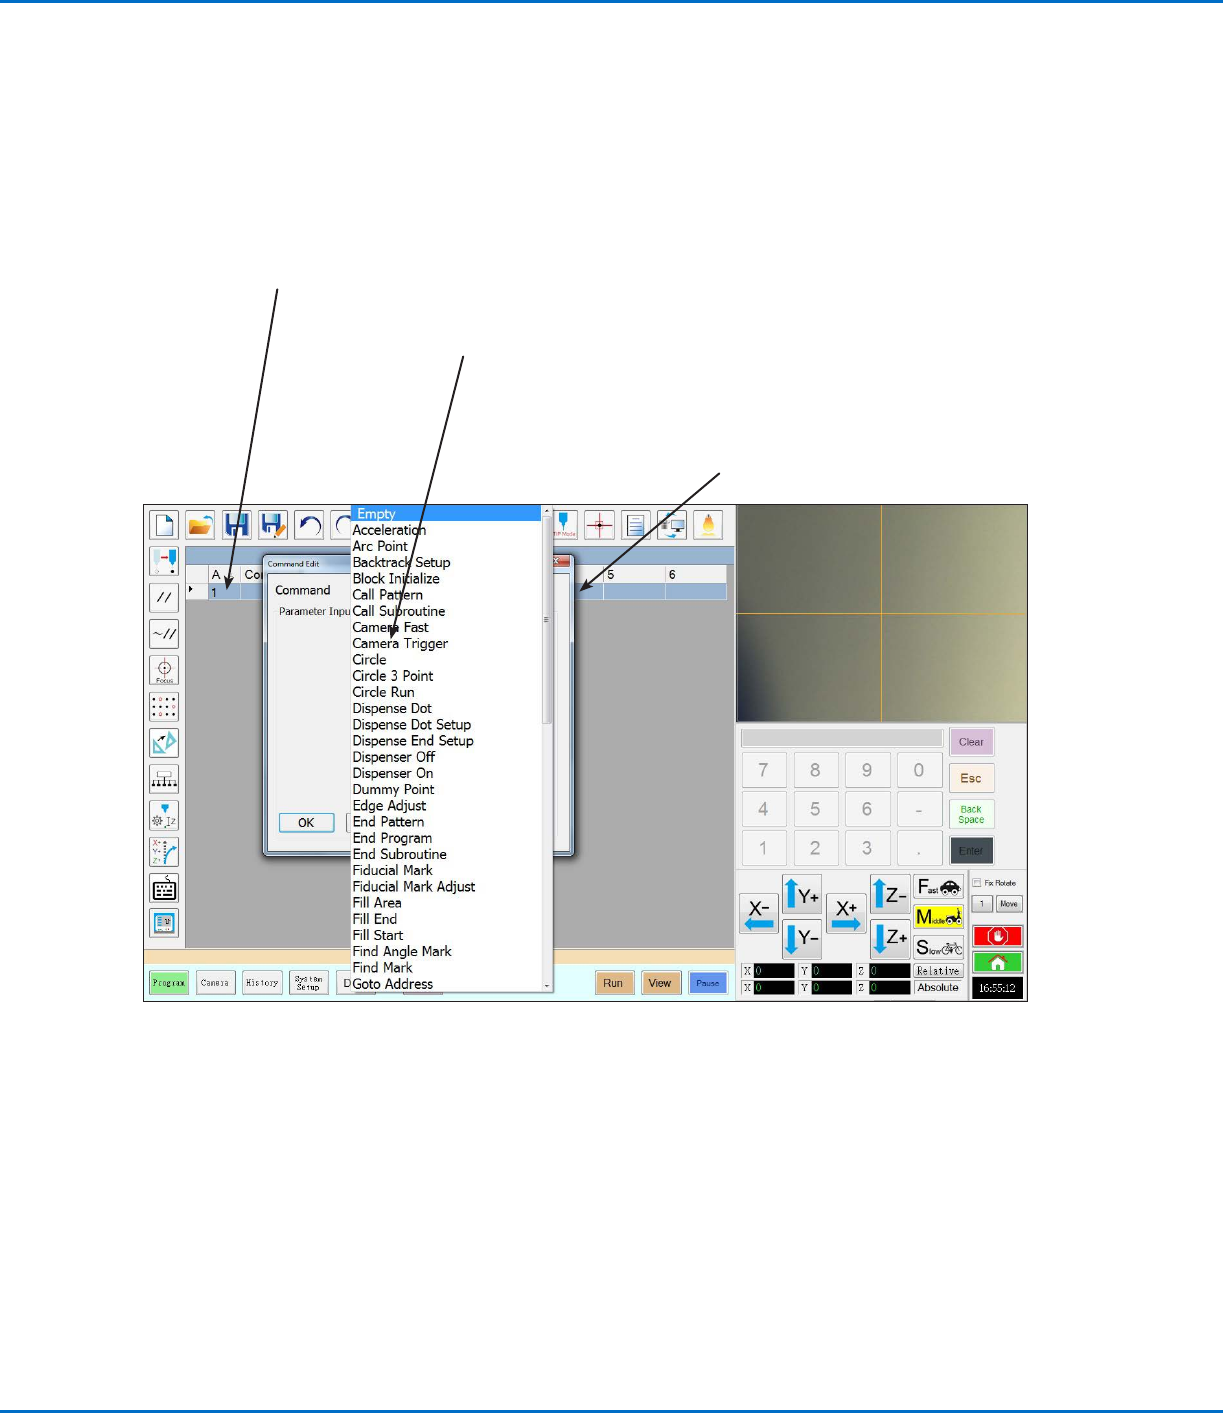
Command address (A): Double-
click to open the command
drop-down menu; select a
command to open its command
window. Refer to “Command
Windows” on page 30.
GV Series Automated Dispensing Systems
30 www.nordsonefd.com info@nordsonefd.com +1-401-431-7000 Sales and service of Nordson EFD dispensing systems are available worldwide.
Command Windows
When you double-click a command address line on the Program screen, a drop-down menu of all available
commands appears. Select any command to open the window for that command. Each command window contains
the parameters, if any, that can be set for the command. Refer to “AppendixA, Command Function Reference” on
page98 for detailed information on all commands and associated parameters.
Command window: Enter parameters for
the command in this window. Refer to
“AppendixA, Command Function Reference”
on page 98 for detailed information on all
commands.
Command address (A):
Double-click to open the
command drop-down menu.
Command edit drop-down menu:
Click a command to open its
command window.
GV Series Automated Dispensing Systems
31www.nordsonefd.com info@nordsonefd.com +1-401-431-7000 Sales and service of Nordson EFD dispensing systems are available worldwide.
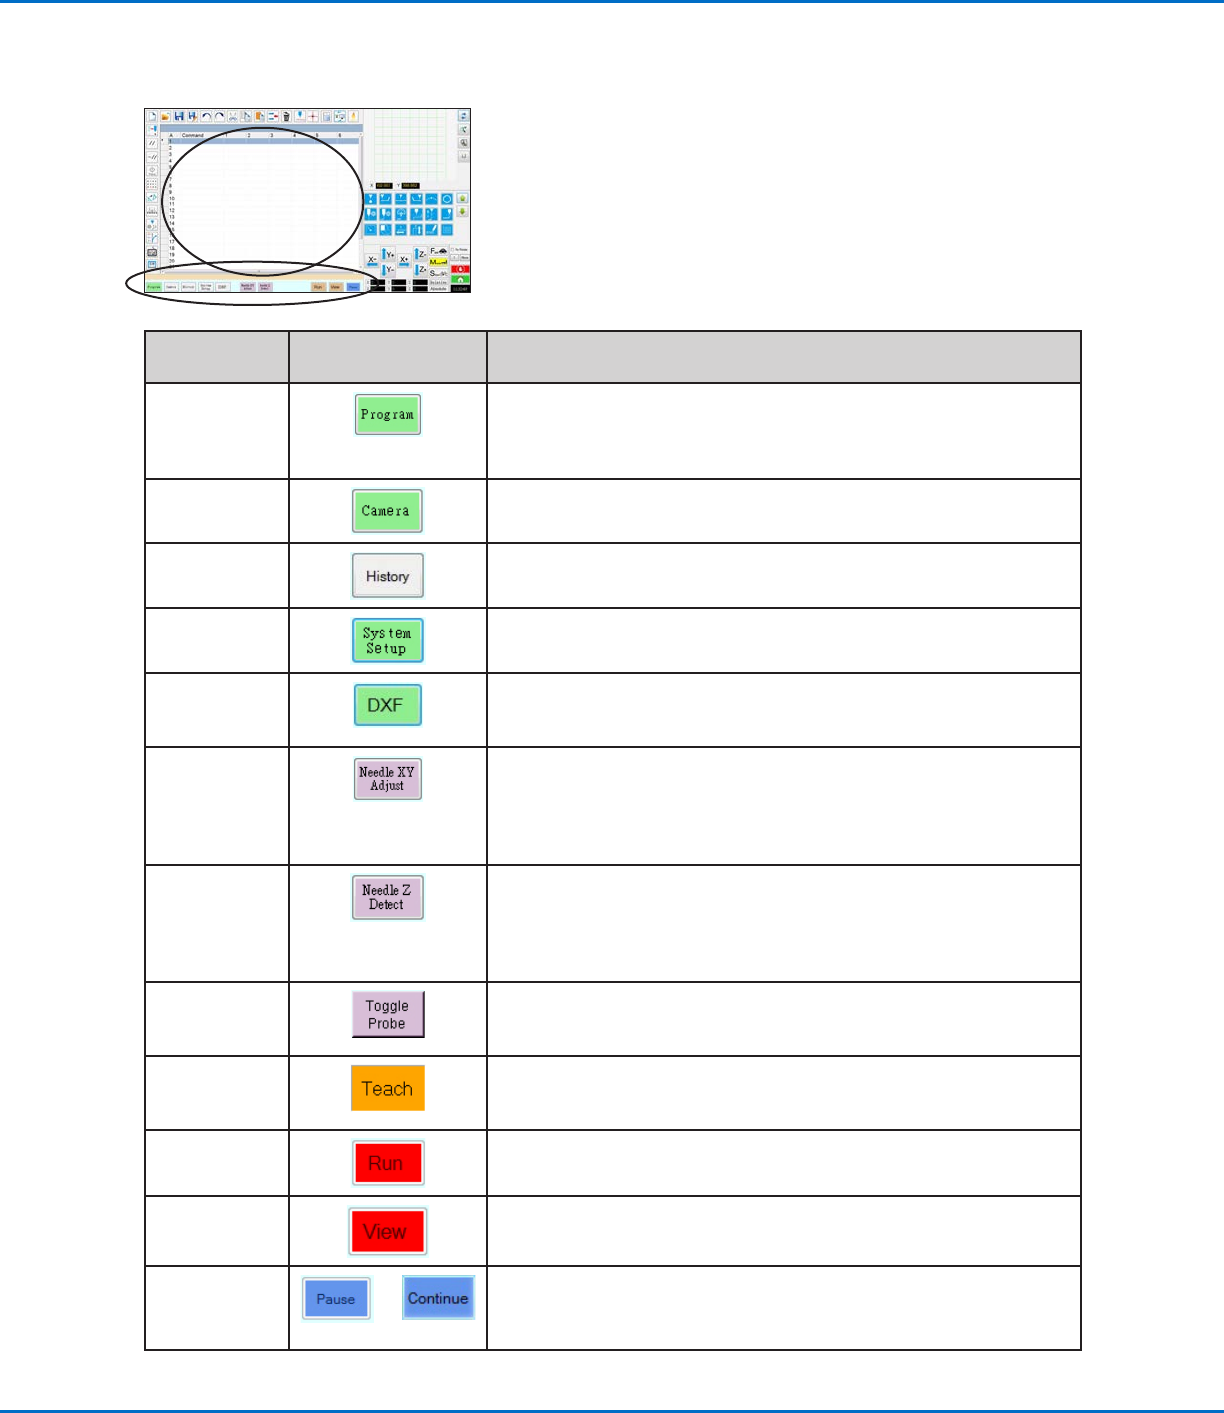
Primary View Screen and Tab Bar
The Primary View screen changes depending on the selected tab. All the tabs are visible at all times.
Tab Name
Tab Color When
Selected
Function
Program
Shows the command view; used to create programs. Right-clicking
on this screen provides quick access to commonly used programming
functions. Refer to “Primary View Screen Right-Click Functions” on
page32 for details.
Camera
Shows the actual camera view; used to perform all camera-related
functions.
History
Shows a time-line of different commands.
System Setup Shows the settings screen; used to view or change system-level
settings or parameters.
DXF
Allows you to load drawings in DXF format into the DispenseMotion
software. Refer to “AppendixC, DXF File Import” on page127 for
more information.
Needle XY
Adjust
Automatically checks and adjusts the XY offsets without touching the
tip to any surface. This button is present only when Needle XY Adjust
is enabled on the System Setup screen. The system must be properly
setup as described under “Setting Up and Calibrating the System
(Required)” on page48.
Needle Z
Detect
Automatically checks and adjusts the tip-to-workpiece offset (Z
clearance) then performs a Needle XY Adjust. This button is present
only when Tip Detect Device is enabled on the System Setup screen.
The system must be properly setup as described under “Setting Up
and Calibrating the System (Required)” on page48.
Toggle Probe
When the optional height sensor is installed, lowers or raises the height
sensor probe. Refer to “AppendixF, Height Sensor Setup and Use” on
page142 for all information related to the optional height sensor.
Teach
When the optional start / stop box is connected, this indicator appears
on the tab bar and flashes when the robot is in the safety bypass mode.
When the Teach indication is present, the Run button is disabled.
Run
Runs the selected program.
View Runs the selected program without dispensing and also centers the
camera on the dispense path.
Pause or
Continue
or
Pauses the program that is currently running. When you click on Pause,
the button changes to Continue.
Click Continue to stop the pause.