3OM-1343-008_w.pdf - 第174页
4-7 AKFEDT -ID 1.2.2 Deleting the Component ID (1) Select the component ID to be deleted. The selected component ID turns blue, indicating that it is selected. Selected Component ID Fig. 3D3 (2) Press the [Delete...] but…

4-6
AKFEDT-ID
[6] [Close] Button
When this button is pressed, the "Type Addition" dialog box closes.
[7] Touch Keypad for Data Editing
Data can be entered from the touch keypad or the track ball.
Reference
Refer to "2.3 Data Entry with Touch Keypad for Data Editing (Chapter 2)"
for the details of the operation method.
0601-002
1.2 Basic Operations in "Selection of component ID" Window
4-7
AKFEDT-ID
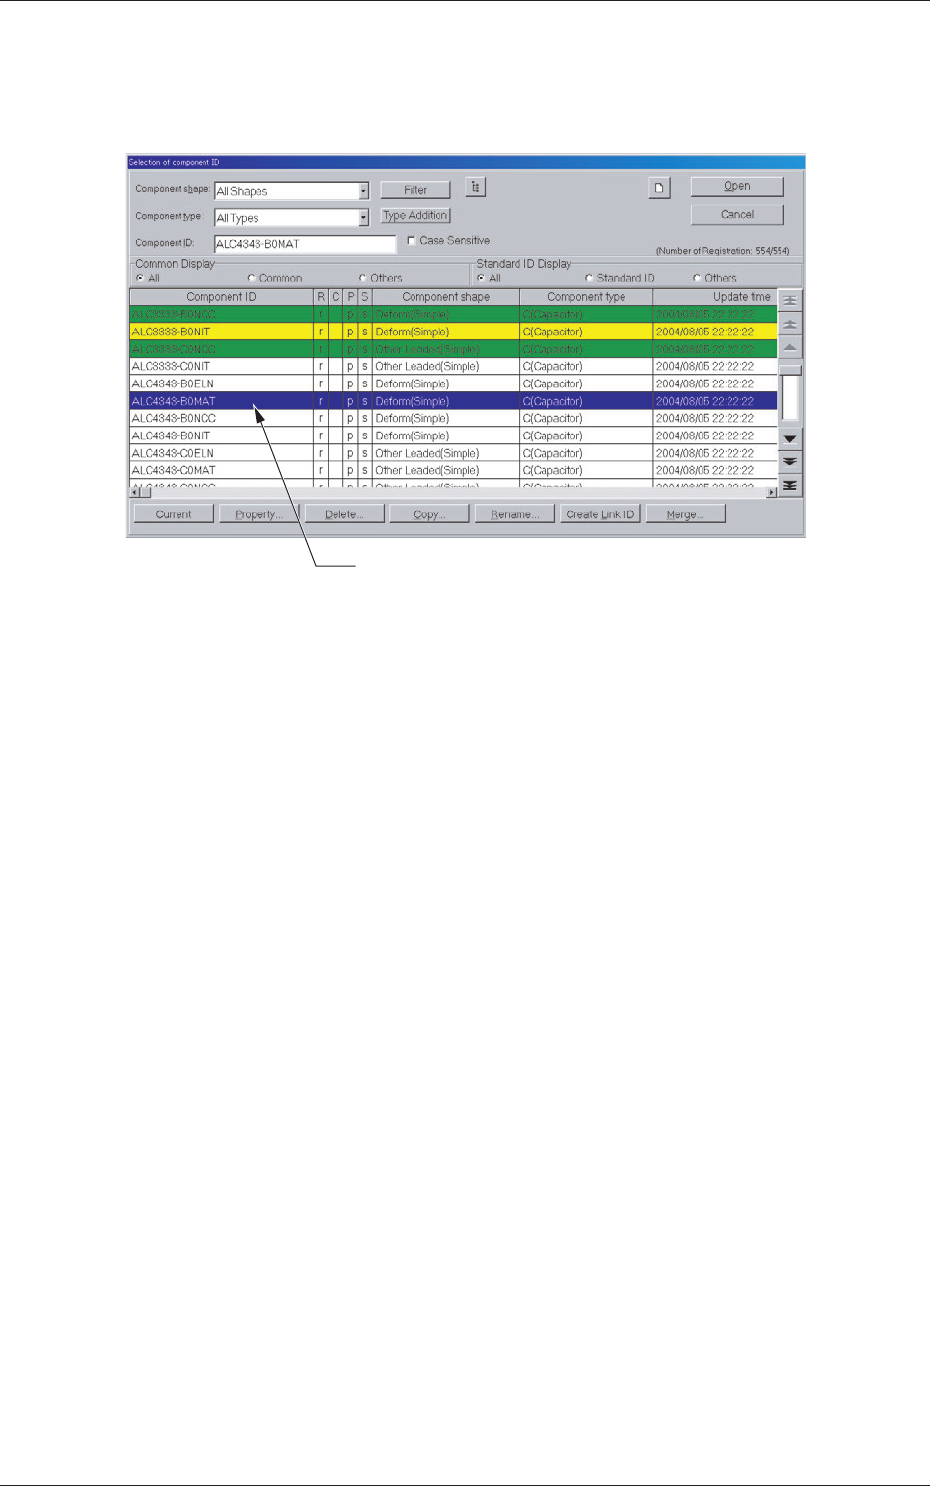
1.2.2 Deleting the Component ID
(1) Select the component ID to be deleted.
The selected component ID turns blue, indicating that it is selected.
Selected Component ID
Fig. 3D3
(2) Press the [Delete...] button.
The "Confi rmation" dialog box opens. When the [YES] button is
pressed, the component ID is deleted.
Pressing the [NO] button cancels the deletion of the component ID.
0601-002
1.2 Basic Operations in "Selection of component ID" Window
4-8
AKFEDT-ID
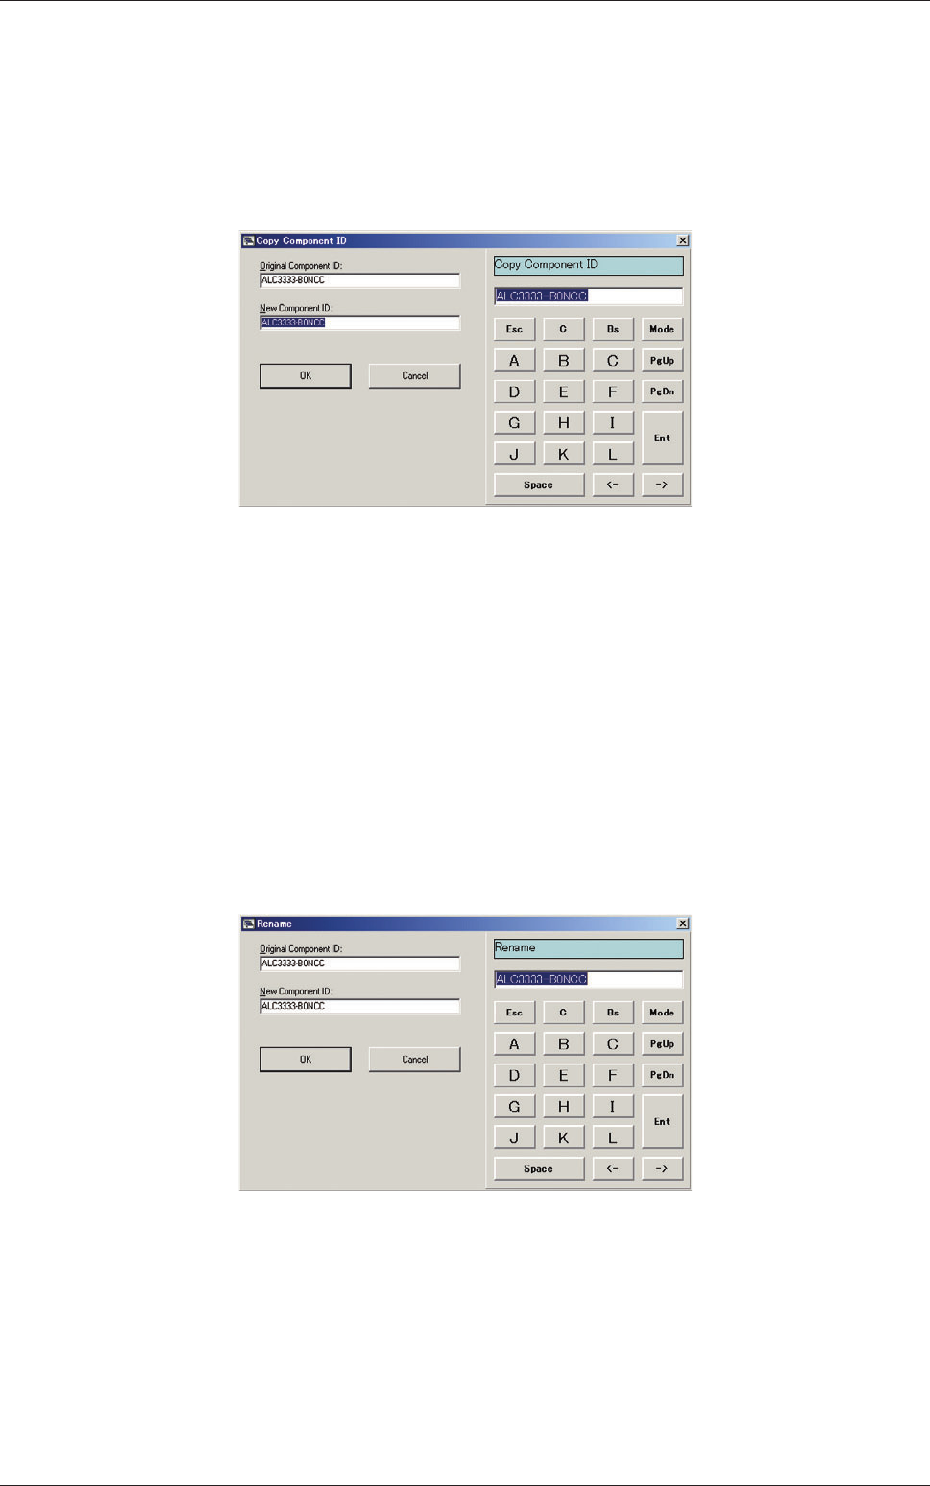
1.2.3 Copying the Component ID
(1) Select the component ID to be copied.
The selected component ID turns blue, indicating that it is selected.
(2) Press the [Copy...] button.
The "Copy Component ID" dialog box opens.
Fig. 3D4
(3) Enter a new component ID name in the "New Component ID" text box
and press the [OK] button.
A new component ID is created.
1.2.4 Renaming the Component ID
(1) Select the component ID to be renamed.
The selected component ID turns blue, indicating that it is selected.
(2) Press the [Rename...] button.
The "Rename" dialog box opens.
Fig. 3D5
(3) Enter a new component ID name in the "New Component ID" text box
and press the [OK] button.
The name of the original component ID is changed to the new one.
0601-002
1.2 Basic Operations in "Selection of component ID" Window