00198374-02_UG_OSC-Paket_R18-2_DE_EN.pdf - 第85页
4 Working with the OSC Features 4.5 Finding Best Acceleration (from R16-2) Bedienungsanleitung OSC Package User Guide OSC-Paket 11/2018 85 Step 4: Station software The execution steps are displayed together with the refe…
4 Working with the OSC Features
4.5 Finding Best Acceleration (from R16-2)
84 Bedienungsanleitung OSC Package User Guide OSC-Paket 11/2018
4.5.2 Application Example
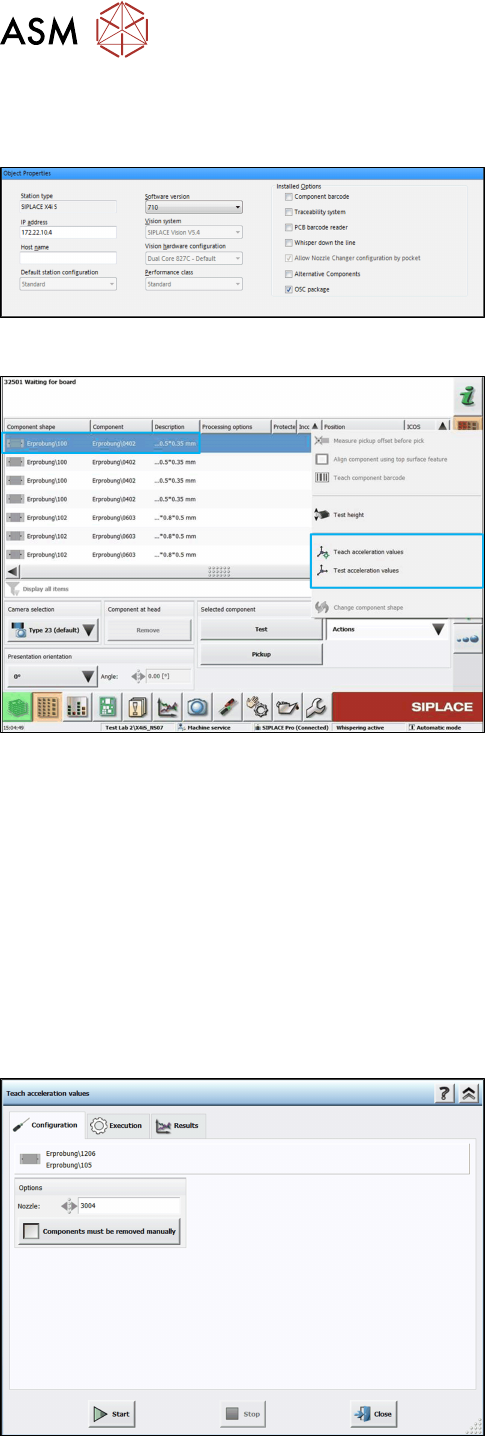
Step 1: SIPLACE Pro
► In the Station Editor under Placement Station,
enable the OSC Package option under Installed
options.
Step 2: Station software
► Switch to the Machine service activity level.
► In the dialog for teaching component shapes,
select the component from the list.
► Click on Teach acceleration values.
The Configuration teach dialog is displayed.
The following decisions can be made in this dialog:
●
Used nozzle
If you want to perform the teaching with another nozzle, the nozzle can be selected from a list.
Only available nozzles will be displayed.
●
Option for disabling the rejection of components
The default value is to reject the components automatically. But if the Components must be
removed manually option is set, you will be prompted to remove the component manually
from the placement head as soon as the check fails. The option is only available for place-
ment heads for which this is possible (please refer to the Online Help of the station software).
Once set, the value is saved for the next run.
Step 3: Station software
► If necessary, select a nozzle from the list for the
teaching.
► If necessary, enable the Components must be
removed manually option.
► Click on Start.
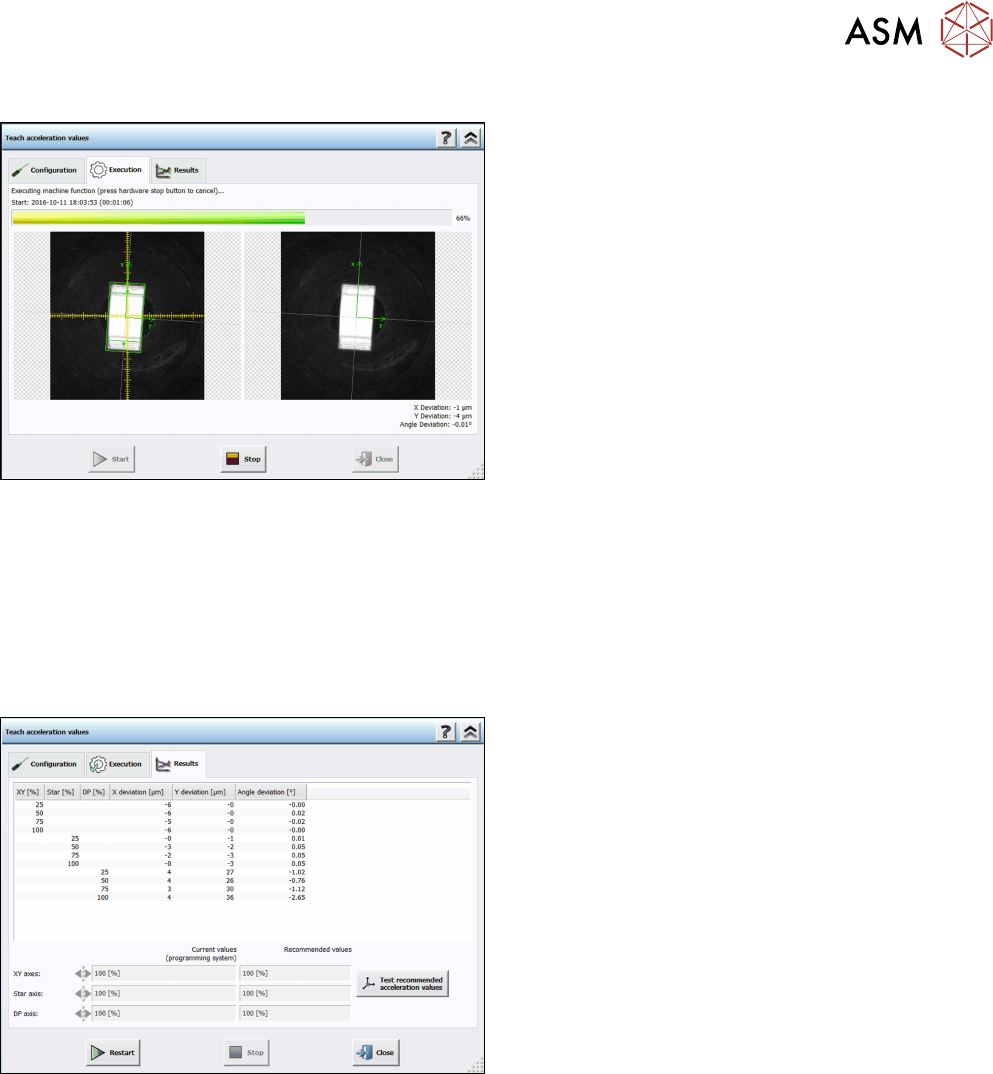
The function is performed automatically for the X-/Y-, star und DP axes. The Execution teach dia-
log is displayed.
4 Working with the OSC Features
4.5 Finding Best Acceleration (from R16-2)
Bedienungsanleitung OSC Package User Guide OSC-Paket 11/2018 85
Step 4: Station software
The execution steps are displayed together with the reference Vision image and the last Vision
image done by the camera. Additionally, the current acceleration values of the axes and the
measured deviations are displayed. If you have to remove a component from the placement head
manually or if the component is lost, a hint will be displayed and you must confirm the action to
continue.
If an error occurs during execution, the error causes are displayed on the last page in an error list.
Otherwise, the results are displayed in the Results dialog.
Step 5: Station software
► Check the results. The recommended values can
be compared with the values of the programming
system.
► Click on Test recommended acceleration values
to test the values.
The teach dialog is closed and the Configuration test dialog is opened.
4 Working with the OSC Features
4.5 Finding Best Acceleration (from R16-2)
86 Bedienungsanleitung OSC Package User Guide OSC-Paket 11/2018
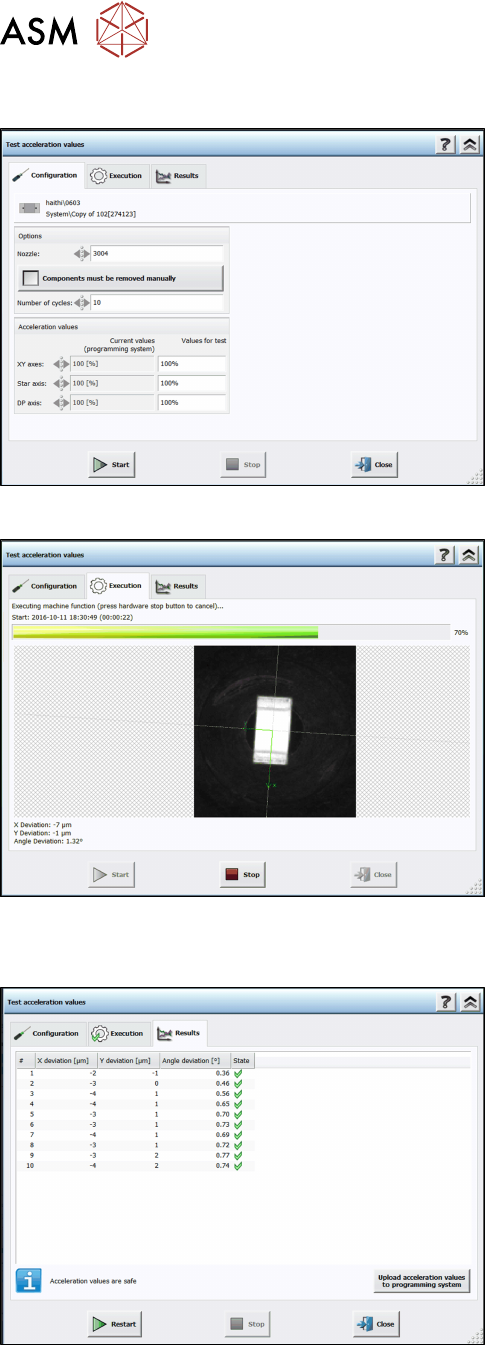
Step 6: Station software
► Set the recommended acceleration values from
the teach function.
► Click on Start.
The test is automatically performed and the Execution test dialog displayed.
The results are displayed in the Results test dialog.
Step 7: Station software
► Check the results.
► Click on Upload acceleration values to program-
ming system.
The upload to SIPLACE Pro is not available until the recommended values have been tested.