CP6的IO代码.pdf - 第268页
3. Slide the parts tape under the raised tape leaf and pull to the front of the feeder. Peel the top-film off the tape and insert into the slit in the tape leaf. Parts T ape Set (position 1) 4. Match the feeding holes on…
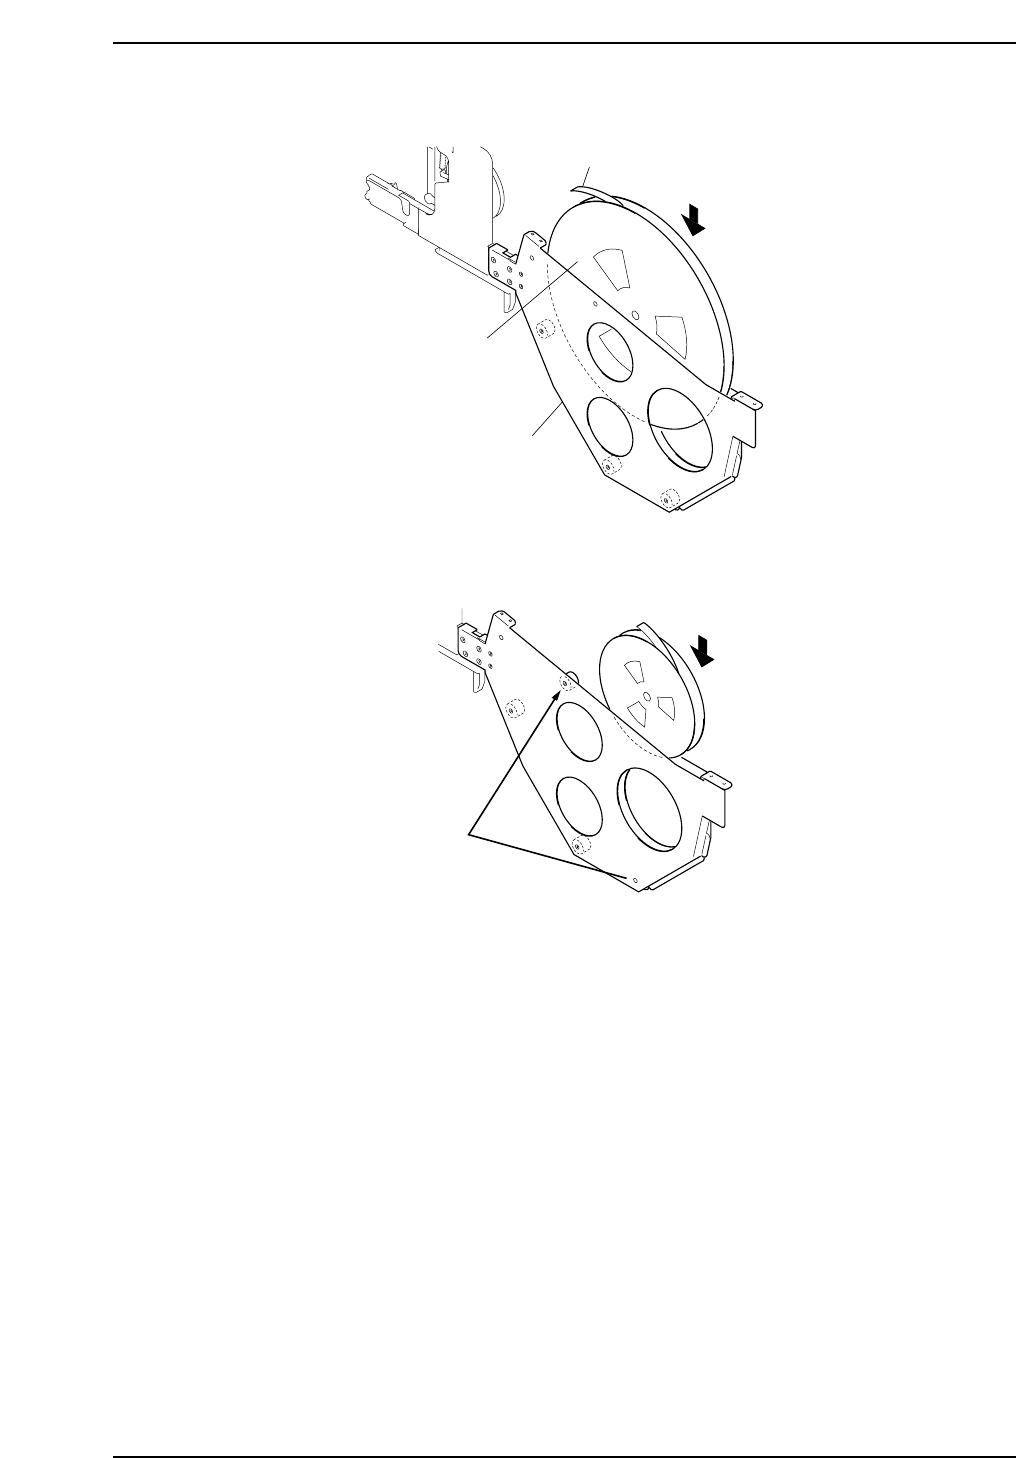
i) Using 13 inch parts reels
ii) Using 7 inch parts reels
Setting the Parts Reel (13 inch holder)
Note: If the roller position is not changed, the parts reel will fall off during operation.
Change the roller
position
CP6M8007
Parts tape
Parts reel
Holder
CP6M8006
Part 8 Chapter 1 WC Feeders
Edition 1.0 8-1-5 CP-6 Series Mechanical Reference
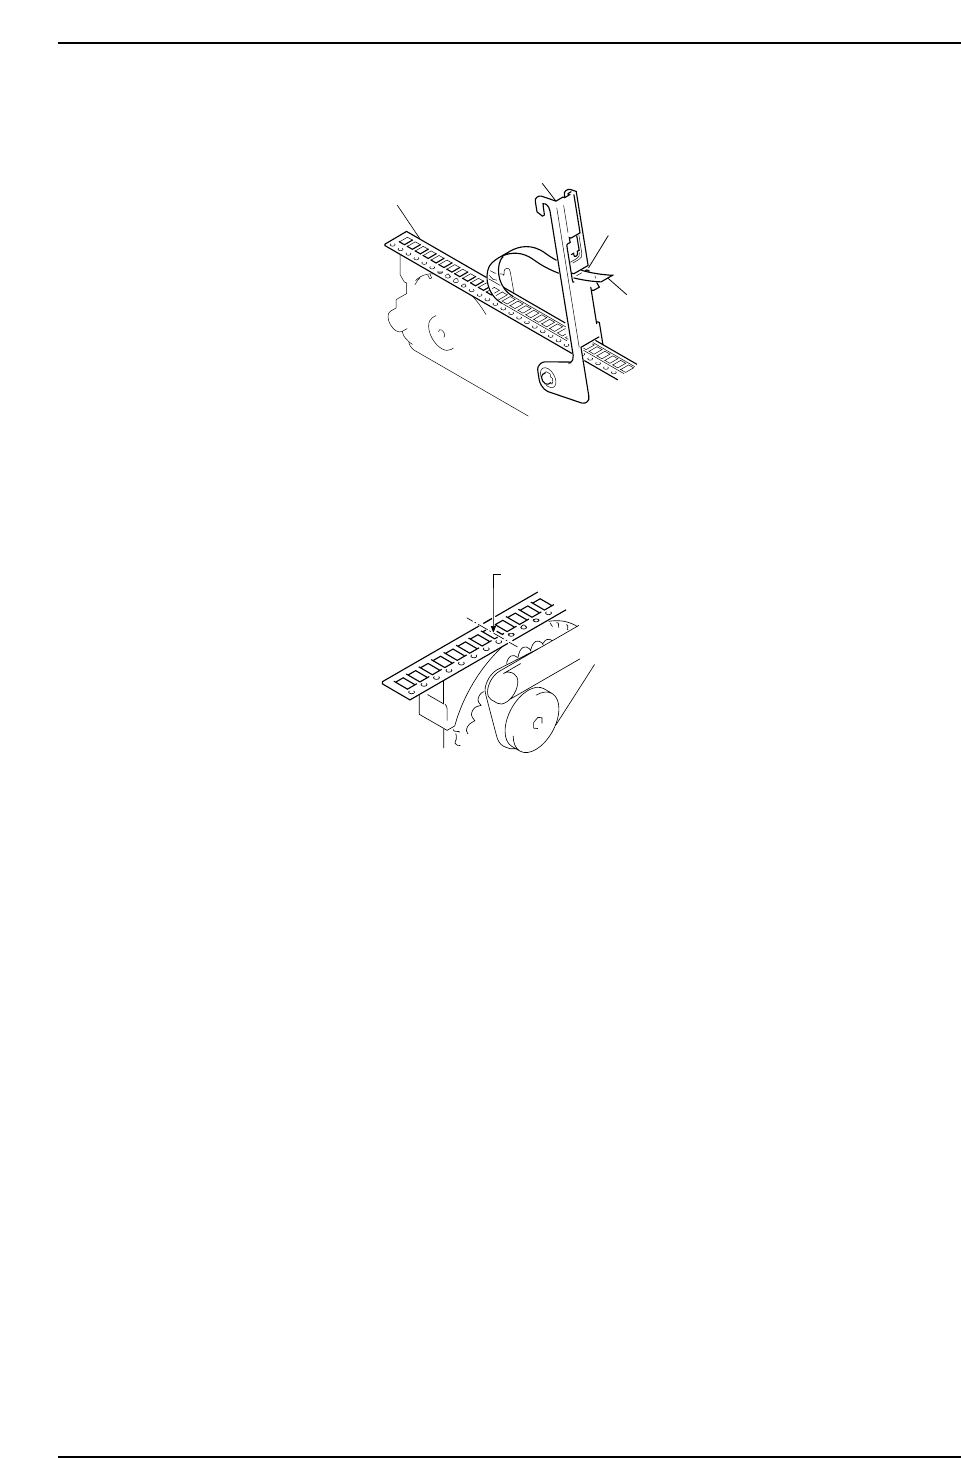
3. Slide the parts tape under the raised tape leaf and pull to the front of the feeder.
Peel the top-film off the tape and insert into the slit in the tape leaf.
Parts Tape Set (position 1)
4. Match the feeding holes on the tape with the sprocket gear. At this time, consider
the pick-up position.
Parts Tape Set (position 2)
Pickup point
CP6M8009
Tape leaf
Parts tape
Slit
Top-film
CP6M8008
Part 8 Chapter 1 WC Feeders
Edition 1.0 8-1-6 CP-6 Series Mechanical Reference
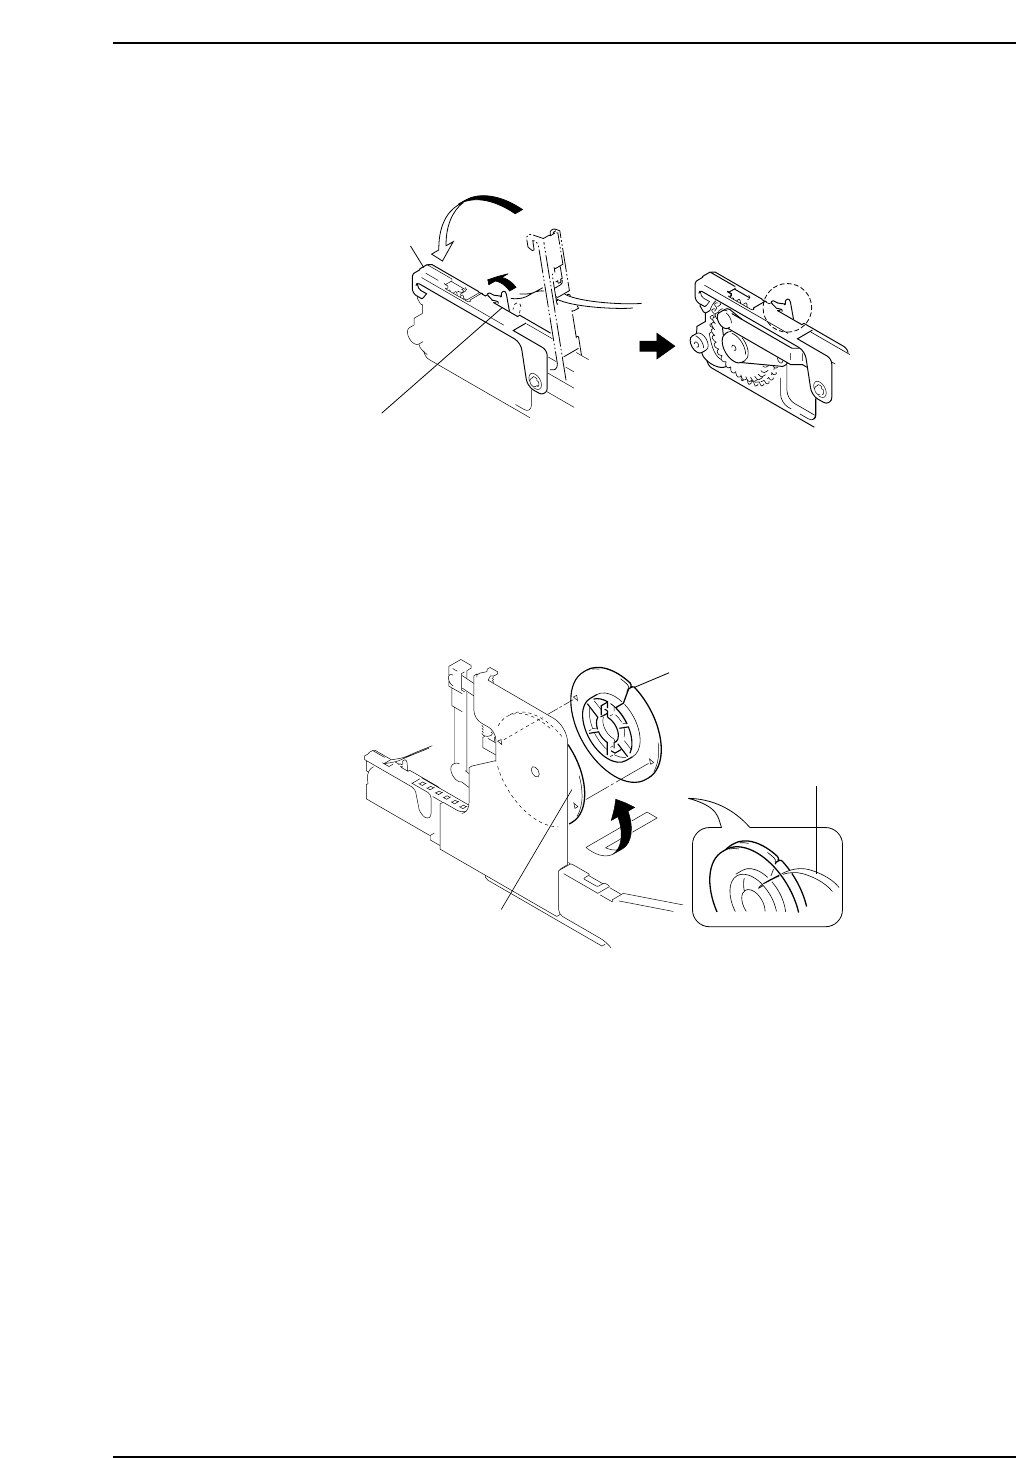
5. Lower the tape leaf. While checking that the parts tape feeding holes and the
sprocket are engaged, take up the slack of the top-film. Lock the tape leaf with the
tape leaf lock.
Locking the Tape Leaf
6. Tie a knot in the end of the top-film, insert into the slit on the take-up reel cover
and pull until snug. On the take-up reel there are two arrows. When locking the
take-up reel, align the arrows and turn in the direction as shown below.
Setting the Top-film
Slit
Top-film
Take-up reel
CP6M8011
Tape leaf
Tape leaf lock
CP6M8010
Part 8 Chapter 1 WC Feeders
Edition 1.0 8-1-7 CP-6 Series Mechanical Reference