OM-1271-003_w.pdf - 第16页
13 Tg1097-ID-OP (6) Attach the nozzle stocker to the machine while pushing down the lever . (7) Press the [Change] button in the "NOZZLE CHANGE" window . In 10 seconds, press the [ST AR T] button on the operati…
12
Tg1097-ID-OP
0411-002
5. Nozzle Change in the "Set-up" Operation
(4) Pinch the lower section of the nozzle stocker to release the nozzle
clamp and remove the nozzle.
CAUTION
• Do not put any foreign substance on the nozzle stocker
section.
Otherwise, the machine will break down.
• Keep the diffusion plates of the vacuum nozzles clear of oil,
nicks, etc.
Otherwise, an error may occur during component recognition.
• Do not bring a magnet close to any vacuum nozzle.
Otherwise, an error may occur during component picks and
placement.
• Do not put any alien substance in the nozzle stocker hole.
Otherwise, the machine will break down.
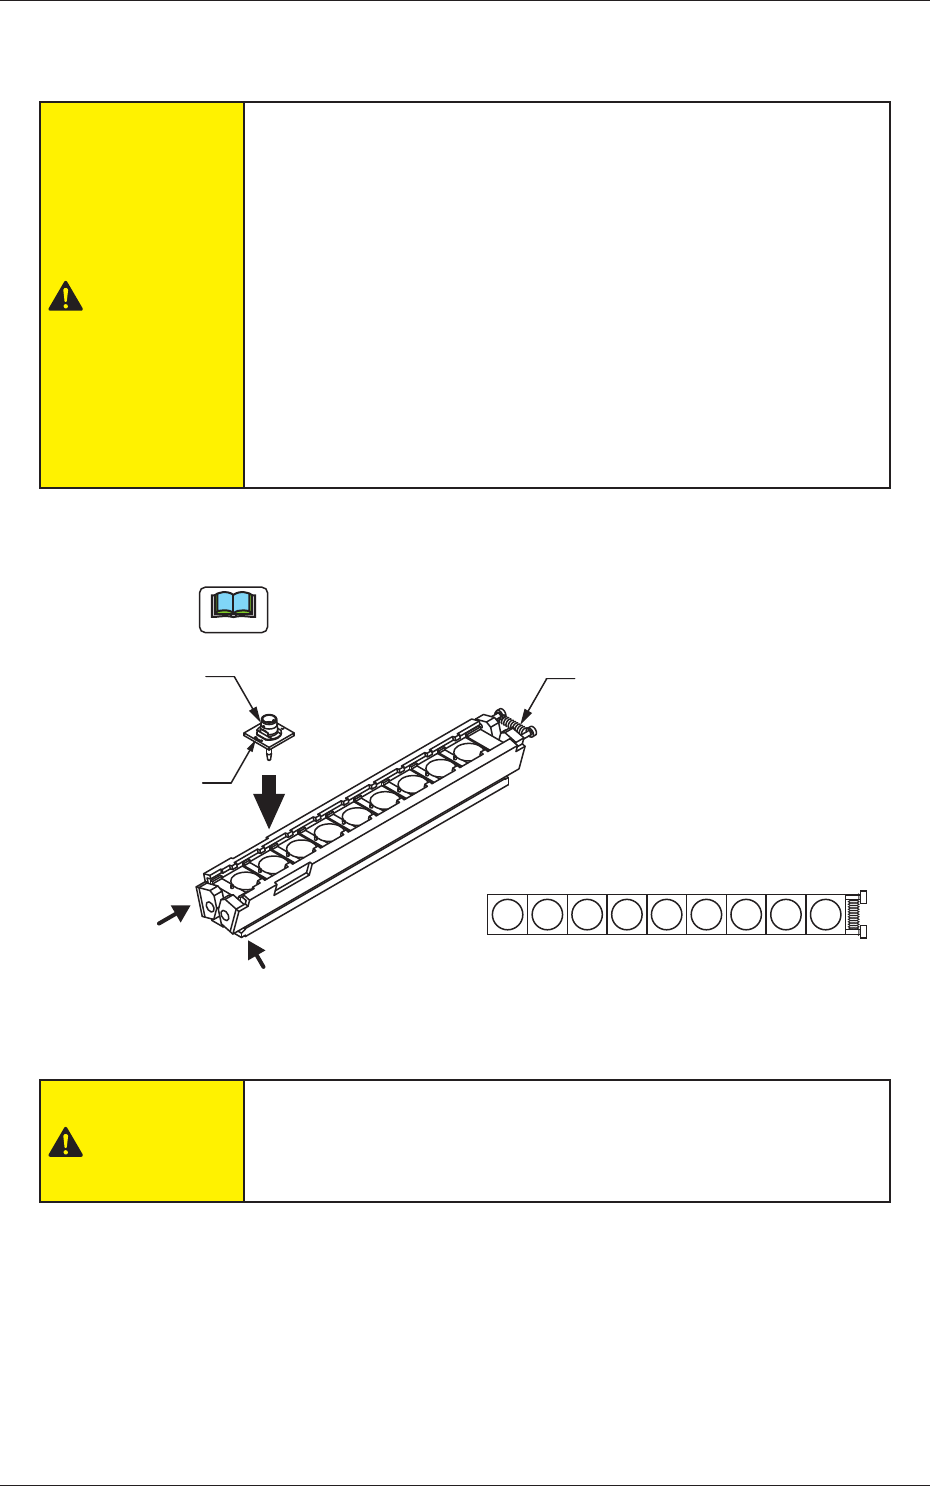
(5) Pinch the lower section of the nozzle stocker and set all the nozzles to
be used in the nozzle stocker.
Note
Set the nozzle so that the nozzle ID mark is on the side without
spring of the nozzle stocker.
Nozzle ID mark
Spring
Nozzle
Pinch the lower section of the nozzle stocker and release the clamp.
1 2 3 4 5 6 7 8 9
Fig. 4
CAUTION
• Attach the nozzle to the nozzle stocker correctly.
If the machine is operated while the nozzle is placed on the nozzle
stocker shutter, the system might be broken down.

13
Tg1097-ID-OP
(6) Attach the nozzle stocker to the machine while pushing down the lever.
(7) Press the [Change] button in the "NOZZLE CHANGE" window. In 10
seconds, press the [START] button on the operation panel to change the
nozzle.
Fig. 5 "NOZZLE CHANGE" Window
(When the multi-functional head is mounted on the Head No. 3 position)
(8) Press the [Confirm] button in the "NOZZLE CHANGE" window
and then the [START] button to confirm that the correct nozzles are
attached.
(9) Press the [NOZ POS OFFSET] button in the "NOZZLE CHANGE"
window, "NOZ POS OFFSET" window appears.
(10) Perform the nozzle position offset teaching for each head.
5. Nozzle Change in the "Set-up" Operation
0411-002
14
Tg1097-ID-OP
6. Nozzle Change in the Manual Operation
0411-002
6. Nozzle Change in the Manual Operation
This window enables you to manually perform a cycle of the vacuum nozzle
attachment and storage operation.
When the [NOZ CHNG] button on the "MAINT."
→
"UNIT ADJ." submenu
bar is pressed, the "NOZZLE CHANGE" window opens.
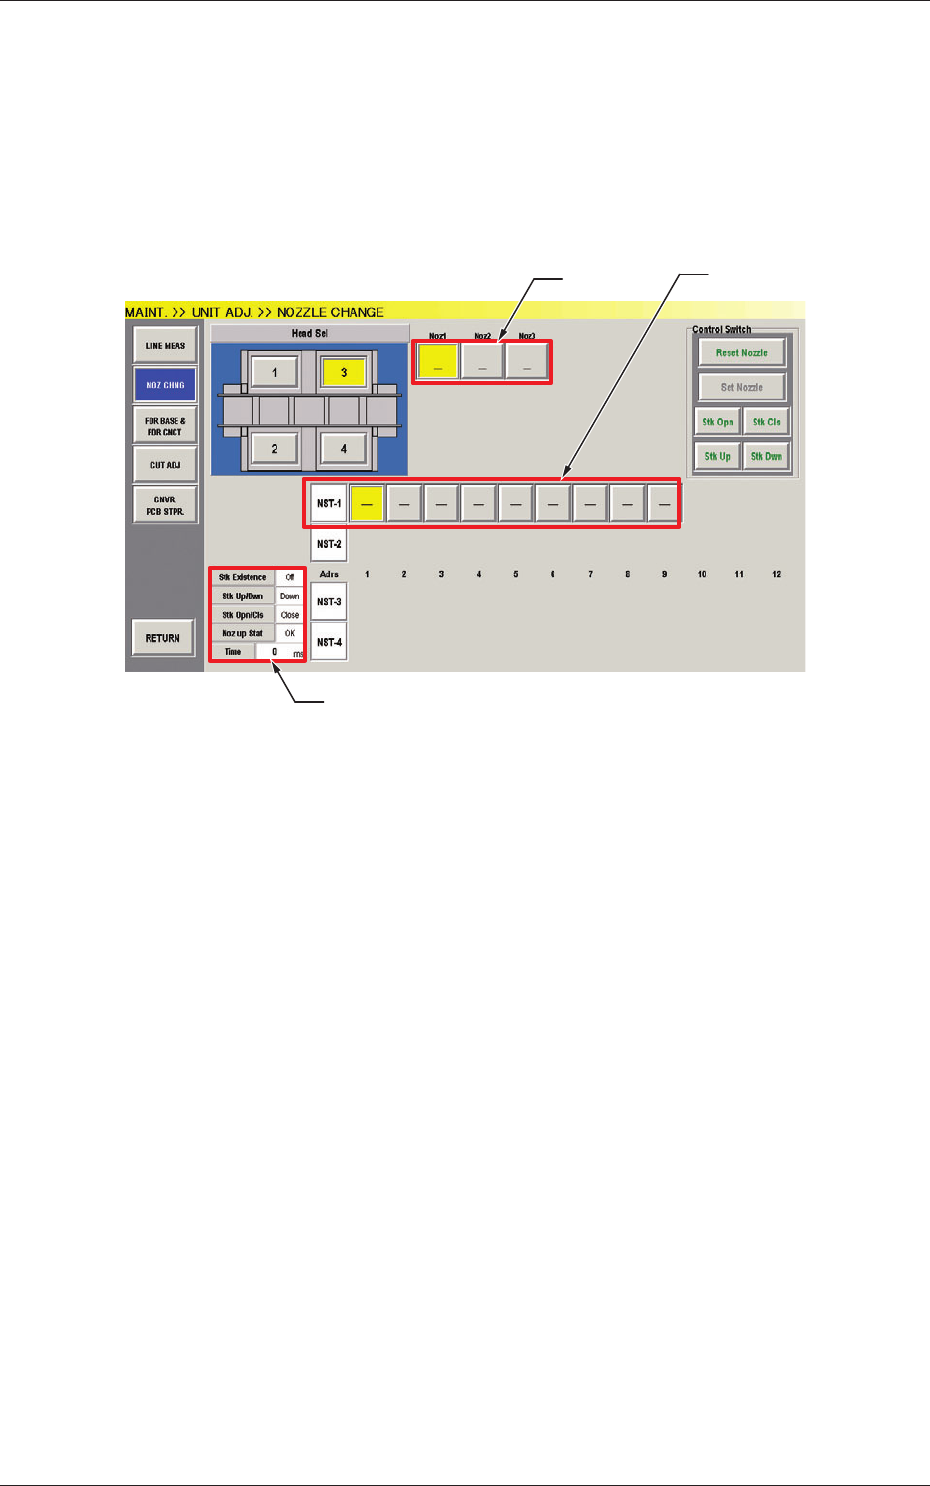
Press the Head No.3 with multi-functional head in "Head Select".
VF01
VF01 VF01
[1]
[2]
[3]
Fig.6 "NOZZLE CHANGE" Window
(When the multi-functional head is mounted on the Head No. 3 position)
[1] Nozzle Allocation No. Selection Buttons
When a button is pressed, the corresponding nozzle to be changed is
selected.
The background color of the button turns yellow.
[2] Nozzle Stocker/Nozzle Selection Buttons
These buttons can be used to specify the nozzle stocker to be opened or
closed and the nozzle stored in the nozzle stocker.
NST-1
: Nozzle Stocker #1
NST-2
, 3, 4
: Nozzle Stocker #2,#3,#4
(When a multi-functional head is used, this can not be
selected.)
When a nozzle button is pressed, the background color turns yellow.
The nozzles accented in red represent that they are attached to the head.
[3] Status Display
This displays the status of the head currently selected.