YS12P_YS12F_YG12F_Mainte_E.pdf - 第76页
3-24 3 Periodic maintenance items 3.4 Checking the SC-axis flex cable (YS12P) TheSC-axisflexcableisaflatmulti-cabledesignedforrigiditytopreventtheharnessfromdroopingasit movesalongwiththescancamer…

3-23
3
Periodic maintenance items
3.3
Checking the spline shaft movement and lubricating the slide section
Aftercleaningthesplineshafts,checkthesplineshaftmovementandlubricatetheslidesection.
c
1
Turn off the machine power switch.
Quit the software and turn off the machine
power switch.
2
Move each spline shaft by hand to
check for abnormal movement.
Move each spline shaft up and down by
hand and make sure that all spline shafts
move smoothly without hanging up and
unusual noise.
c
If the machine is operated while movement of any
assistance.
3
Clean the outside of each spline
shaft.
Use a lint-free cleaning wiper or cotton swab
to wipe the outside of each spline shaft.
4
Apply grease to the outside of each
spline shaft.
Apply a thin, uniform coat of grease by hand
to the outside of each spline shaft.
53335-L6-00
5
Wipe away excess grease.
Move each spline shaft by hand several
times and wipe away excess grease.
Applying grease to spline shaft
Step 4
Z-axis spline shaft
3-24
3
Periodic maintenance items
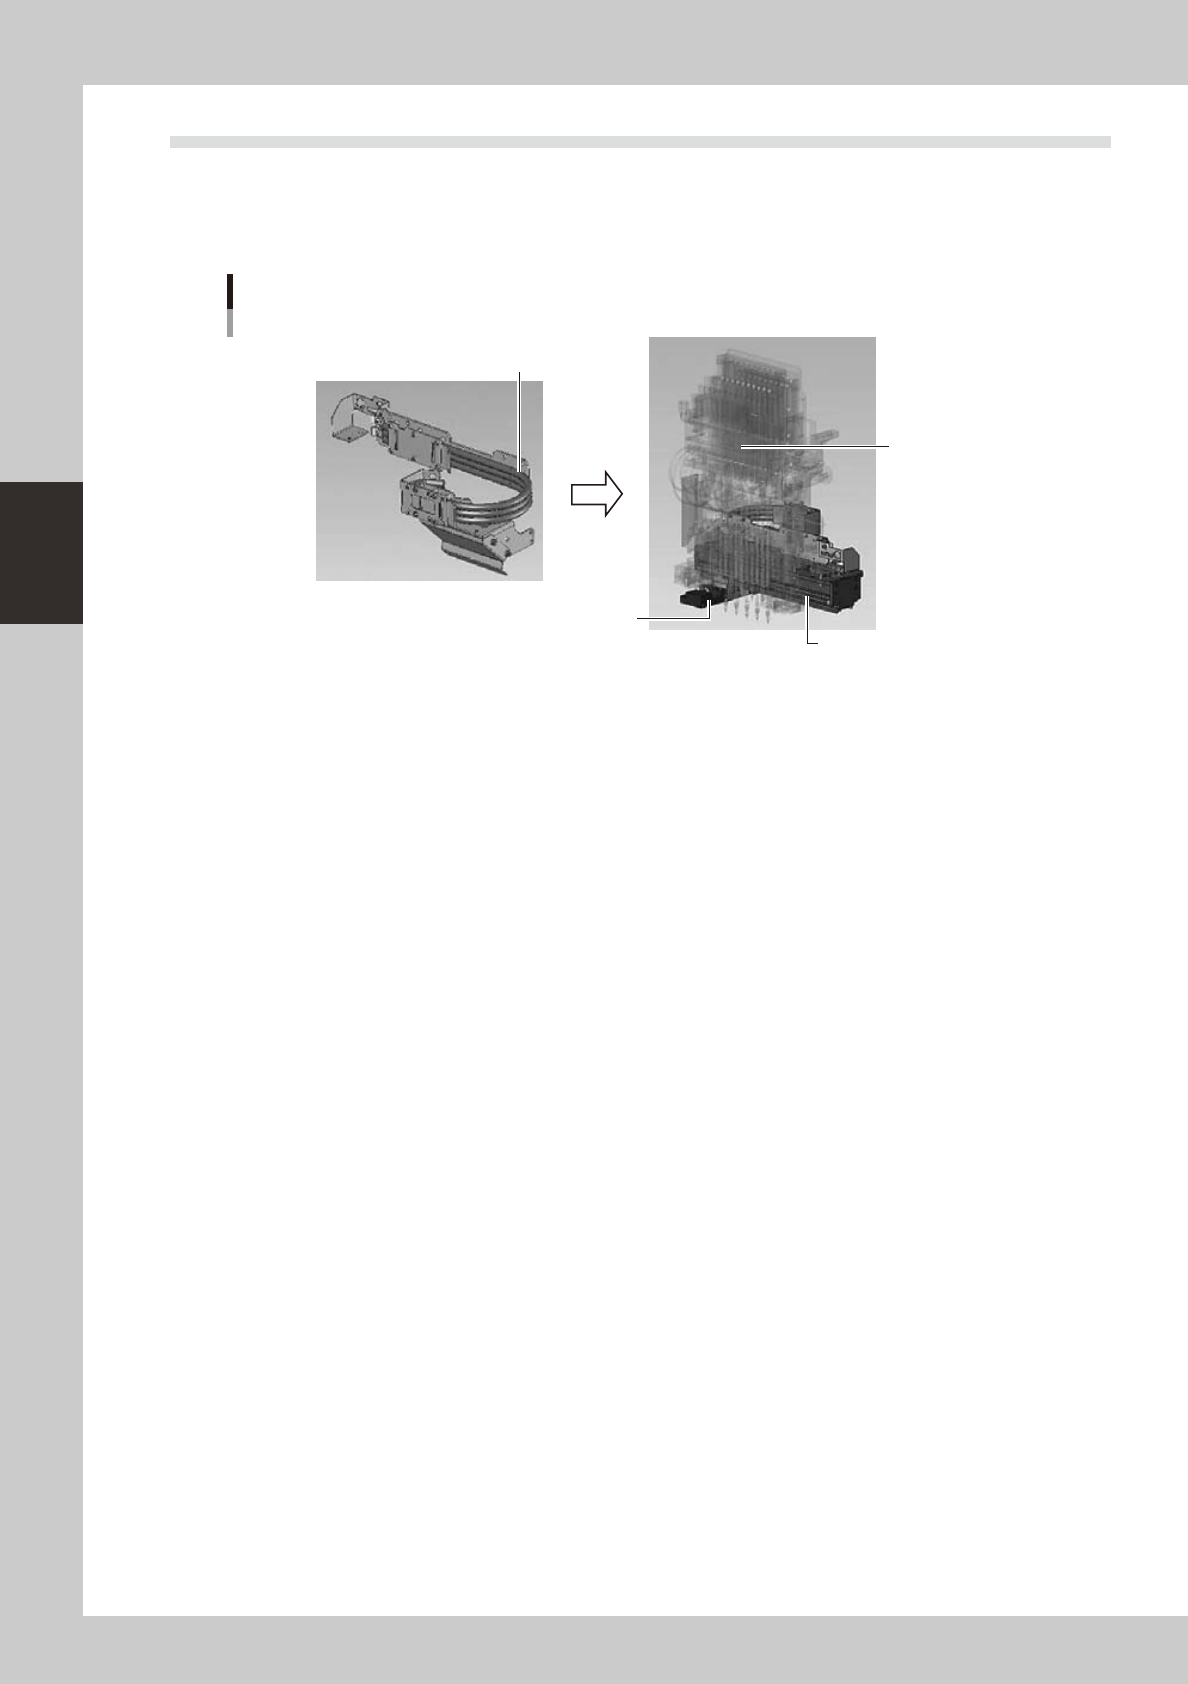
3.4 Checking the SC-axis flex cable (YS12P)
TheSC-axisflexcableisaflatmulti-cabledesignedforrigiditytopreventtheharnessfromdroopingasit
movesalongwiththescancamera.However,thecablemayeventuallydroopduetowarpingorweakening
fromlong-termuse.Ifcabledroopingoccurs,thenthecablemaycomeincontactwithmovingpartsandcause
trouble.Werecommendmakingperiodicchecksandreplacingthecableifdroopingbecomesobvious.
SC-axis unit
Checking the SC-axis flex cable condition
Scan camera
Head assembly
Check for drooping in the flex cable.
53351-L6-00
3-25
3
Periodic maintenance items
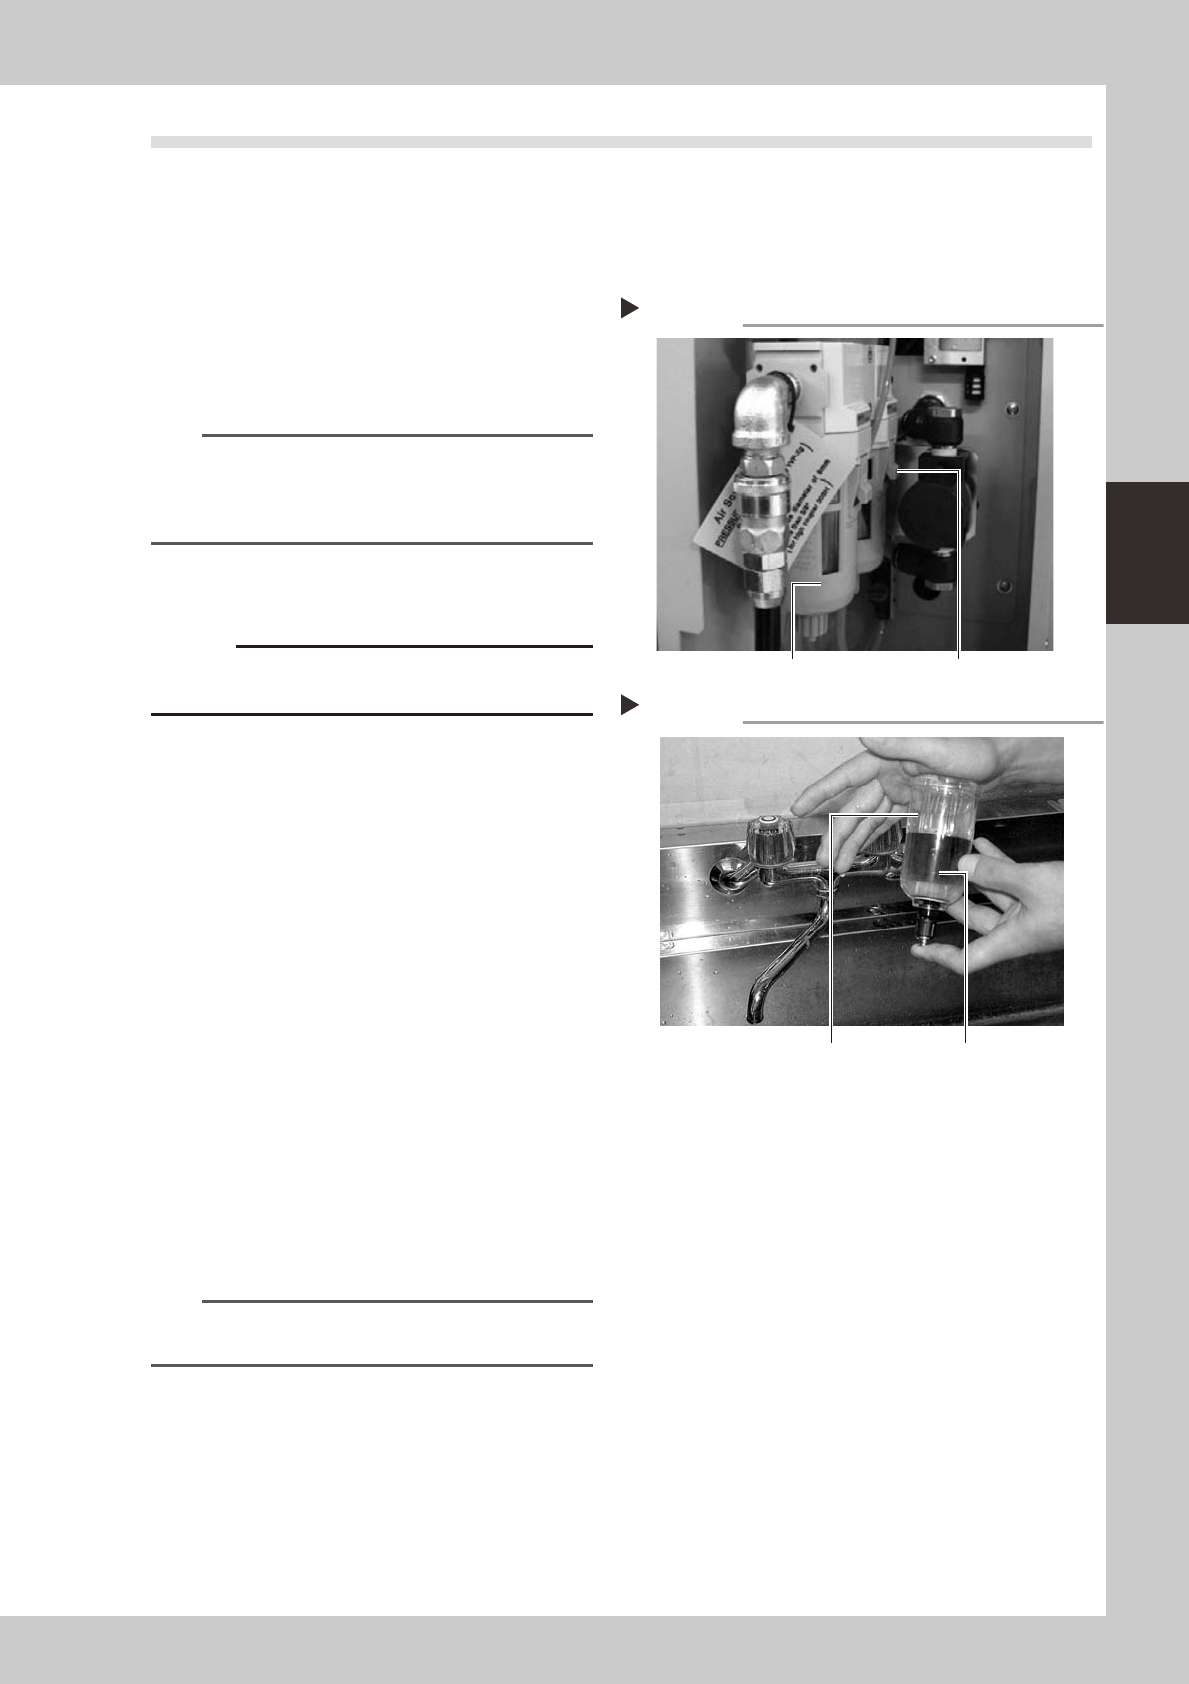
3.5 Inspecting and cleaning the air/mist filters
Air/mistfiltersareusedtopreventoil,mistandotherimpuritiesintheaircompressorfrompenetratingintothe
machine.Thesefiltersshouldbeinspectedandcleanedperiodicallyasinstructedbelow.(Thefiltercloserto
theaircoupleristheairfilterandtheotheroneisthemistfilter.)
n
Cleaning the filter cup
1
Check the inside of the filer cup.
Check for oil or water deposits in the filter
cup through the window. If the window is
dirty, follow the steps below to clean the
filter cup.
TIP
The drain cock at the bottom of the filter cup is an
auto-drain type. It automatically drains the oil or water
when deposited in the cup. We recommend
connecting a hose to this drain cock.
2
Disconnect the air hose from the
air coupler.
c
3
Remove the filter cup.
While pressing the button on the side of the
filter cup, turn it clockwise, and pull the filter
cup downwards.
53325-L6-00
4
Clean the inside of the filter cup.
1. Lightly clean the filter cup with water.
2. Then, pour water-diluted neutral
detergent into the filter cup and clean
the inside while shaking it.
3. Air blow the filter cup and wipe away
any moisture with clean cloth or paper.
53326-L6-00
5
Reattach the filter cup.
1. Align the button on the side of the cup
with the attach/detach position and
push the cup upwards.
2. Turn the cup counterclockwise until you
hear a click.
n
NOTE
Leave the filter cup removed to clean the air filter as
explained in the next procedure.
6
Reconnect the air hose to the air
coupler.
After connecting the air hose, check that no
air is leaking.
Removing the filter cup
Step 3
Filter cup Button
Cleaning the filter cup
Step 4
Filter cup
Water-diluted
neutral detergent