YS12P_YS12F_YG12F_Mainte_E.pdf - 第87页
Chapter 4 How to replace consumable par ts Contents 1. Replacing nozzle leaf springs 4- 1 2 2 2.2 Replacing a solenoid coil 4- 3 2.3 Replacing the cleaning blo w …
3-34
3
Periodic maintenance items
4.7
Cleaning the scan camera lighting unit (6-month inspection) …. YS12P
Thelightdiffuserplateandprismforthescancameraareattachedtotheopeningattheleftendofthecamera.
Thesediffuserplateandprismmaybecomedirtyduetodustanddirt.Periodiccleaningisrecommended.
c
the camera unit.
1
Return all nozzles to the nozzle station.
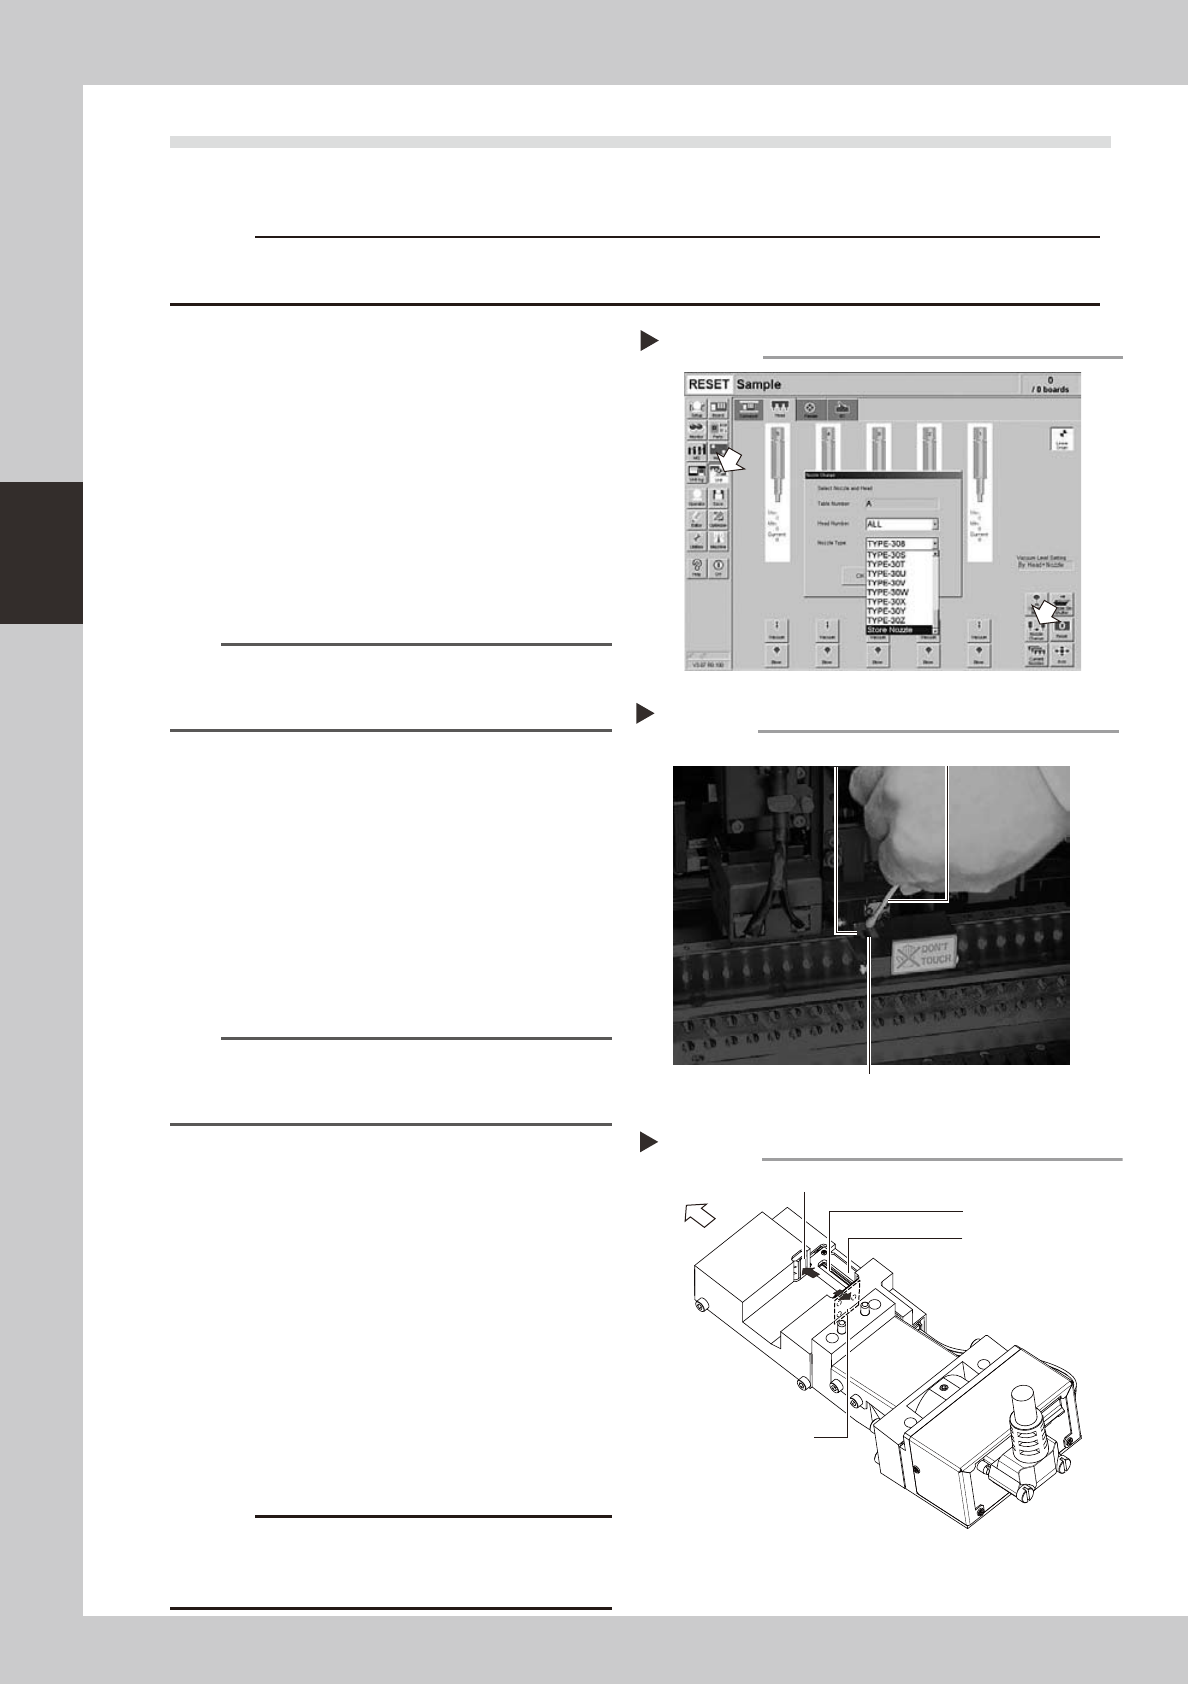
1. Press the [Unit] button and open the
[Head] tab. Then press the [Nozzle
Change] button.
2. In the "Nozzle Change" dialog that
appears, select "ALL" from the "Head
Number" drop-down list and select "Store
Nozzle" from the "Nozzle Type" drop-down
list.
3. Press the [OK] button to return all nozzles
to the nozzle station.
54312-L6-10
n
NOTE
If the machine does not have a nozzle station, press the
emergency stop button and then detach the nozzles
by hand.
2
Move the head unit.
Press the emergency stop button and then
move the head unit to a position where
cleaning can be carried out easily.
3
Move the scan camera.
1. Move all heads (nozzle holder sections)
by hand to their upper ends.
2. Move the scan camera to the right side
of the R-axis motor. At this point, do not
apply excessive force to the scan
camera.
n
NOTE
When the machine has only one fiducial camera,
moving the scan camera to the left end will make
cleaning easier.
4
Wipe the diffuser plate and prism.
1. Use a cotton swab to remove dust and
dirt on the upper surface of the main
light diffuser plate and on the prism
surface. Since the prism surface is narrow,
twist the end of the cotton swab into a
pointed tip and use it to wipe the prism
surface lightly.
2. Wipe the side-view light diffuser plate
and prism using a cotton swab. Use a
hand mirror when wiping the prism
surface since it cannot be seen from the
front.
53360-L6-00
53361-L6-00
c
of the prism to peel or flake and the diffuser plate to
discolor.
Cleaning points of light diffuser plate and prism
Main diffuser plate
Side-view diffuser plate
Side-view prism
Front of machine
Main prism
Returning all nozzles to nozzle station.
Step 1
Cleaning the light diffuser plate and prism
Step 4
Light diffuser plate
Prism
Cotton swab

Chapter 4 How to replace consumable parts
Contents
1. Replacing nozzle leaf springs 4-1
2
2
2.2 Replacing a solenoid coil 4-3
2.3 Replacing the cleaning blow valve 4-4
3.
Cleaning and replacing the conveyor belts
4-5
4. Lubrication points 4-7
7
4.2 Y-axis linear guide and ball screw 4-8
4.3 PU-axis linear guide and ball screw 4-8
4.4 Conveyor W-axis linear guide and ball screw 4-9
4.5 Head spline shaft 4-9
4-1
4
How to replace consumable parts
1. Replacing nozzle leaf springs
e
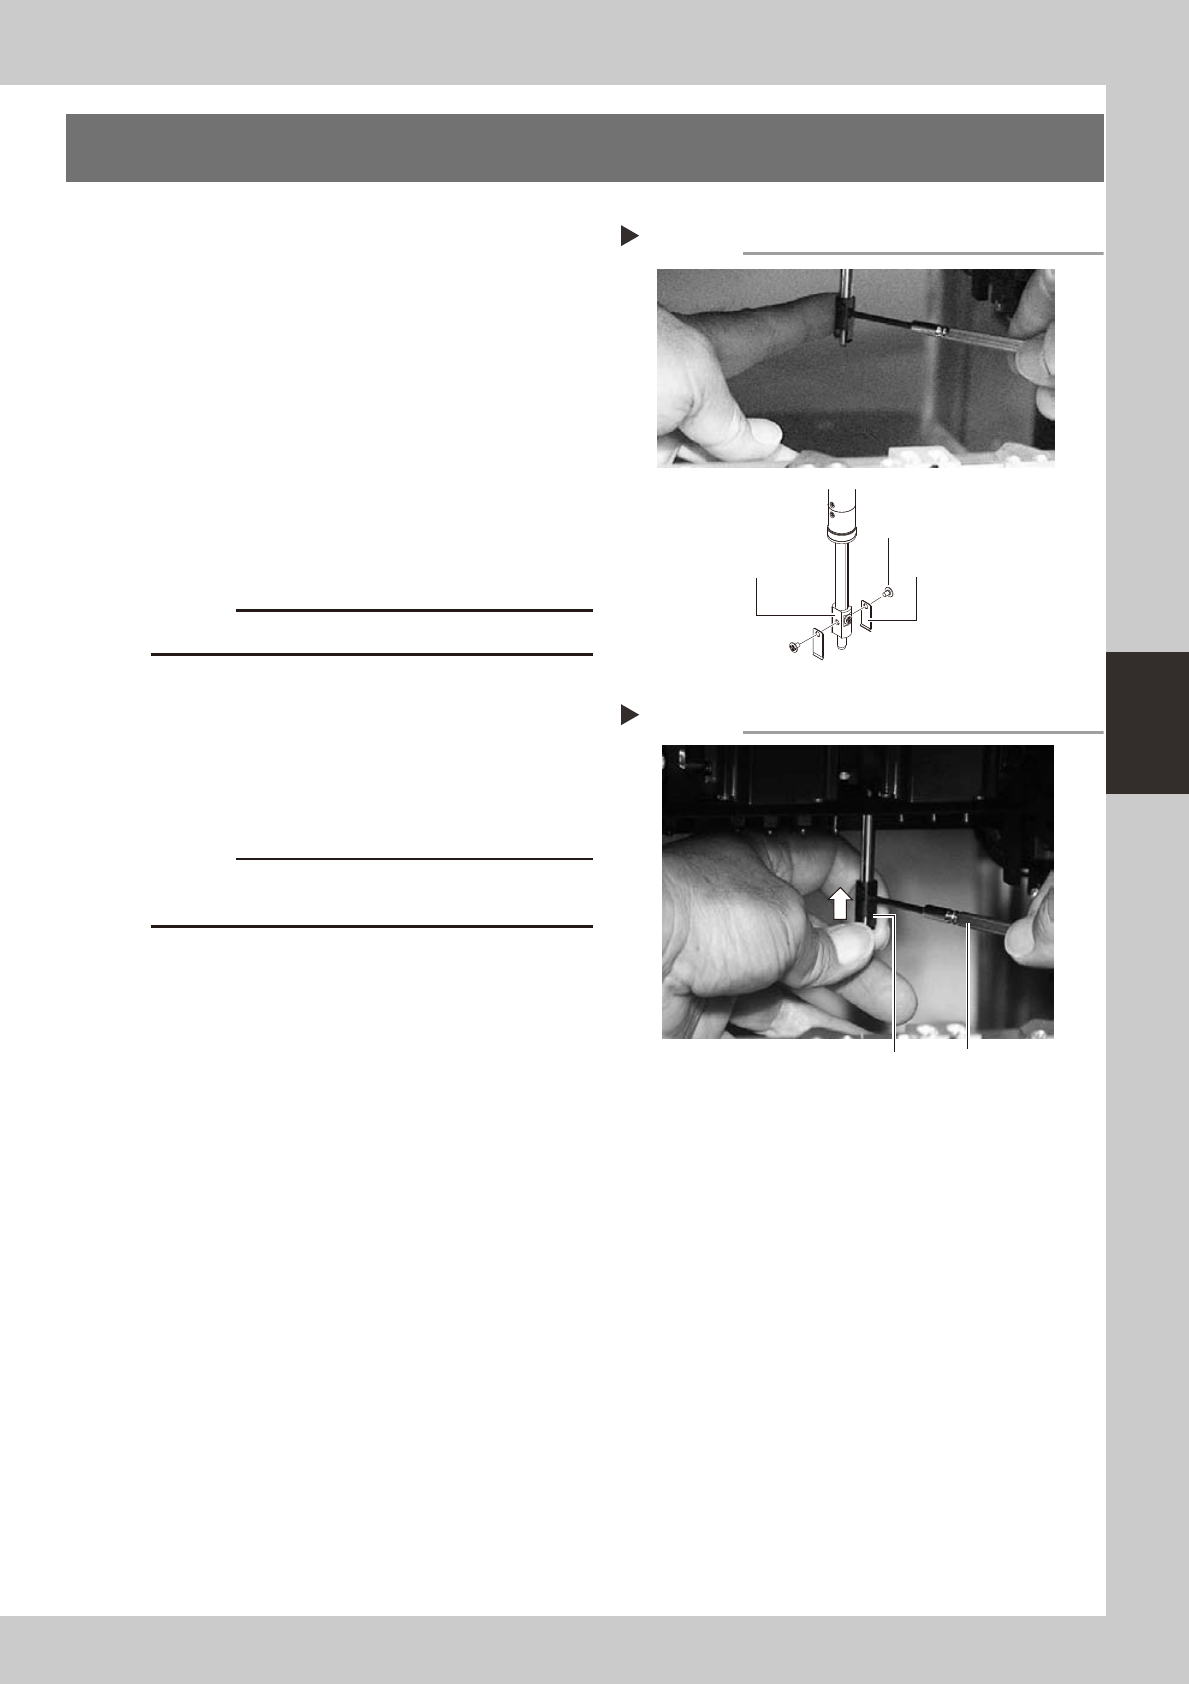
1
Press the emergency stop button.
The machine must be in emergency stop to
ensure safety during work.
2
Remove the nozzle.
Remove the nozzle attached to the leaf
springs to be replaced, by pulling it
downwards by hand.
3
Remove the leaf springs.
Use a Phillips precision screwdriver to loosen
the screws securing the defective leaf
springs and remove the leaf springs from the
nozzle holder while pressing the nozzle shaft
from the back.
53400-M7-00
c
4
Attach new leaf springs.
While pressing the nozzle shaft from the
back, tighten the screw with the Phillips
precision screwdriver to assemble the leaf
spring.
53401-L2-00
c
Always attach the leaf springs so that they become
parallel.
5
Reattach the nozzle.
6
Check that the nozzle is held
securely.
1. Check that there is no gap between the
leaf springs and nozzle.
2. Attempt detaching and attaching the
nozzle several times to check that there
is no looseness.
Step 3
Nozzle holder
Removing nozzle leaf springs
Nozzle leaf
spring mounting
screw
Nozzle leaf spring
Attaching nozzle leaf springs
Step 4
Leaf spring
Precision screwdriver