YS12P_YS12F_YG12F_Mainte_E.pdf - 第78页
3-26 3 Periodic maintenance items n Cleaning the air filter 1 Remo ve the filter cup. See the previo us procedure in "Cleaning the f ilter cup". 2 Remo ve the air filter . Rotate the white part clockwise as vie…
3-25
3
Periodic maintenance items
3.5 Inspecting and cleaning the air/mist filters
Air/mistfiltersareusedtopreventoil,mistandotherimpuritiesintheaircompressorfrompenetratingintothe
machine.Thesefiltersshouldbeinspectedandcleanedperiodicallyasinstructedbelow.(Thefiltercloserto
theaircoupleristheairfilterandtheotheroneisthemistfilter.)
n
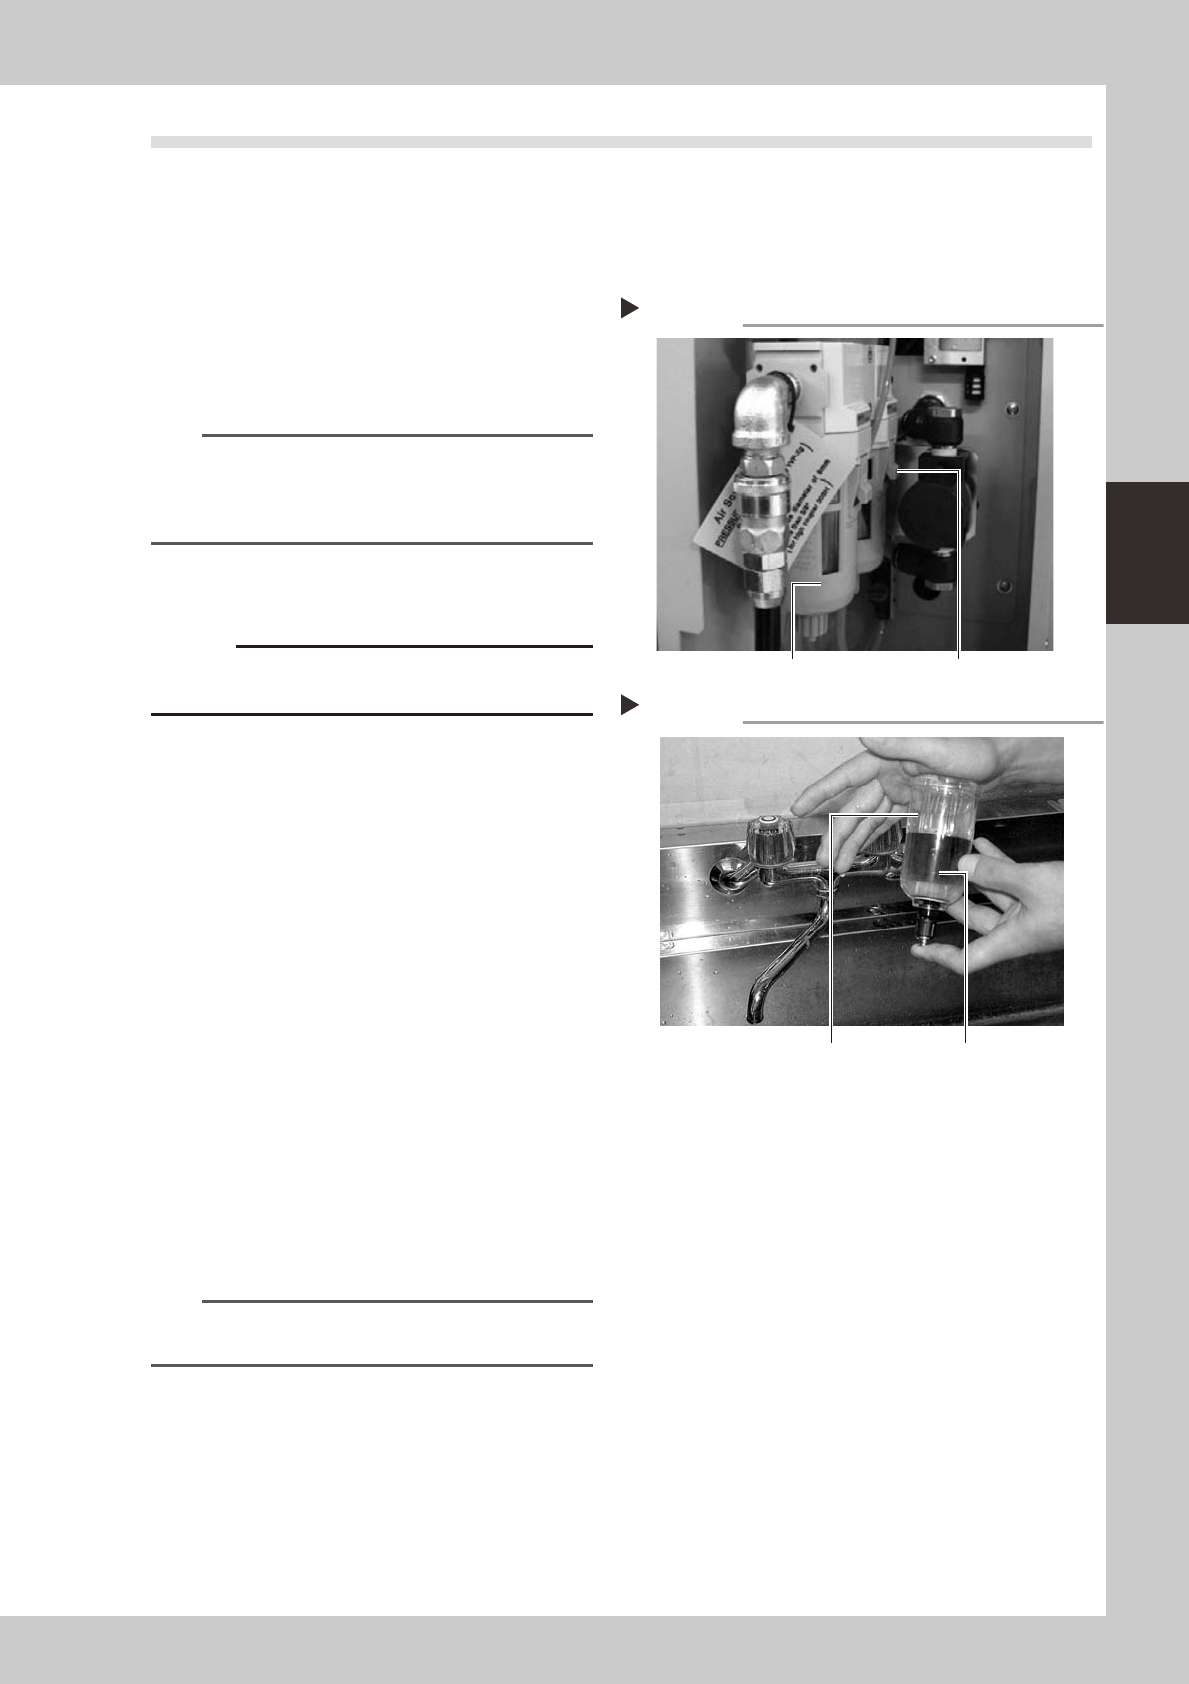
Cleaning the filter cup
1
Check the inside of the filer cup.
Check for oil or water deposits in the filter
cup through the window. If the window is
dirty, follow the steps below to clean the
filter cup.
TIP
The drain cock at the bottom of the filter cup is an
auto-drain type. It automatically drains the oil or water
when deposited in the cup. We recommend
connecting a hose to this drain cock.
2
Disconnect the air hose from the
air coupler.
c
3
Remove the filter cup.
While pressing the button on the side of the
filter cup, turn it clockwise, and pull the filter
cup downwards.
53325-L6-00
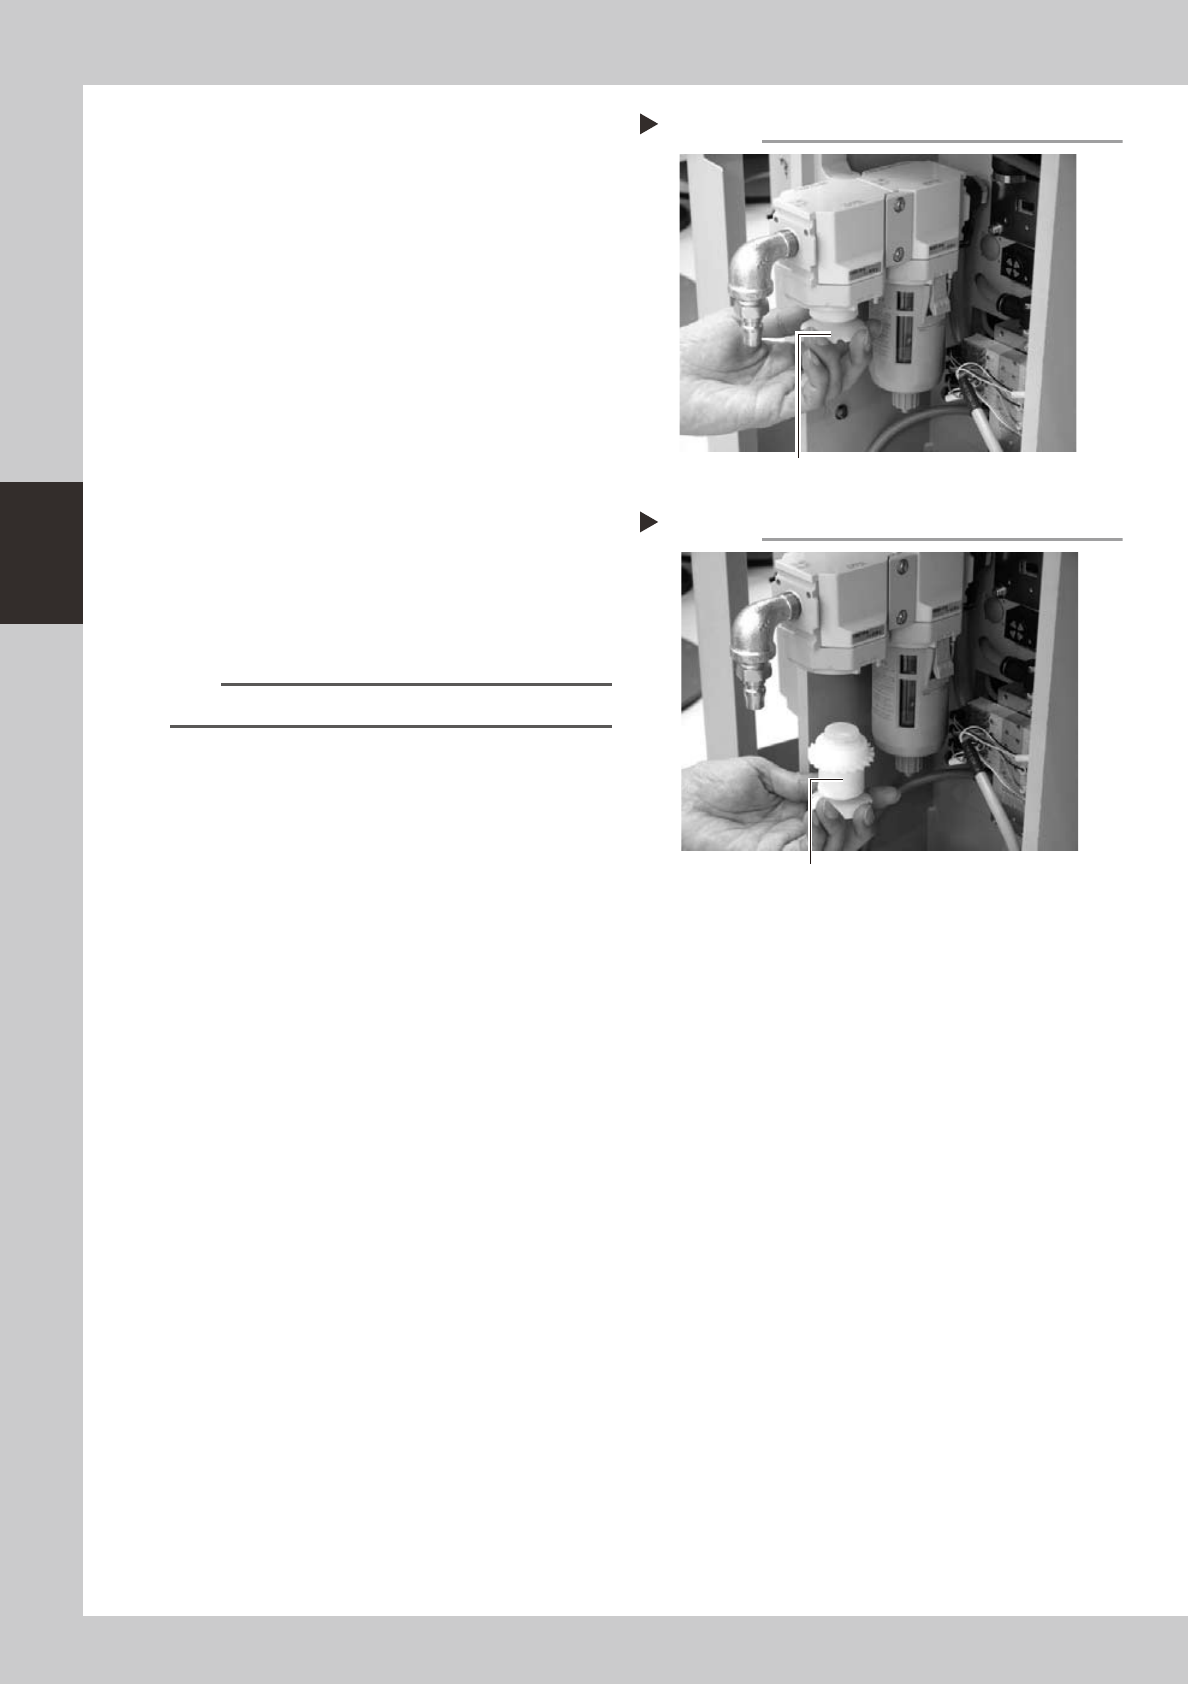
4
Clean the inside of the filter cup.
1. Lightly clean the filter cup with water.
2. Then, pour water-diluted neutral
detergent into the filter cup and clean
the inside while shaking it.
3. Air blow the filter cup and wipe away
any moisture with clean cloth or paper.
53326-L6-00
5
Reattach the filter cup.
1. Align the button on the side of the cup
with the attach/detach position and
push the cup upwards.
2. Turn the cup counterclockwise until you
hear a click.
n
NOTE
Leave the filter cup removed to clean the air filter as
explained in the next procedure.
6
Reconnect the air hose to the air
coupler.
After connecting the air hose, check that no
air is leaking.
Removing the filter cup
Step 3
Filter cup Button
Cleaning the filter cup
Step 4
Filter cup
Water-diluted
neutral detergent
3-26
3
Periodic maintenance items
n
Cleaning the air filter
1
Remove the filter cup.
See the previous procedure in "Cleaning the
filter cup".
2
Remove the air filter.
Rotate the white part clockwise as viewed
from the top and take out the air filter.
53327-L6-00
3
Clean the air filter.
Use an air blow gun to blow away dust and
impurities trapped by the air filter. If the filter
is excessively dirty and cannot be cleaned,
replace it with a new filter.
4
Reattach the air filter.
Screw the white disk back in to attach the
air filter to the original position.
53328-L6-00
5
Reattach the filter cup.
n
NOTE
When cleaning the mist filter, use the same procedure.
Removing the air filter
Step 2
Loosen and remove this part.
Reattaching the air filter
Step 4
Air filter
3-27
3
Periodic maintenance items
3.6 Cleaning and greasing the hexagon spline
ThissectiondescribeshowtocleanandgreasethehexagonsplinesoftheW-axisconveyor.
Fordetailsaboutlubricationpointsandprocedures,seethesection,“Lubricationpoints”,inChapter4.
Preparethespecifiedgrease(NSL).
1
Clean the hexagon spline.
1 Set the board width to its maximum level
with manual operation and put the
machine in the emergency stop state.
2 Wipe away the old grease and dirt from
the entire hexagon spline with a lint-free
cloth or paper towel (for clean room).
3 Cancel the emergency stop and make
the board width narrower. After that,
wipe also the remaining portions.
53383-M7-00
2
Apply grease.
Apply the specified grease (NSL) by hand
uniformly over the surface of the hexagon
spline.
n
NOTE
In the same manner as described in step 1, apply the
grease to the entire hexagon spline.
53388-M7-00
Cleaning the hexagon spline
Step 1
Cleaning cloth
Step 2
Grease
Greasing the hexagon spline