Pneumatic Tape Feeder _ENG Ver9_.pdf - 第36页
Samsung Pneumatic T ape Feeder Users' Manual 2-12 Pass the carrier tape through groove C. Figur e 2-20. Exit of the carrier tape of the 8mm tape feeder Figur e 2-21. Exit of the carrier tape of the 12-56mm tape feed…
Operation of the Tape Feeder
2-11
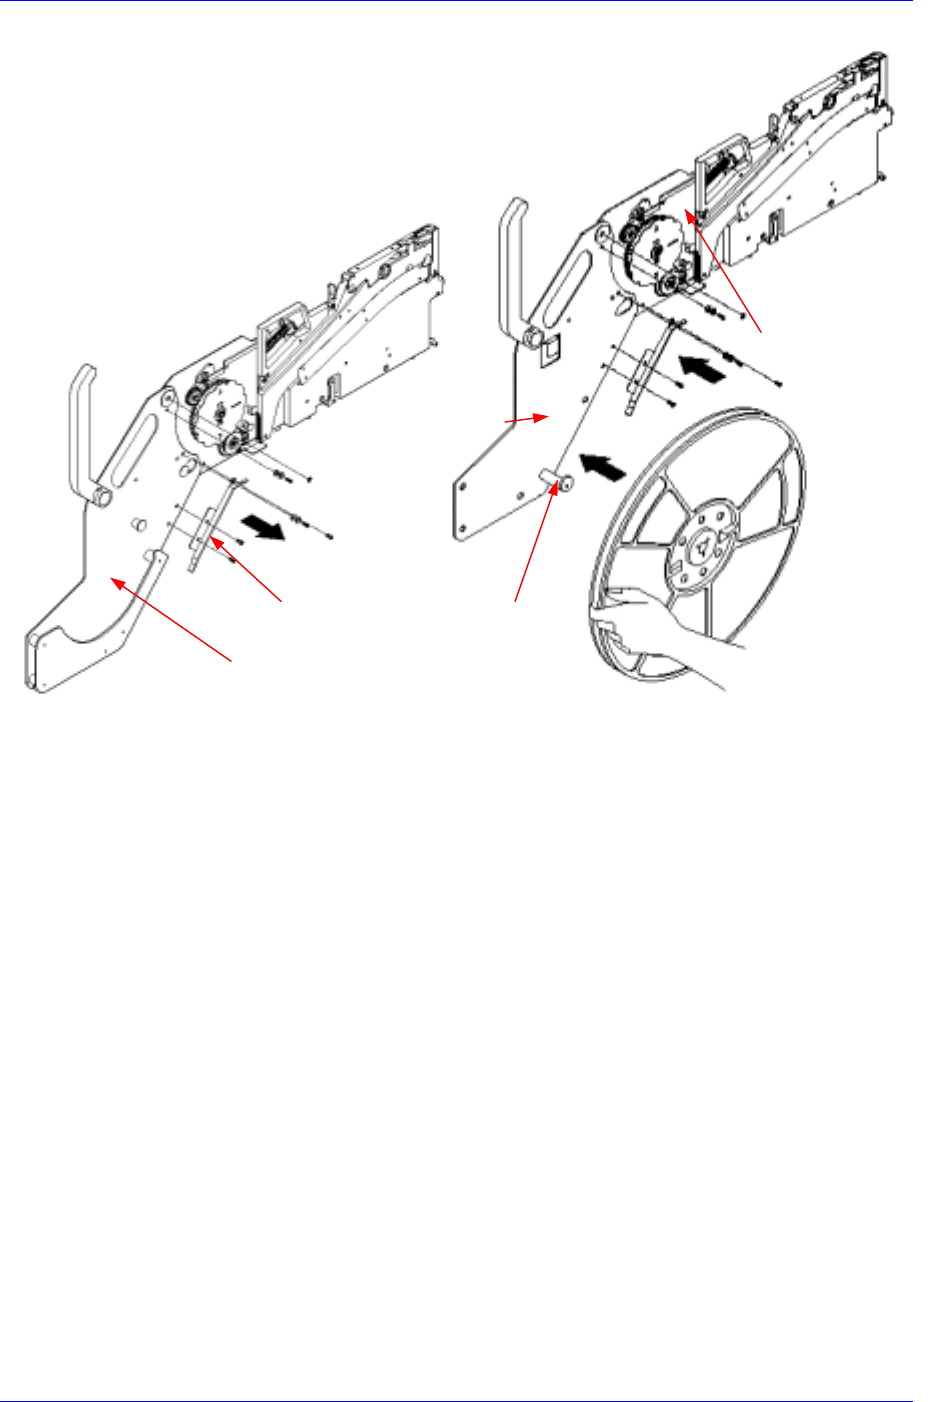
Figure 2-19. Replacing a large reel (8mm Non-Stop tape feeder)
Take-up reel plate
Large reel arm plate
Standard reel arm plate
Reel
hange
r
Guide plate

Samsung Pneumatic Tape Feeder Users' Manual
2-12
Pass the carrier tape through groove C.
Figure 2-20. Exit of the carrier tape of the 8mm tape feeder
Figure 2-21. Exit of the carrier tape of the 12-56mm tape feeder
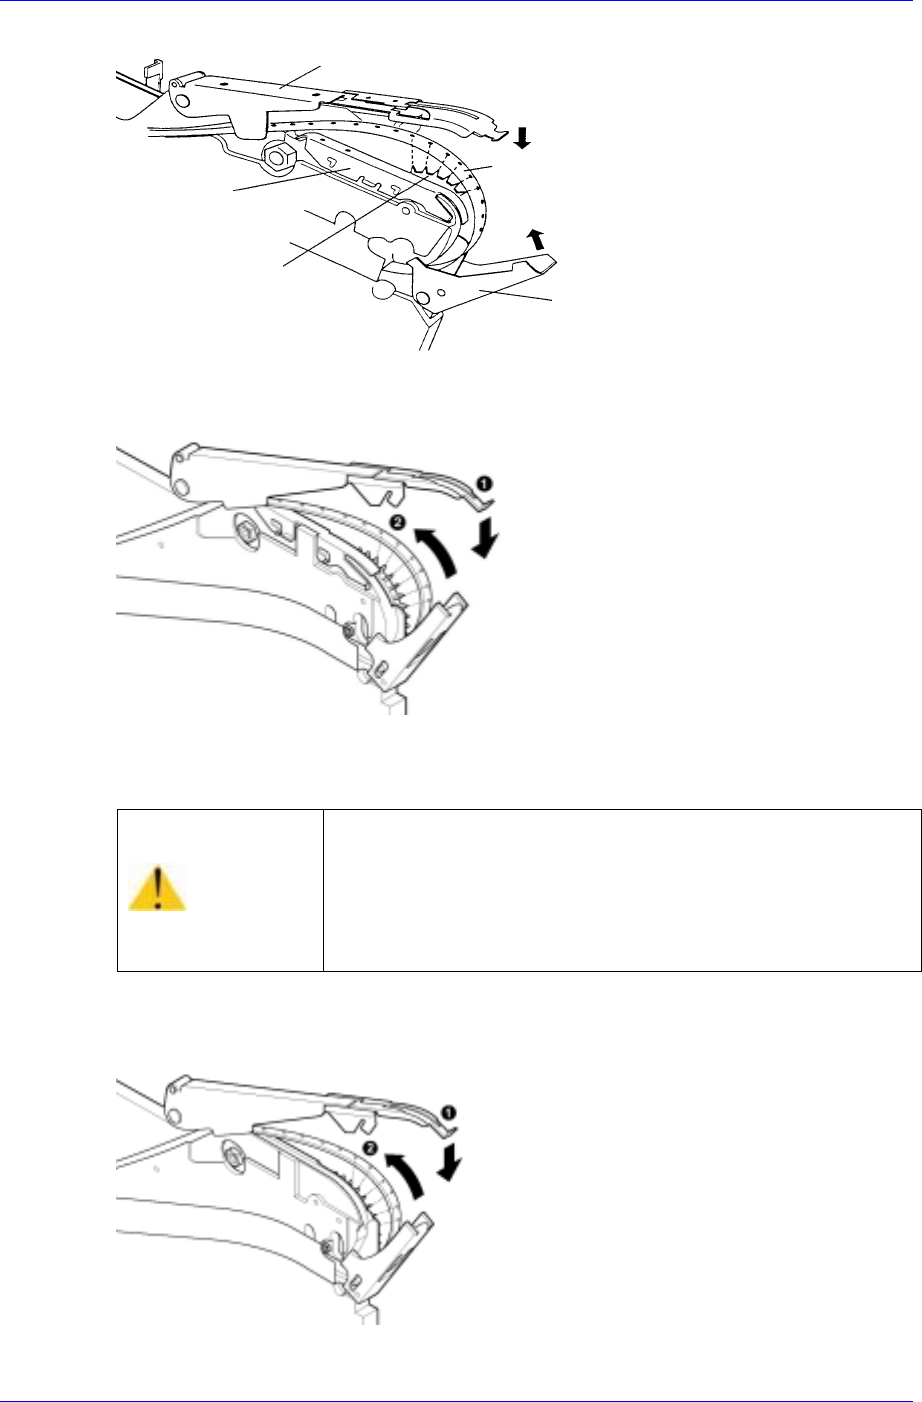
Insert the sprocket into the transport groove of the carrier tape, press the tape guide and
shut the locker. When the lock cover is shut properly, the buck-up is released
automatically. Verify that the carrier tape is tightly attached to the tape guide and the
buck-up.
Tape
Groove C
Tape reel
Tape
Groove C
Operation of the Tape Feeder
2-13
Figure 2-22. Installing the carrier tape on the sprocket
Figure 2-23. Installing the carrier tape on the sprocket (8mm Non-Stop tape feeder)
Figure 2-24. Installing the carrier tape on the sprocket (8mm non-stop emboss tape feeder)
Caution
While the buck up is fixed, applying impact or closing the
lock cover could force the buck up to bounce, which could
cause injury.
Do not close the lock cover while the tape guide is open.
Be sure to check if the positions of the shutter and the pin
match when closing the tape guide
Tape guide
Carrier tape
Lock cover
Sprocket
Buck-up