00198519-03_UM_LDU_2_X_DE_EN_CHS-ZH.pdf - 第154页
4 Operation 4.1 Settings in SIPLACE Pro 154 User Manual / Bedienungsanleitung / 用户手册 SIPLACE Linear Dipping Unit 2 X 05/2020 Defining an Auto Cavity dipping plate (only for LDU 2 X with Auto Cavity option) ► In the Tools…
4 Operation
4.1 Settings in SIPLACE Pro
User Manual / Bedienungsanleitung / 用户手册 SIPLACE Linear Dipping Unit 2 X 05/2020 153
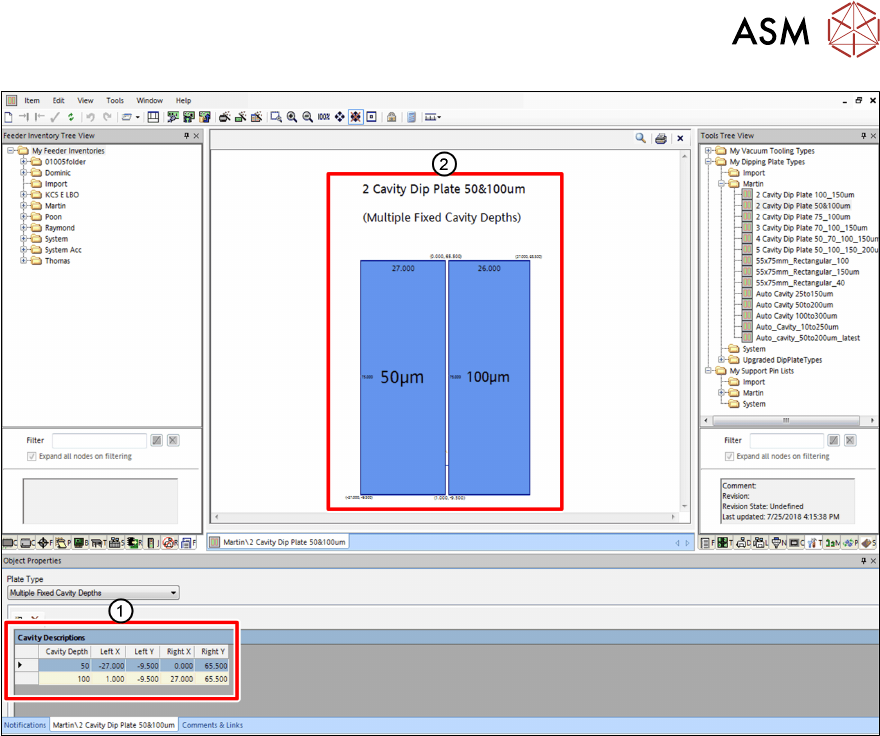
► Enter the appropriate coordinates and the cavity depth of every cavity in the corresponding
fields(1)
.
Cavity Depth: Depths of the cavities
Left X / Left Y: Lower left corners of the cavities
Right X / Right Y: Upper right corners of the cavities
The coordinates and the cavity depths of the cavities are displayed in the display area(2).
4 Operation
4.1 Settings in SIPLACE Pro
154 User Manual / Bedienungsanleitung / 用户手册 SIPLACE Linear Dipping Unit 2 X 05/2020
Defining an Auto Cavity dipping plate (only for LDU 2 X with Auto Cavity option)
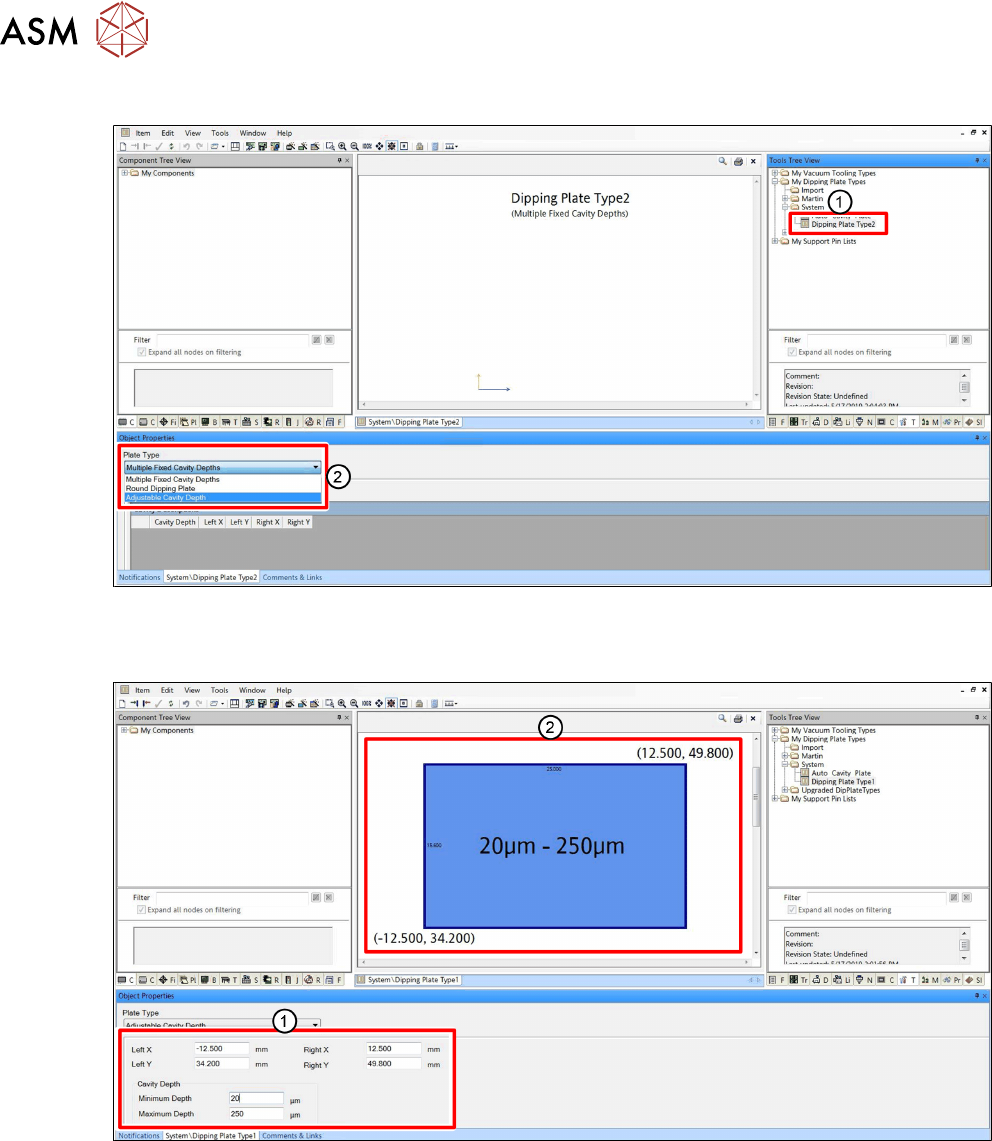
► In the Tools Tree View, select the dipping plate to be defined(1).
► In the Object Properties area, select Adjustable Cavity Depth from the Plate Type
menu(2).
► Enter the appropriate coordinates and the cavity depth range in the corresponding fields(1).
Left X / Left Y: Lower left corner of the cavity
Right X / Right Y: Upper right corner of the cavity
Minimum / Maximum Cavity Depth: Travel range of the cavity plate
The coordinates and the depth range of the cavity are displayed in the display area(2).
4 Operation
4.1 Settings in SIPLACE Pro
User Manual / Bedienungsanleitung / 用户手册 SIPLACE Linear Dipping Unit 2 X 05/2020 155
4.1.3 Assigning a dipping plate and a flux to the LDU
On one placement machine, several LDU units can be used. Each LDU can be fitted with another
dipping plate type and filled with another flux, suitable to the dipping requirements of the compon-
ents. For this purpose, the appropriate dipping plate and flux material must be assigned to every
LDU set up.
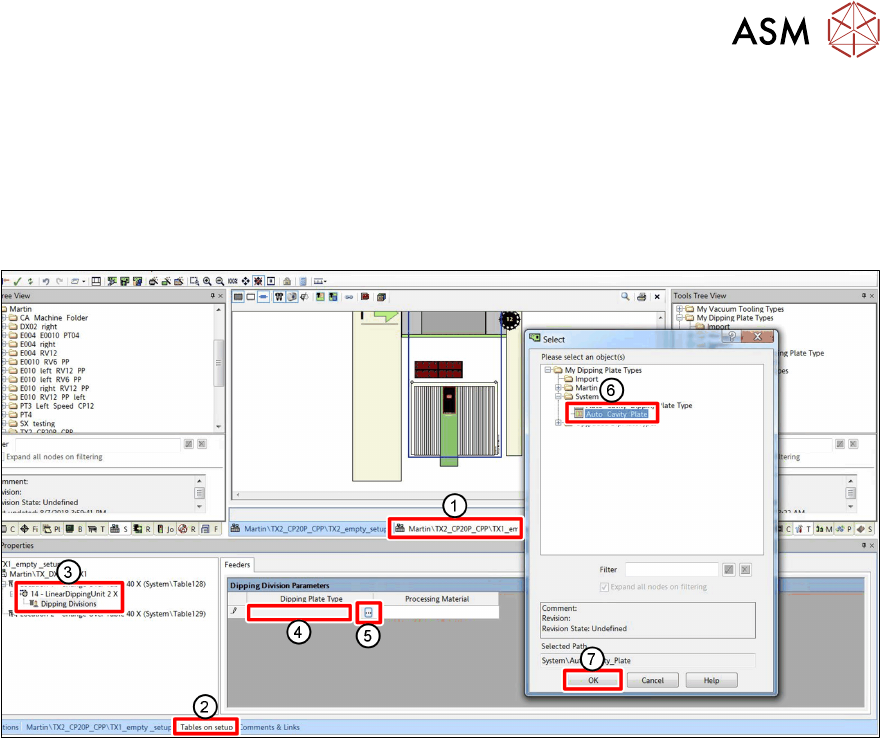
Assigning a dipping plate to the LDU 2 X
► In SIPLACE Pro, click on the tab of the Setup(1).
► Click on the Tables on setup tab(2) in the Object Properties view.
► In the Properties tree view, click on the Dipping Divisions folder of the desired LDU 2 X(3).
► Click on the blank field in the Dipping Plate Type column of the Dipping Division Paramet-
ers area(4).
A Select button with three points is displayed.
► Click on the Select button(5).
A dialog window is displayed.
► Click on the desired dipping plate in the tree view(6).
► Click OK(7).