SOM-1735-001.pdf - 第45页
8.1 "Camera X/Y Origin" T ab This tab sheet enables the operator to perform the origin adjustment of the image camera, the sensitivity adjustment of the CCD camera, the intensity adjustment of front lighting, e…
8. "UNIT ADJ." Window (Submenu)
• Window Layout
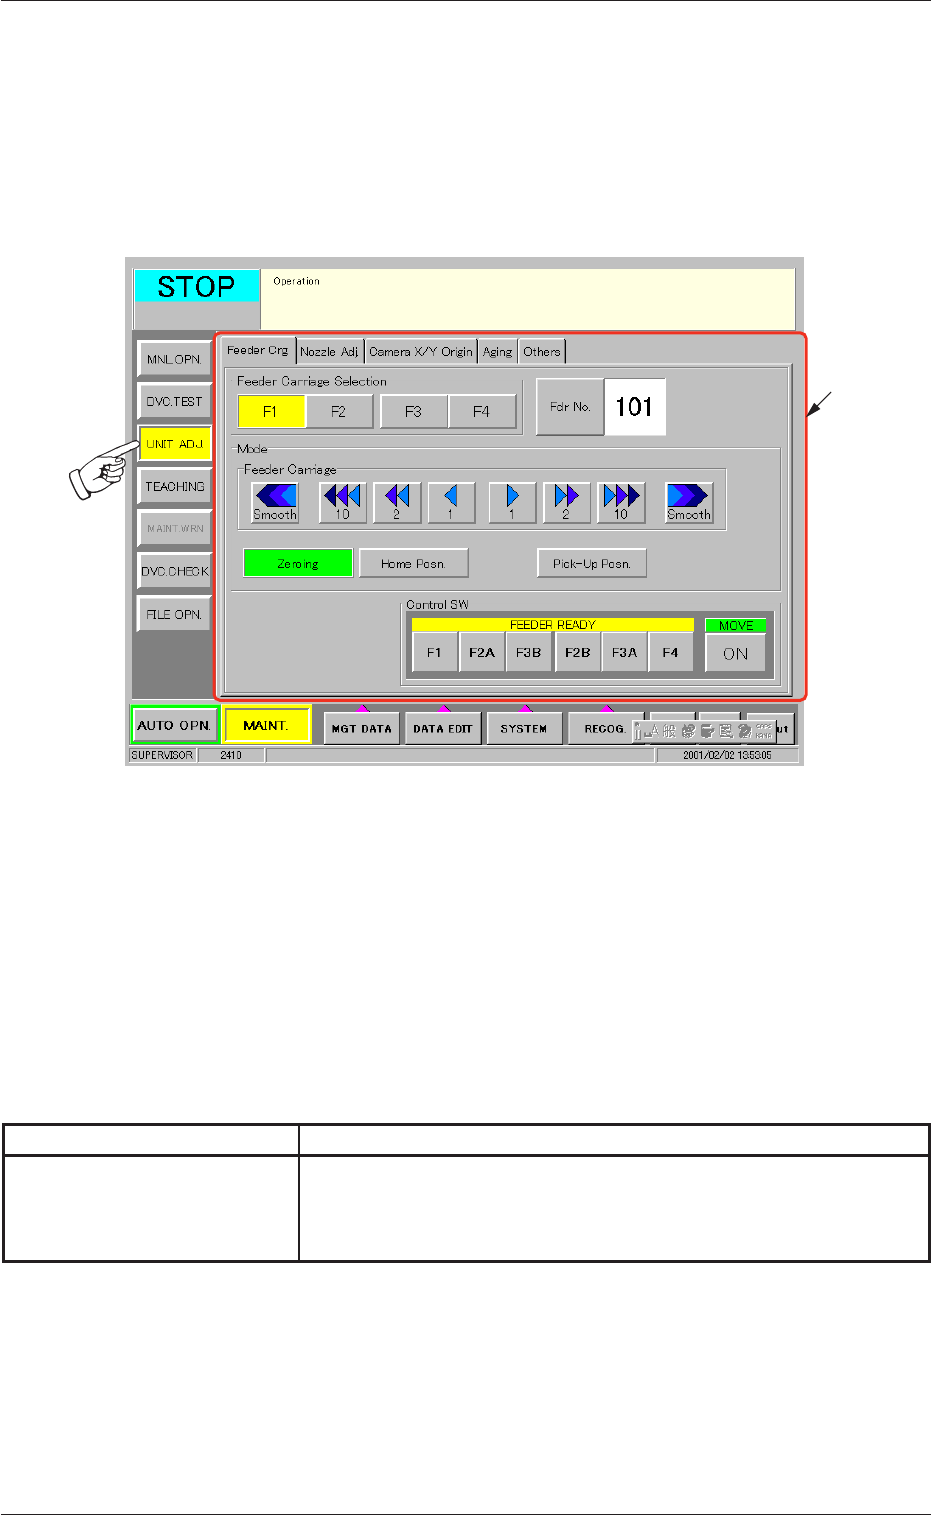
When the [UNIT ADJ.] button on the submenu bar is pressed, the fol-
lowing window opens. (Operation Sequence: [MAINT.] Button Æ [UNIT
ADJ.] Button on Submenu Bar Æ "UNIT ADJ." Window)
Fig. 97 "UNIT ADJ." Window (Submenu)
• Window Composition
*1 Tabs and Tab Sheets
The "UNIT ADJ." window (submenu) is provided with 5 tab
sheets. When each tab is pressed, the corresponding tab sheet
appears inside the window.
Table 14
Tab Description
Camera X/Y Origin This tab sheet enables the operator to perform the origin adjust-
ment of the image camera, the sensitivity adjustment of the CCD
camera, the intensity adjustment of front lighting, etc.
8. "UNIT ADJ." Window (Submenu)
0307-001 43 Tg0930-PM-SO
*1
8.1 "Camera X/Y Origin" Tab
This tab sheet enables the operator to perform the origin adjustment of
the image camera, the sensitivity adjustment of the CCD camera, the
intensity adjustment of front lighting, etc.
• Sheet Layout
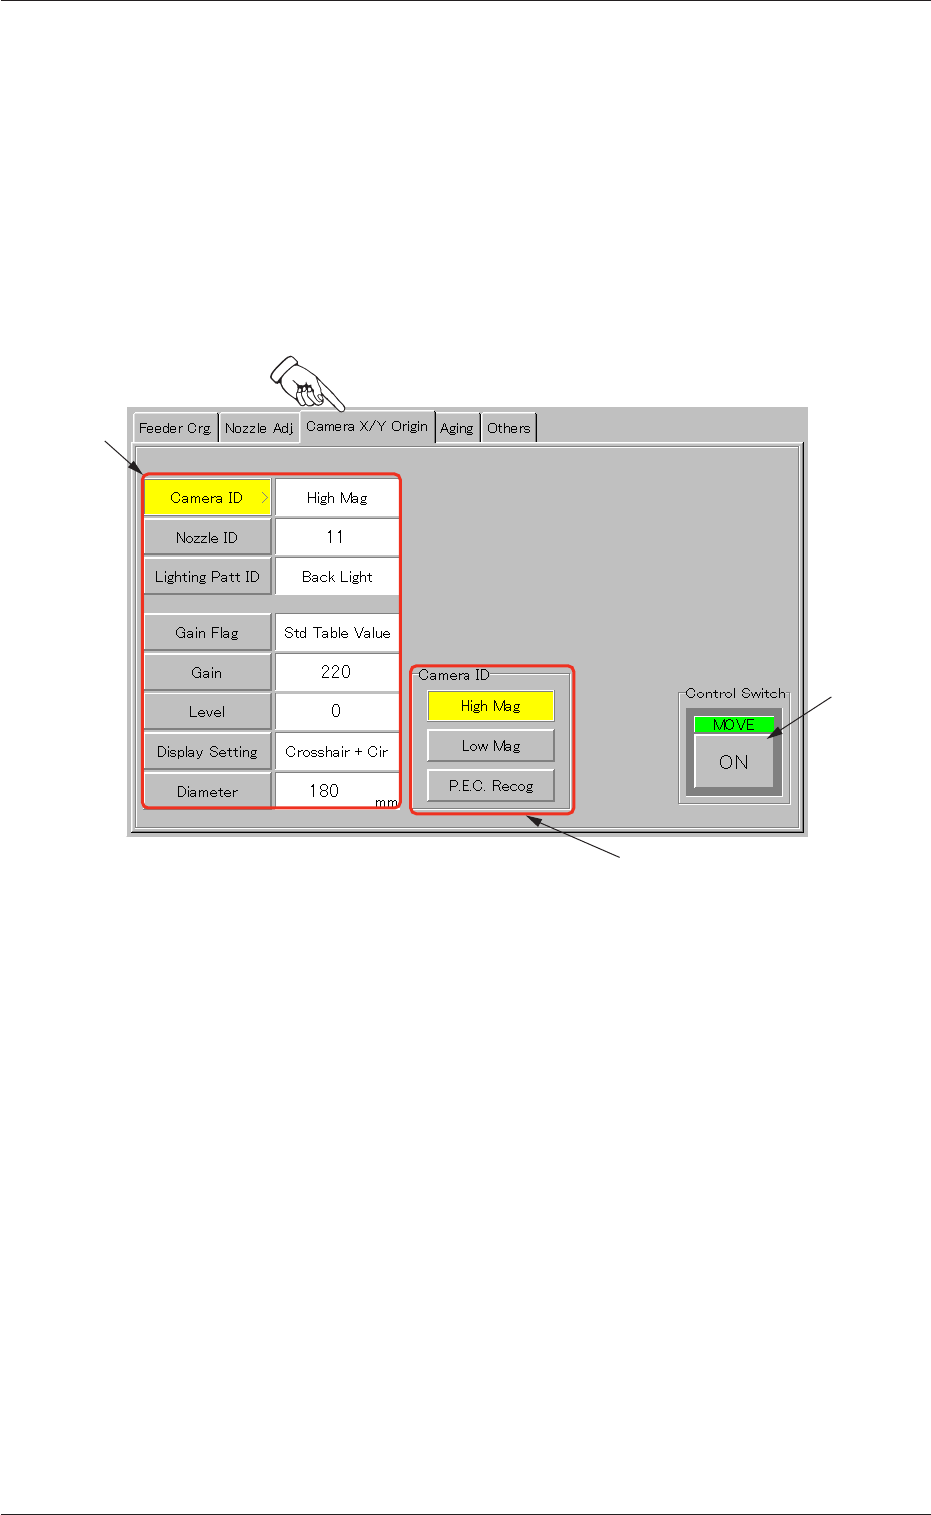
When the "Camera X/Y Origin" tab is pressed in the "UNIT ADJ." win-
dow (submenu), the following tab sheet appears.
Fig. 98 "Camera X/Y Origin" Tab Sheet
• Sheet Composition
*1 Operation Selection Buttons
When a button is pressed, it turns yellow, indicating that it is
selected.
[Camera ID] Button :
[Nozzle ID] Button :
[Lighting Patt ID] Button :
[Gain Flag] Button :
[Gain] Button :
[Level] Button :
[Display Setting] Button :
[Diameter] Button :
8.1 "Camera X/Y Origin" Tab
0307-001 44 Tg0930-PM-SO
*1
*2
*3
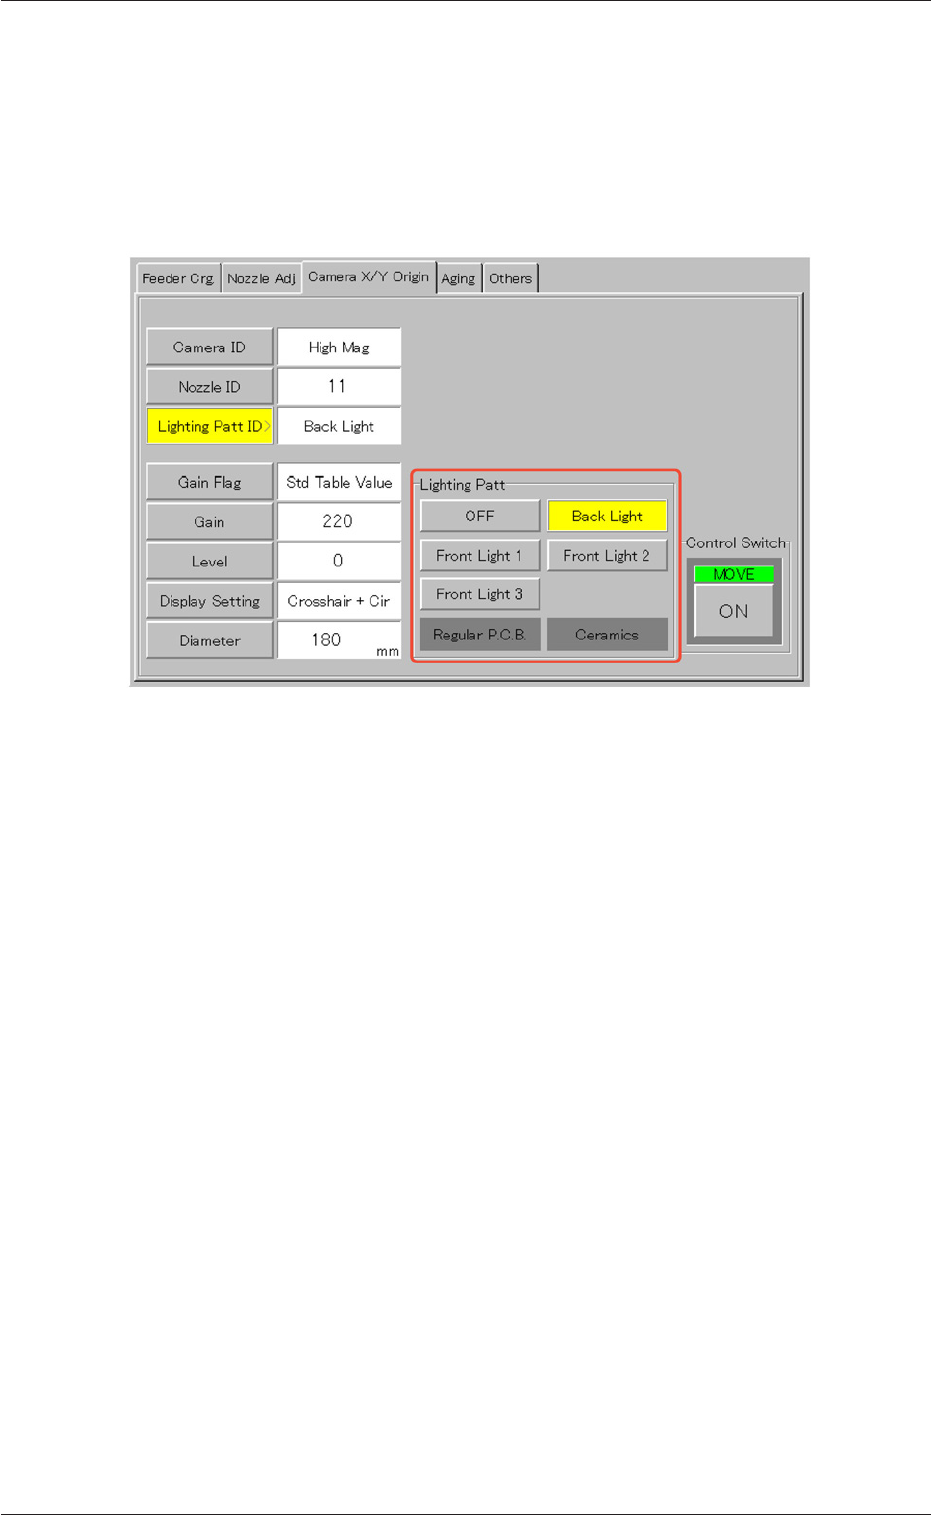
*2 Adjustment and Setting Buttons
The displayed contents change as follows, depending on which
button was selected in "*1".
• When the [Lighting Patt ID] button is pressed, the following ad-
justment and setting buttons appear.
Fig. 99
When one of the buttons ([OFF], [Back Light], [Front Light 1], [Front
Light 2], and [Front Light 3 (Option)] buttons) is pressed, the speci-
fied item appears in the "Lighting Patt ID" text box.
*3 Control Switch
When the [ENABLE] button on the front operation panel is
pressed in 2 seconds after each parameter is specified in "*2"
and [ON] button is pressed, the machine performs the zeroing
adjustment.
8.1 "Camera X/Y Origin" Tab
0307-001 45 Tg0930-PM-SO