1OM-1003-007.pdf - 第83页
*1 1 Front T ouch Screen Fig. 1A16 The operation windows will be displayed on the front touch screen. V arious types of operations become available by touching the opera- tion buttons and tabs on the screen. Since the to…
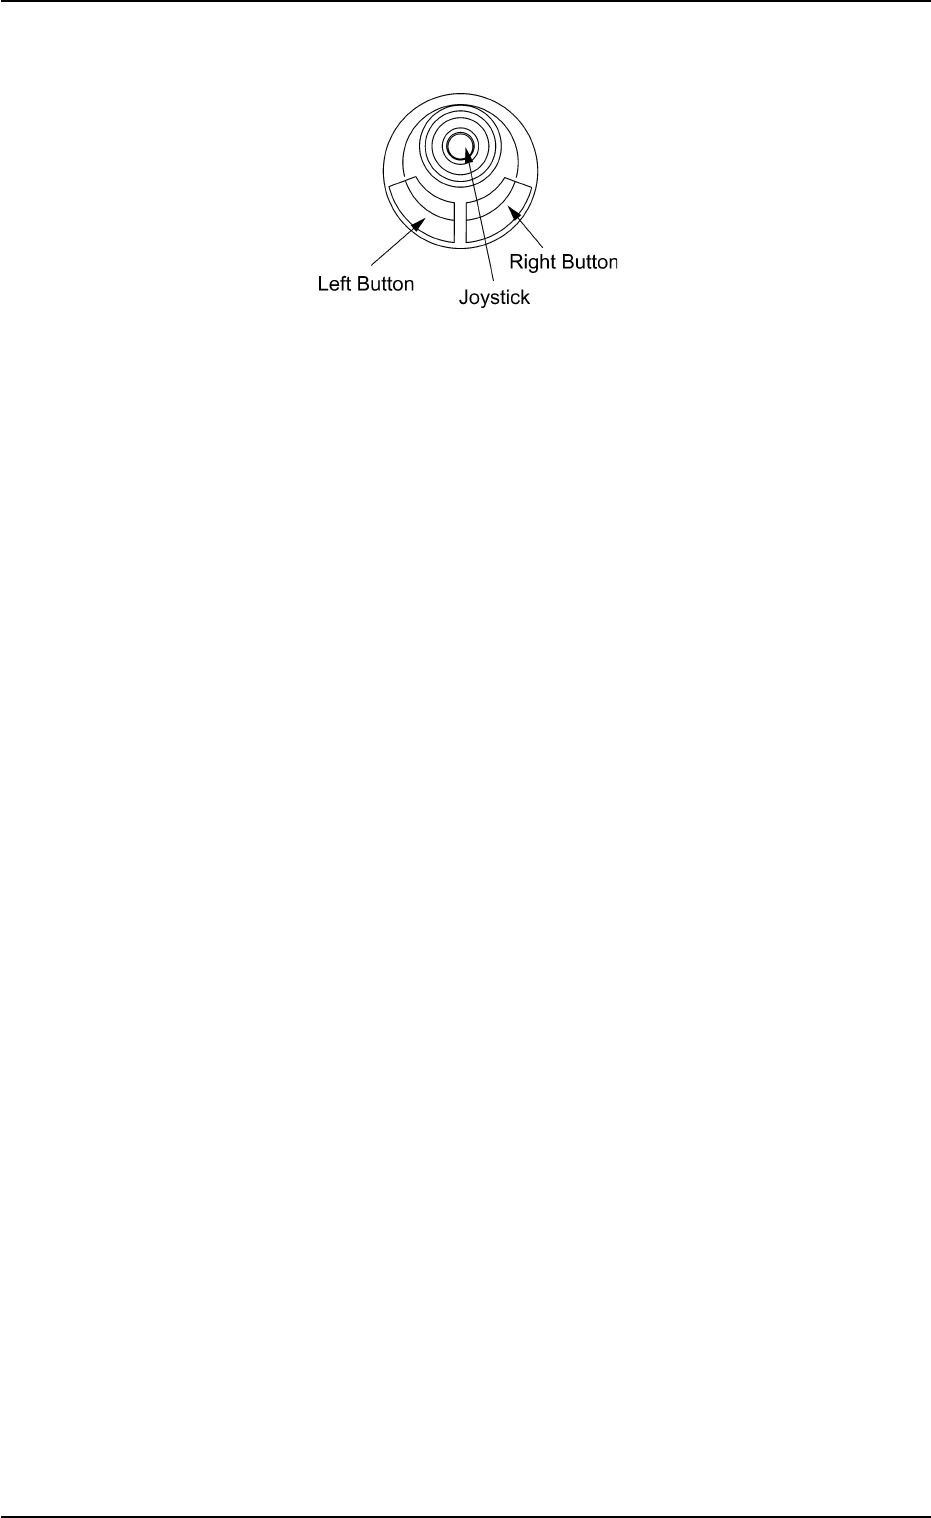
*10 Pointing Device
Fig. 1A15
This device is used to indicate where the pointer is on the operation
screen.
Basic Operations of Pointing Device
• Pointer
To point to an object on the operation screen, move the pointer with
the joy stick.
• Click
To click, point the pointer at the object you want to select, and quickly
press and release the left button.
Quickly pressing and releasing the right button is called "Right-Click".
• Double-Click
To press the left button twice in rapid succession while keeping the
pointer motionless between clicks.
• Drag
To move an object on the screen from one place to another by point-
ing to it, holding the left button down, and pulling it to where you want
it to be, using the joy stick. When the pointer has dragged the object
to the desired position, release the left button.
2.3 Operational Measures
0305-001 1-19 AIL01EOPP
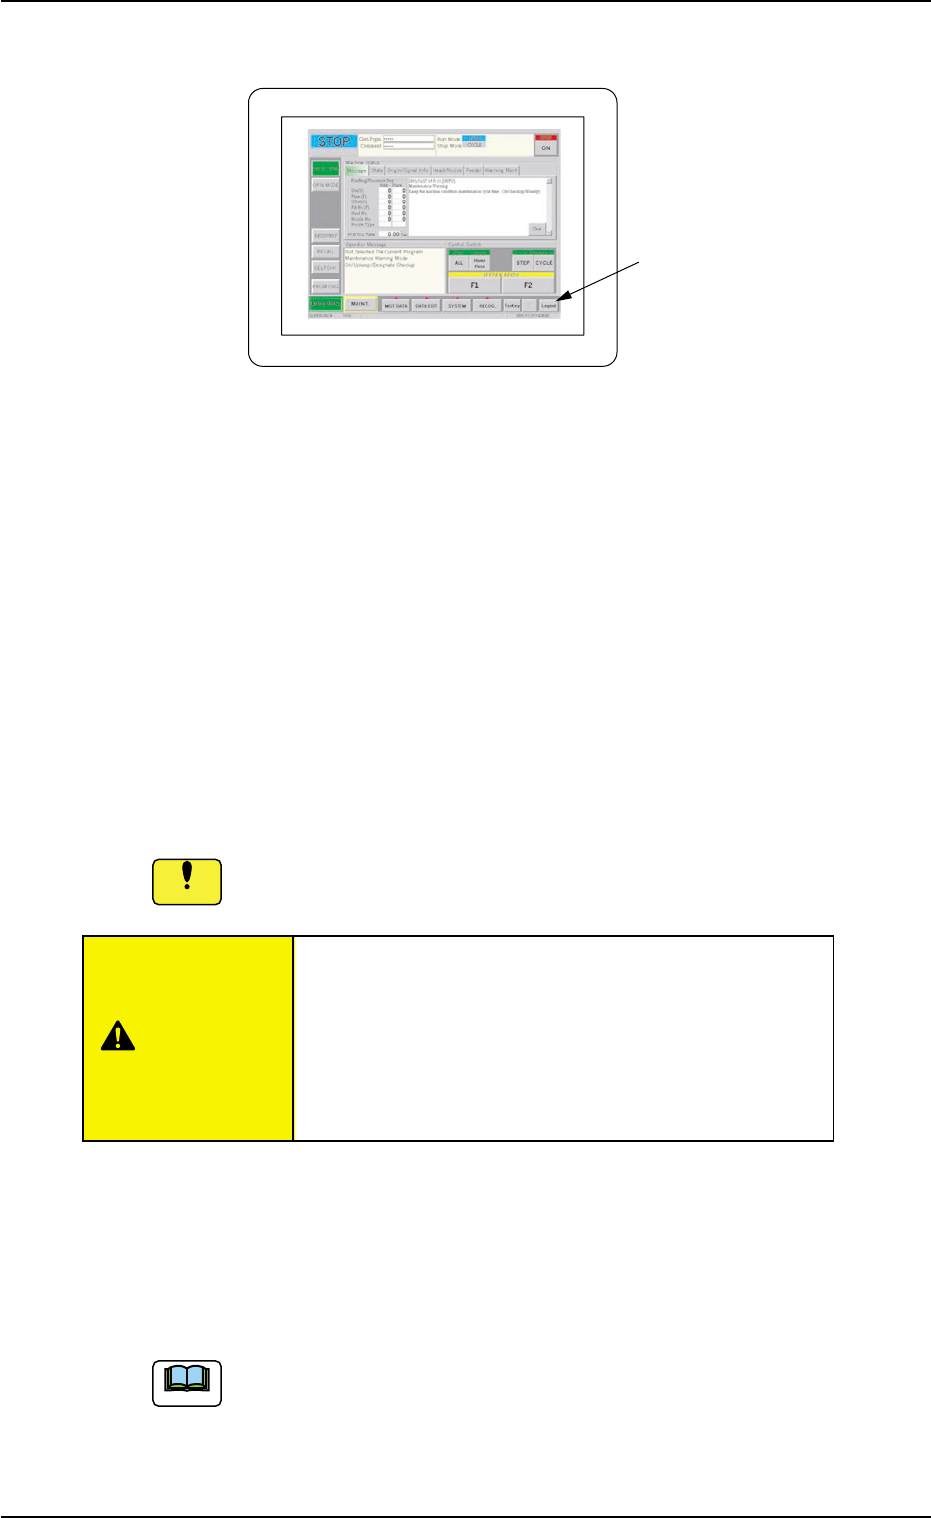
*11 Front Touch Screen
Fig. 1A16
The operation windows will be displayed on the front touch screen.
Various types of operations become available by touching the opera-
tion buttons and tabs on the screen.
Since the touch screen uses the molecules in liquid crystals, handle it
like glass.
Do not apply strong pressure to the touch screen. Try not to touch the
screen except for input operations.
The touch-sensitive regions of the touch screen reacts to a force of
0.78 Ncm
2
(approx. 80 gf/cm
2
) or less.
Do not press the screen with an excessive force.
The surface of the touch screen is fragile. Do not rub the surface or
touch it with a pen, a screwdriver, etc.
The machine is not a water-proof and encapsulated
type.
Avoid dust, water droplet, oil droplet, and metal pieces.
Especially, when metal pieces or combustible mate-
rial is mixed into the machine, it may lead to fire igni-
tion.
When temperature is low at power-up, the brightness of the back light
drops. The deterioration is not abnormal.
The brightness resumes normal after a few minutes.
When the back light is turned on or off repeatedly at low temperature,
the life will be shortened.
Refer to "1.2.2 Notes on Handling Touch Screens" in "Section
2" for the detailed information on how to clean the touch screens.
2.3 Operational Measures
Front Touch Screen
CAUTION
0412-002 1-20 AIL01EOPP
Note
Notice
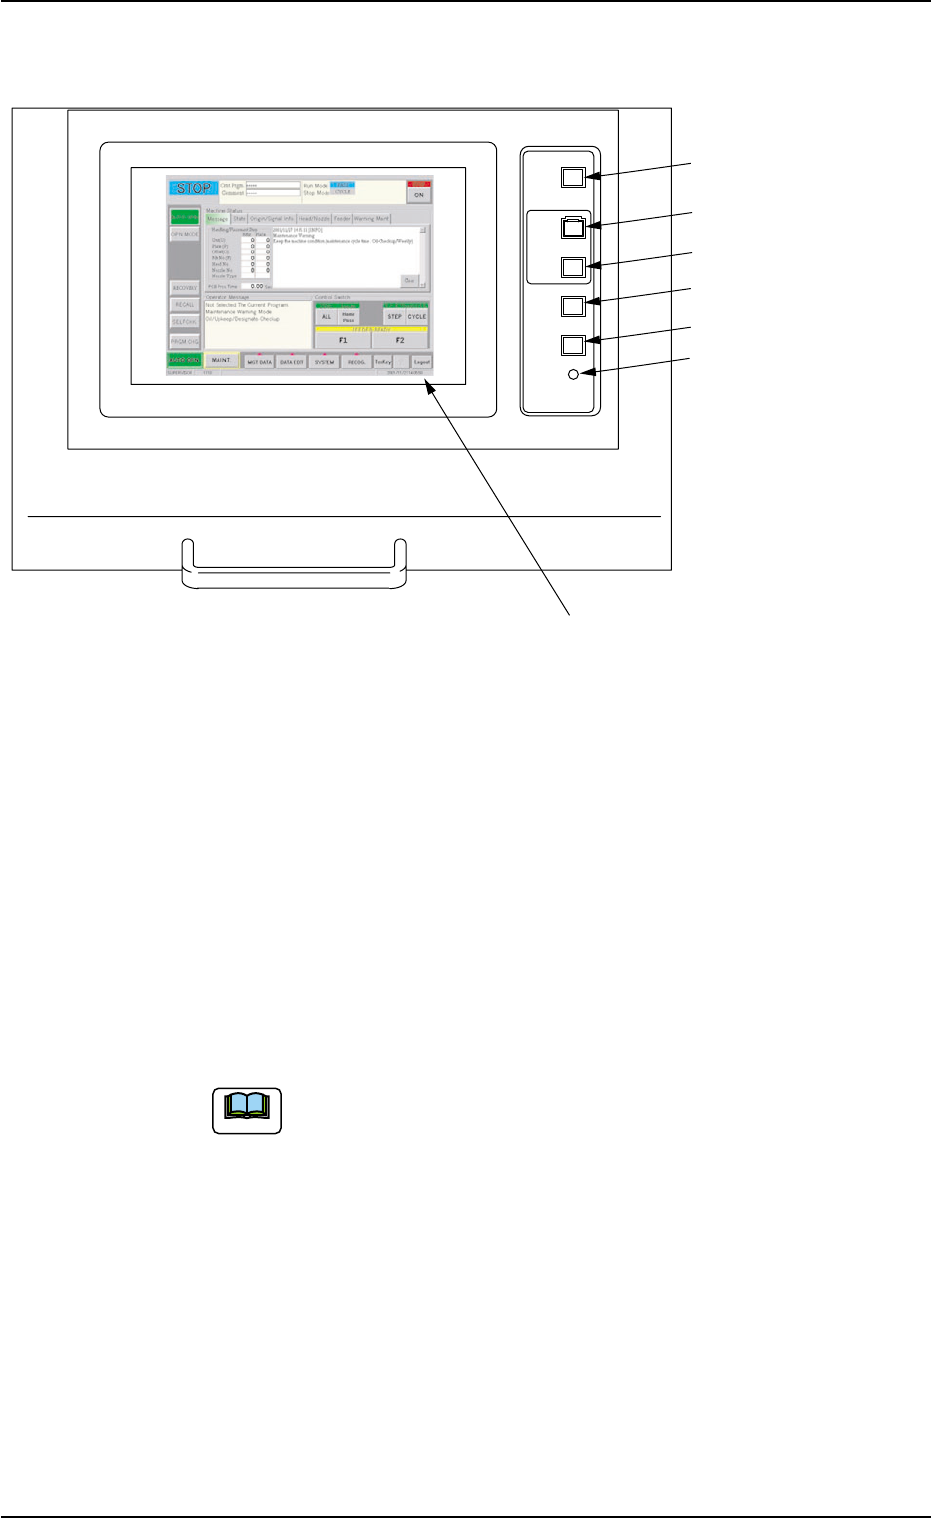
2.3.4 Rear Operation Panel
Fig. 1A17
*1 [POWER ON] Button
• This button is used to turn on the power for operations.
*2 [START] Button
• This button is used to start the automatic operation.
The automatic operation can be started only when the lamp is flickering.
• While the lamp of this button is ON, it indicates that the machine is running
automatically.
When the [STOP] button is pressed during automatic operation, the LED
of this button extinguishes.
The lamp is kept ON while each device is being zeroed.
*3 [STOP] Button
• This button is used to stop the automatic operation.
• When this button is pressed during X/Y table test, the test operation stops.
• When this button is pressed during zeroing operation, the zeroing opera-
tion of each device is interrupted, excluding the P.C.B. transfer.
0305-001 1-21
AIL01EOPP
2.3 Operational Measures
LOCK
START
POWER
ON
STOP
ENABLE
PNL
CHANGE
*1 [POWER ON] Button
*2 [START] Button
*3 [STOP] Button
*4 [ENABLE] Button
*5 [PNL CHANGE] Button
*6 [LOCK] Lamp
*7 Rear Touch Screen
Note