TUT-CP842-Oper guide-preliminary.pdf.pdf - 第49页
Conveyor Width Adjustment The XY -table is constructed with no width change mechanism. Use a command to link the XY -table to the in- and out-conveyors and then carry out conveyors width adjustment. In addition note that…
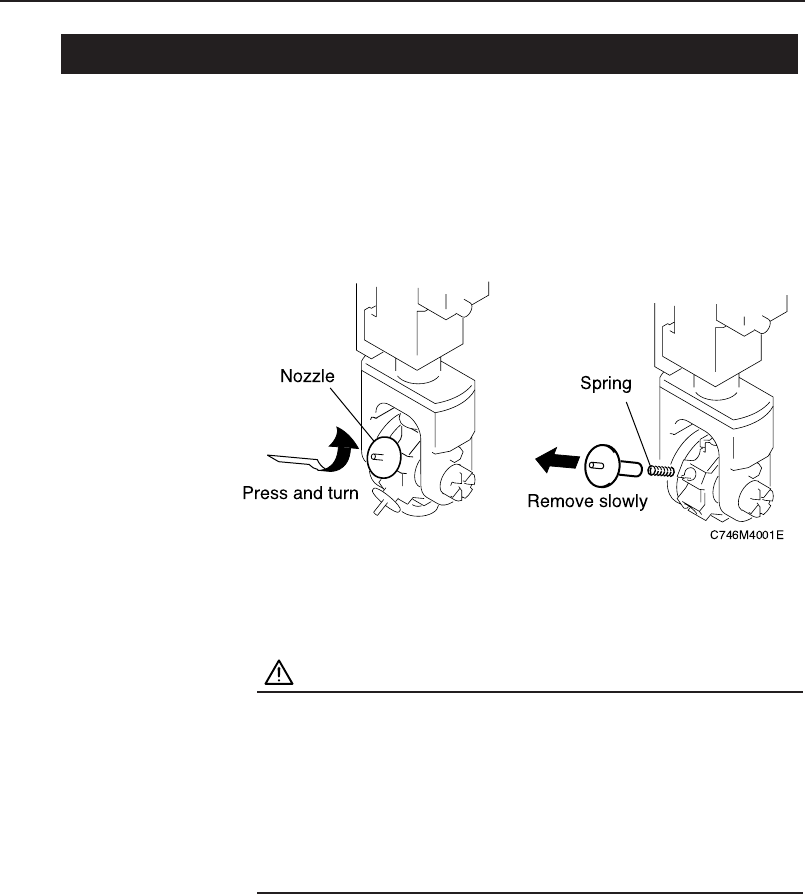
Nozzle Replacement
Nozzles are set in each nozzle holder on all of the placement heads. The
nozzle holders are numbered from 1 to 6. Refer to the production program
nozzle data to be sure that nozzles are installed correctly. All 16 placement
heads (A - P) must have the same nozzles attached in the same locations.
CAUTION
• To avoid bending, thin nozzles of 0.4 and 0.7 mm in
diameter should be held by the disk when they are
removed from the head.
• Nozzles should be removed carefully to avoid dislodging
and losing the internal spring. After removing the
nozzle, check that the spring has not been left inside the
holder.
3.5 Machine
Chapter 3: Preparing for Production
Preliminary
3-18 CP-842E/842ME Operator’s Guide
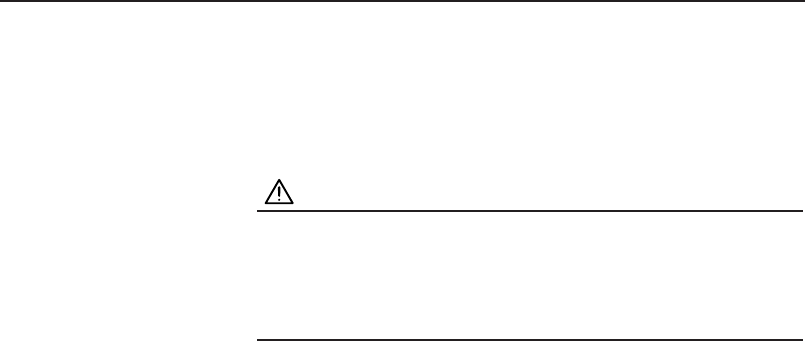
Conveyor Width Adjustment
The XY-table is constructed with no width change mechanism. Use a
command to link the XY-table to the in- and out-conveyors and then carry out
conveyors width adjustment. In addition note that a gap of 1 mm is required
between the panel and the sides of the conveyor rail (0.5 mm on each side).
CAUTION
Before performing conveyor width adjustment, check the
back-up pin positions on the XY-table, verifying that there
will be no interference between the back-up pins and the
adjustable rail.
Procedure
1. Execute the necessary commands to link the XY-table to the in
and out-conveyors. At the touch panel’s main screen, select the
following commands: [Conveyor] - [Conveyor Width] - [Width
Change Preparation], then press the the START button.
Chapter 3: Preparing for Production
Preliminary
3-19CP-842E/842ME Operator’s Guide
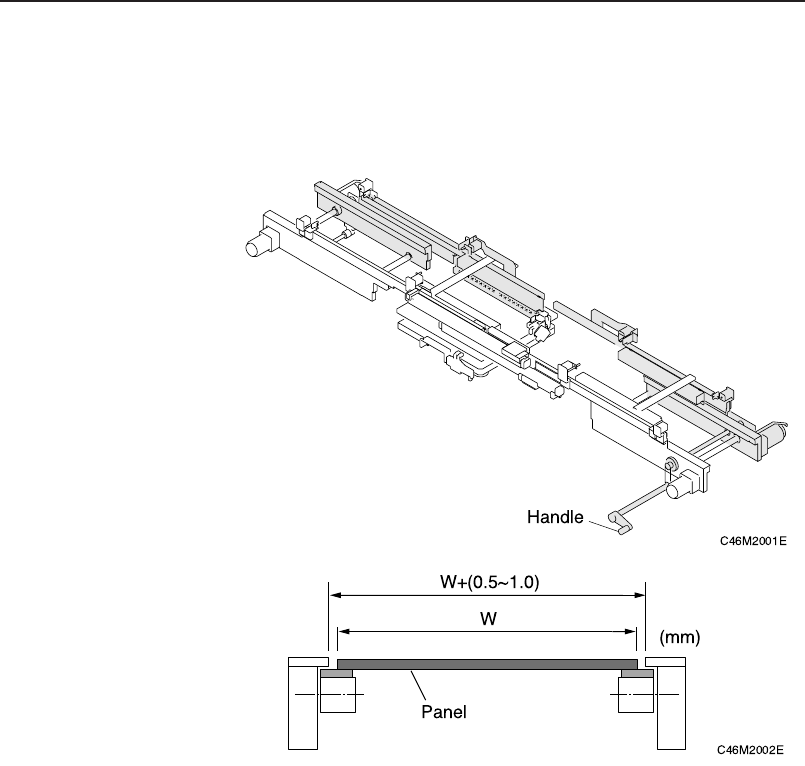
2. Turn the handle on the out-conveyor to adjust the conveyor
width until the panel can be conveyed smoothly. The conveyor
width should be such that there is a 0.5 mm gap on each side of
the panel as shown in the figure below.
3. Lower the XY-table.
4. Run a test panel through the machine, verifying that it is
conveyed smoothly and that panel clamping is correctly
perfomed.
Chapter 3: Preparing for Production
Preliminary
3-20 CP-842E/842ME Operator’s Guide