TUT-CP842-Oper guide-preliminary.pdf.pdf - 第51页
Back-up Pin Installation Back-up pins or rubber blocks are installed on the back-up pin plate to eliminate any warp on the bottom of the panel and to absorb any panel vibrations. Adjustment of the length of back-up pins …
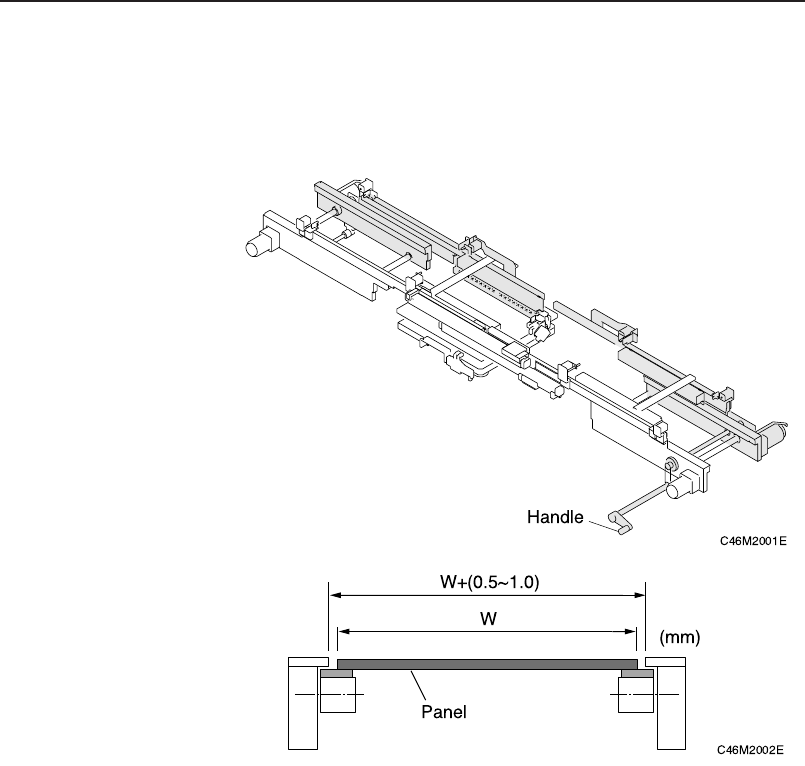
2. Turn the handle on the out-conveyor to adjust the conveyor
width until the panel can be conveyed smoothly. The conveyor
width should be such that there is a 0.5 mm gap on each side of
the panel as shown in the figure below.
3. Lower the XY-table.
4. Run a test panel through the machine, verifying that it is
conveyed smoothly and that panel clamping is correctly
perfomed.
Chapter 3: Preparing for Production
Preliminary
3-20 CP-842E/842ME Operator’s Guide

Back-up Pin Installation
Back-up pins or rubber blocks are installed on the back-up pin plate to
eliminate any warp on the bottom of the panel and to absorb any panel
vibrations. Adjustment of the length of back-up pins is not required even if the
thickness of the panel changes.
Procedure
1. Execute the necessary commands to move the XY-table to the
loading position.
[Panel Loader] – [Move to Loading Position] – START button
2. Raise the XY-table.
[Panel Loader] – [Lifter Up] – START button
3. Press the EMERGENCY STOP button.
WARNING
Be sure to turn the 200V power off before performing this
procedure.
4. When using backup pins.
Loosen the pin mounting bolts and reconfigure the pins as necessary.
Chapter 3: Preparing for Production
Preliminary
3-21CP-842E/842ME Operator’s Guide
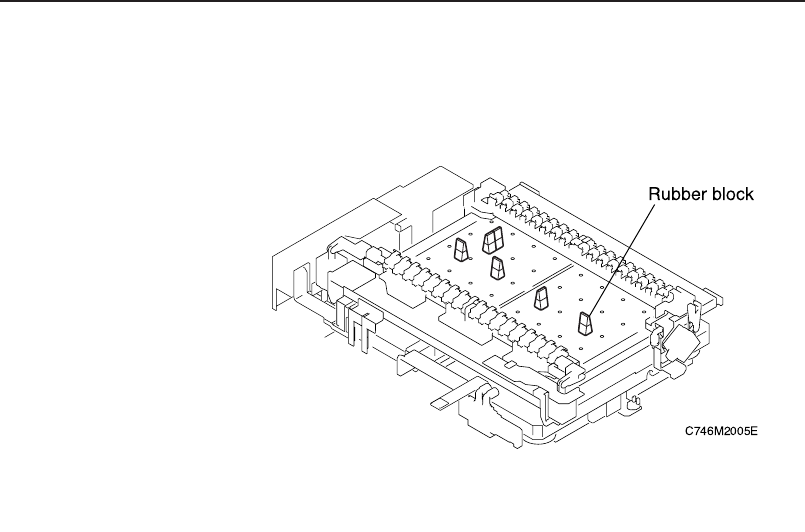
When using rubber blocks.
Snap the blocks into suitable lengths and use double-faced tape to stick them
to the backup plate.
Note: If there are pre-placed parts on the underside of a panel the installation
of back-up pins must take this into account so as to avoid a collision
with any of these parts.
Chapter 3: Preparing for Production
Preliminary
3-22 CP-842E/842ME Operator’s Guide