_414214_AVK3 服务手册.pdf - 第118页
6.9 T iming Belt T ension Measurement (Sonic T ension Meter) SERVICE MANUAL A VK3 6.9−1 D77SEC−85−210−A0 6.9 T iming Belt T ension Measurement (Sonic T ension Meter) D77SEC−85−210−A0 Sentence No. Timing Belt tension meas…

6.8 Secret Screen Service Functions (CONFIDENTIAL)
SERVICE MANUAL
AVK3
6.8−8
D77SEC−85−080−A0
= MEMO =
6.9 Timing Belt Tension Measurement (Sonic Tension Meter)
SERVICE MANUAL
AVK3
6.9−1
D77SEC−85−210−A0
6.9 Timing Belt Tension Measurement (Sonic Tension
Meter)
D77SEC−85−210−A0
Sentence No.
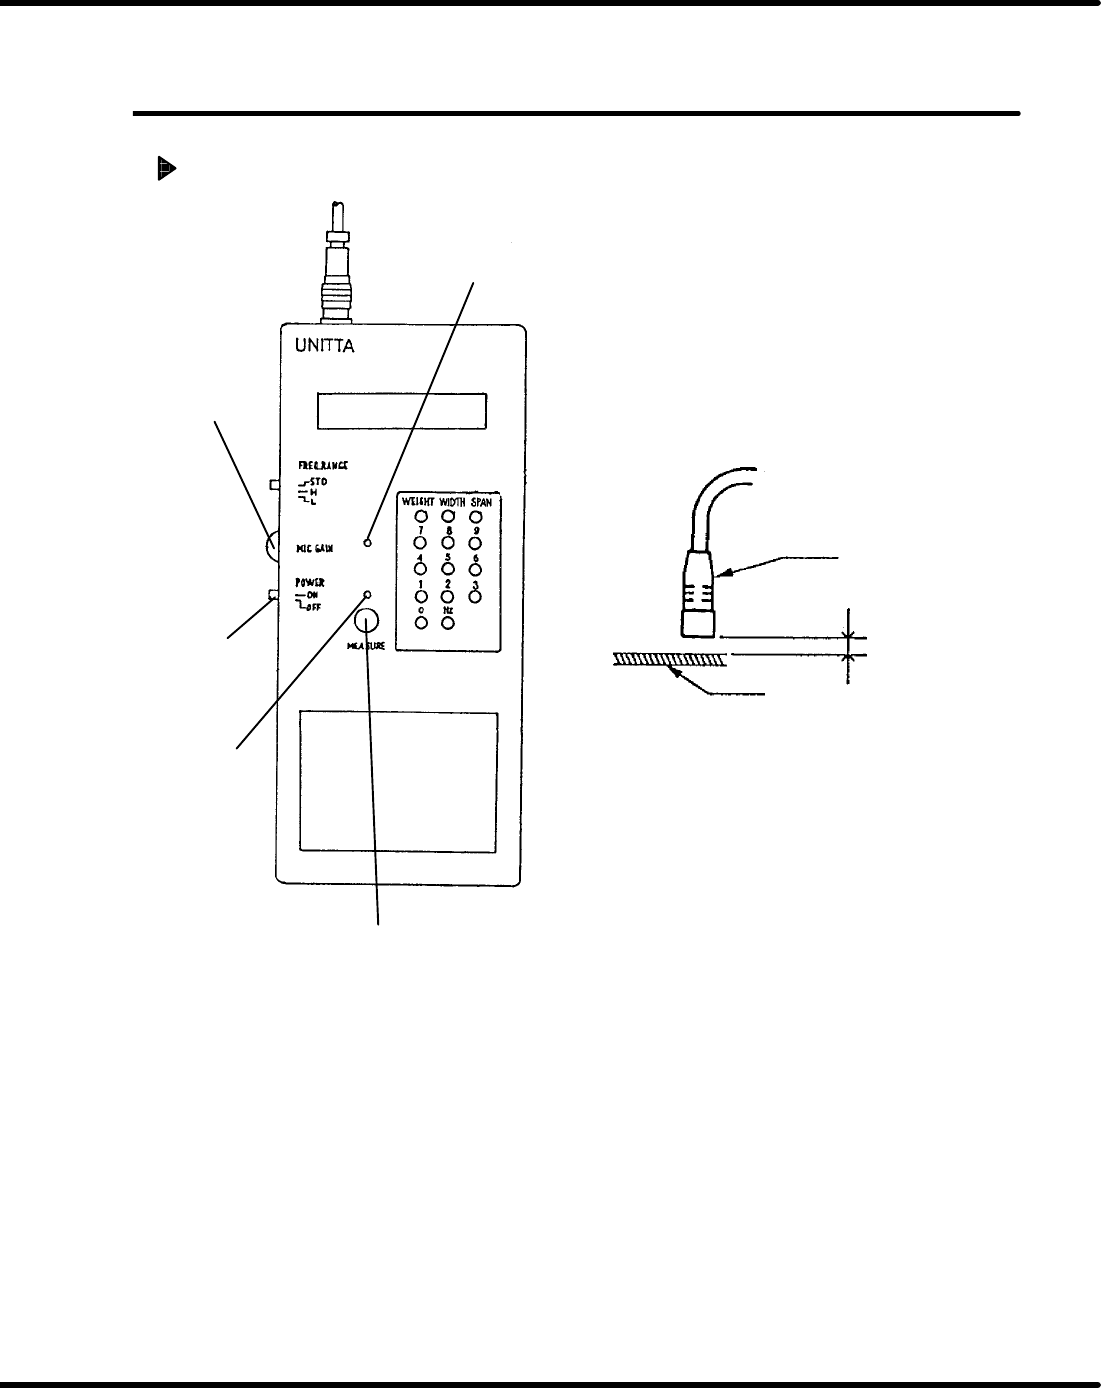
Timing Belt tension measurement
[MEASURE] start switch
Power
ON/OFF
dip switch
MIC gain LED
Adjust
volume
Measurement
LED
About 6mm
Microphone
Belt
1. Turn the power ON.
2. Select [WEIGHT] and input unit weight of belt (gf/cm
2
).
3. Select [WIDTH] and input width of belt (mm).
4. Select [SPAN] and input span length of belt (mm).
5. Keep the clearance between microphone and the belt to about 6mm.
6. Select [MEASURE] start switch.
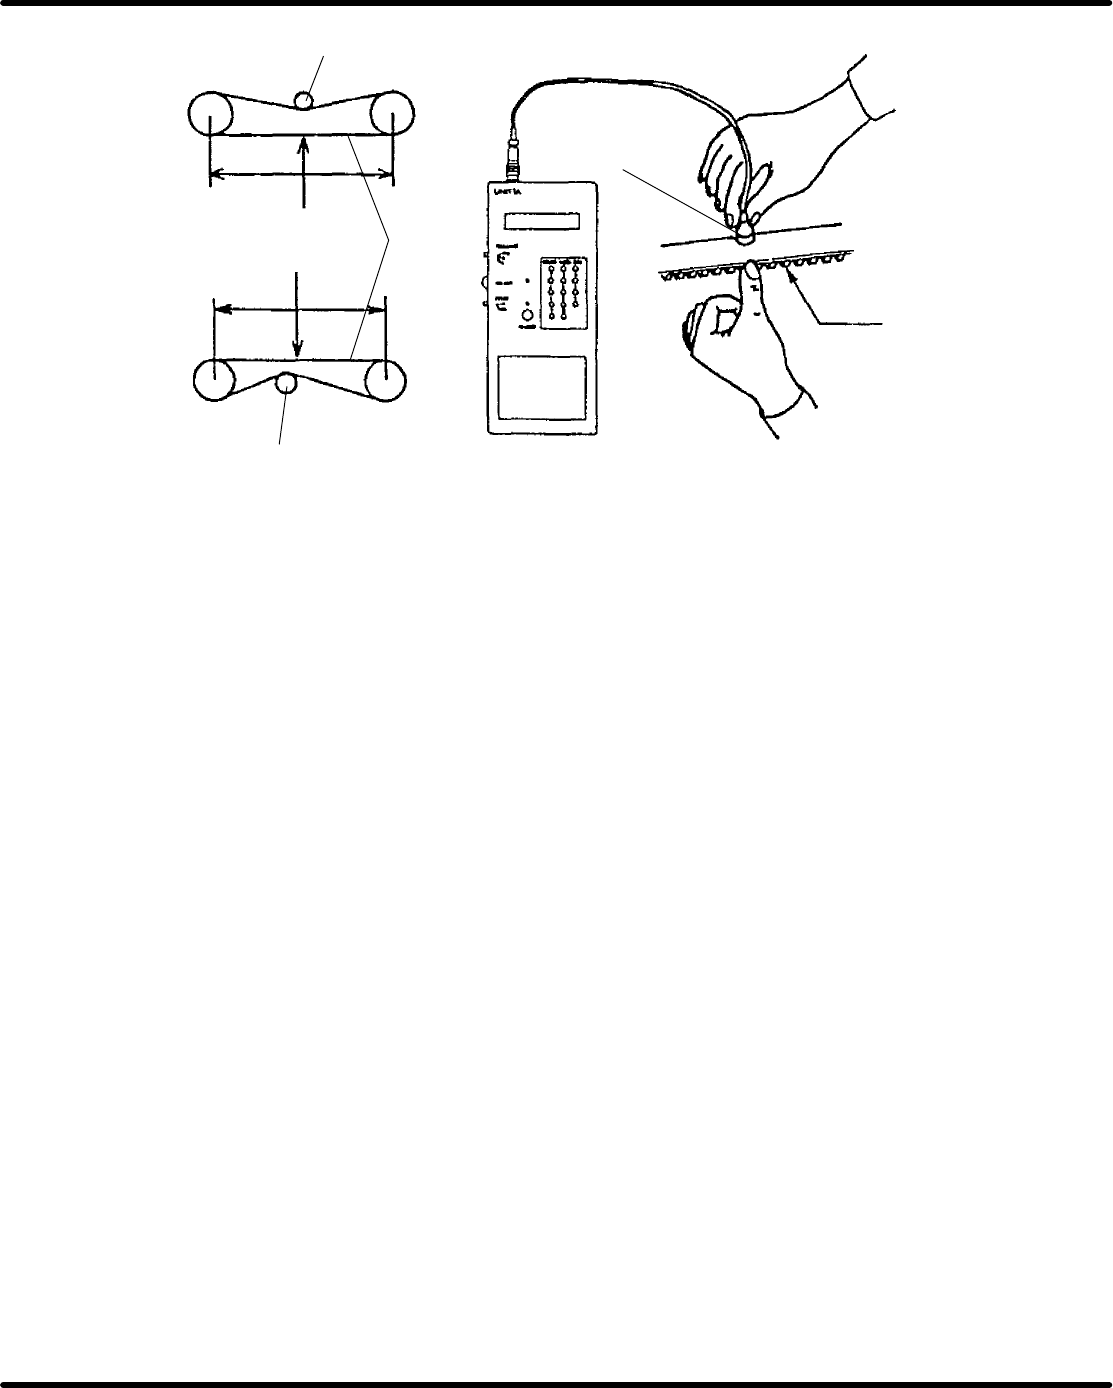
7. Snap the belt by finger for measuring.
=NOTE=
Snap the belt while the measurement LED is lit.
6.9 Timing Belt Tension Measurement (Sonic Tension Meter)
SERVICE MANUAL
AVK3
6.9−2
D77SEC−85−210−A0
Measure the center of belt
side without tension roller
Belts
Tension roller
Belt
Microphone
Tension roller
8. Read out the measured value.
9. If not within the specification, adjust the belt tension and measure again.
=NOTE=
When MIC gain LED flashes ON/OFF before the measurement, turn down adjust vol-
ume.
=NOTE=
Do not interfere with the measurement by snapping the belt with finger during the
measurement.
=NOTE=
Before measuring the belt tension, rotate the belt through one complete circuit to re-
move any localized tension risers. When installing a belt, be sure to adjust the tension
to higher than the specification as the belt will stretch over time. After a 24 hour period
has lapsed, measure the tension again and adjust it to the specification.