00198243-01_AI_BulkFeederX_XS-SX_DE+EN.pdf - 第104页
3 Retrofit kit for SX-Series 3.4 Inserting the cable into the machine 104 Assembly Instructions / Montageanleitung SIPLACE BulkFeeder X Retrofit Kit for SX Series and X Series S 07/2017 ► Run the cable through the convey…
3 Retrofit kit for SX-Series
3.4 Inserting the cable into the machine
Assembly Instructions / Montageanleitung SIPLACE BulkFeeder X Retrofit Kit for SX Series and X Series S 07/2017 103
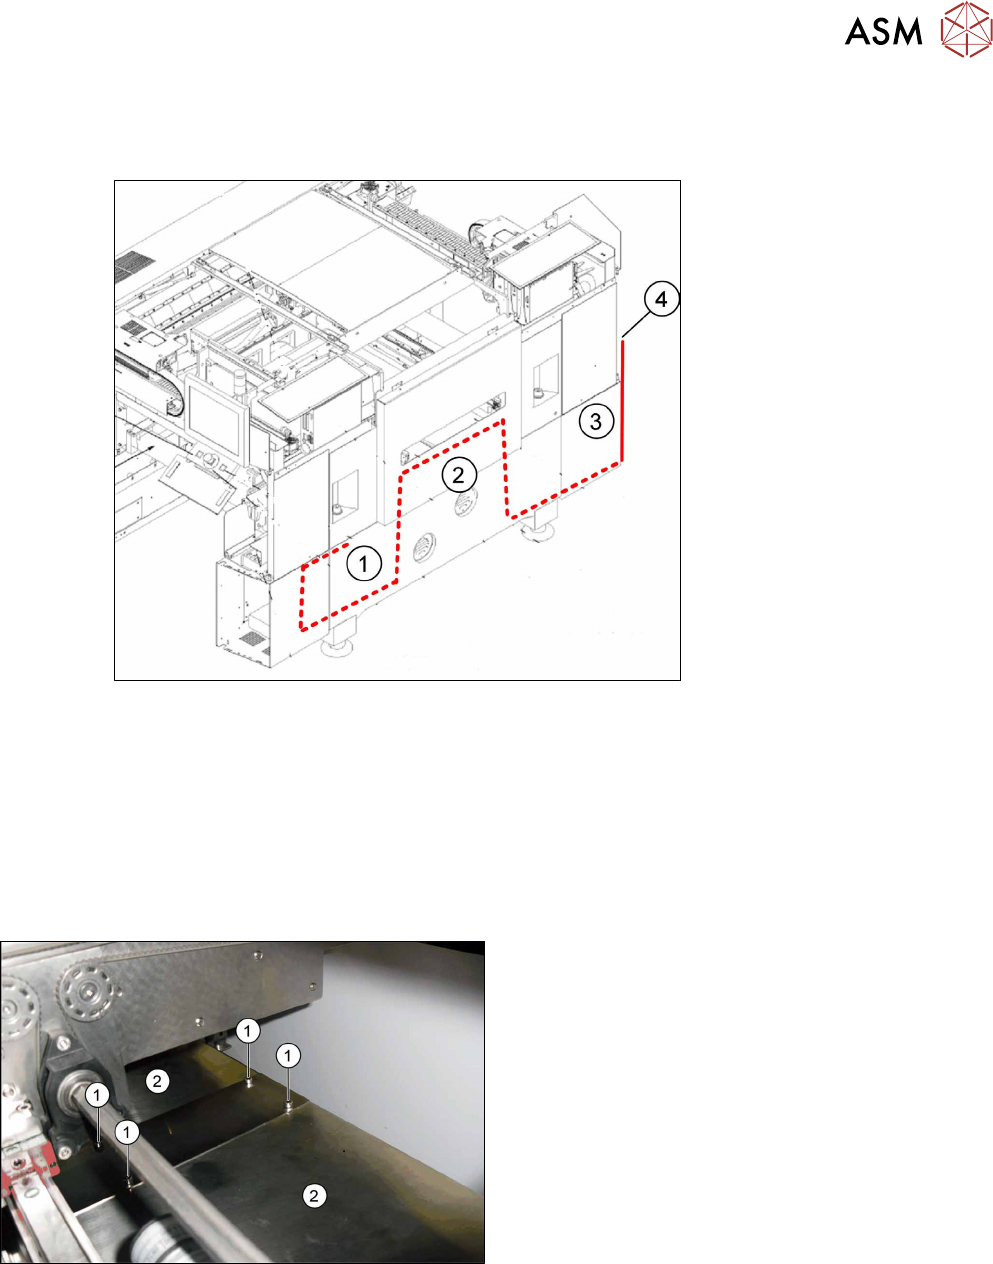
Location 1
The cable for connecting the BulkFeeder X at location 1 is inserted using the conveyor control. The
following diagram shows the cable insertion.
Fig.7: Running the cable to location 1
1 Infrastructure box with BulkFeeder X
computer
2 Conveyor control
3 Pneumatic unit 4 Connector to BulkFeeder X
To insert the cable, proceed as follows:
► Use the software to move the conveyor sides into a position which allows you best access, to
remove the conveyor control covers.
► Undo the screws (1) fastening the holding plate
and then remove the holding plate.
► Remove the covers (2) from the conveyor control.
3 Retrofit kit for SX-Series
3.4 Inserting the cable into the machine
104 Assembly Instructions / Montageanleitung SIPLACE BulkFeeder X Retrofit Kit for SX Series and X Series S 07/2017
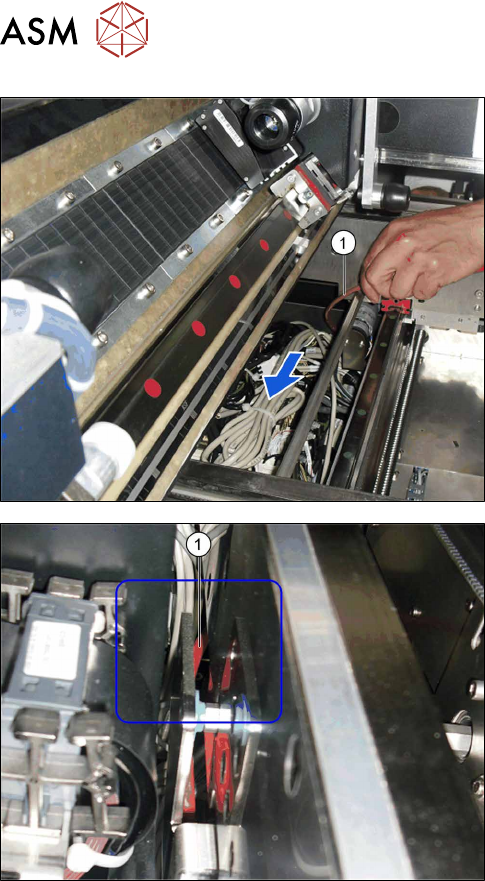
► Run the cable through the conveyor control.
► Run the cable between the conveyor control and
the conveyor side, down to sector 1.
3 Retrofit kit for SX-Series
3.4 Inserting the cable into the machine
Assembly Instructions / Montageanleitung SIPLACE BulkFeeder X Retrofit Kit for SX Series and X Series S 07/2017 105
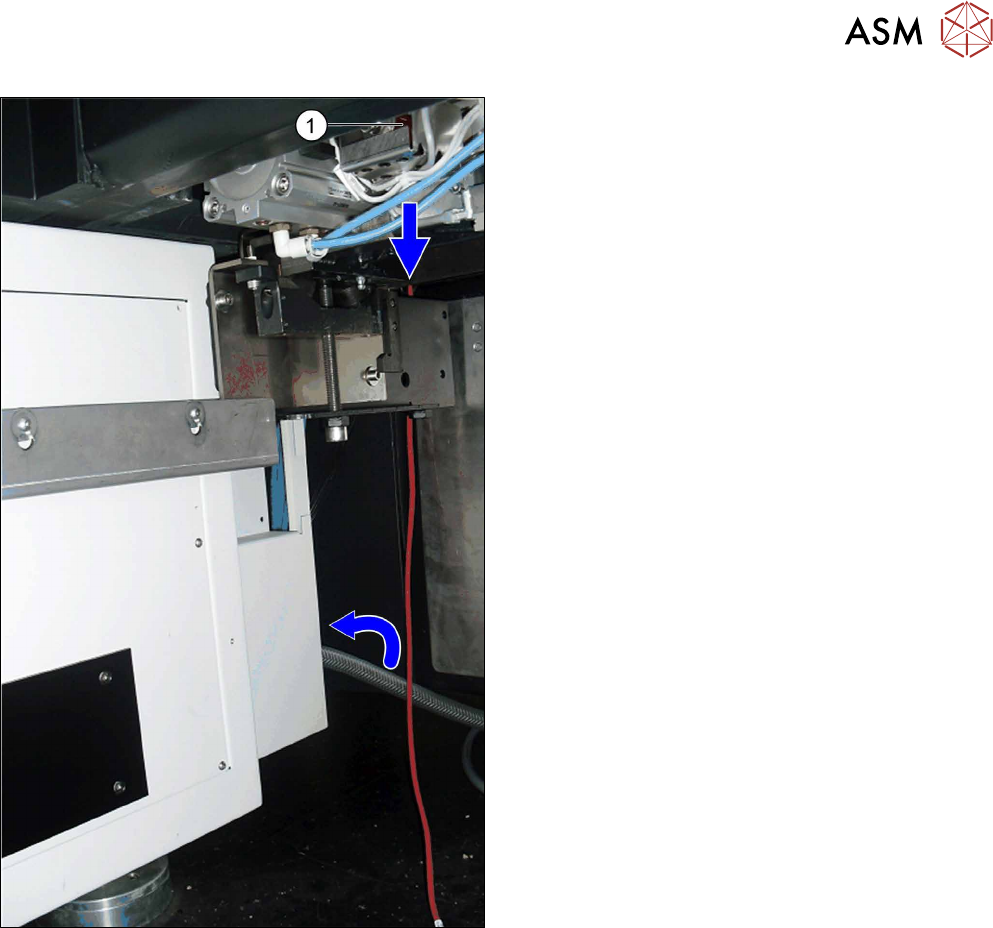
► Run the cable (1) through the rear opening in the
pneumatic unit and towards the front.