00198243-01_AI_BulkFeederX_XS-SX_DE+EN.pdf - 第126页
4 Retrofit kit for X-Series S 4.5 Connecting the BulkFeeder X computer to the station computer 126 Assembly Instructions / Montageanleitung SIPLACE BulkFeeder X Retrofit Kit for SX Series and X Series S 07/2017 4.5.3 Con…
4 Retrofit kit for X-Series S
4.5 Connecting the BulkFeeder X computer to the station computer
Assembly Instructions / Montageanleitung SIPLACE BulkFeeder X Retrofit Kit for SX Series and X Series S 07/2017 125
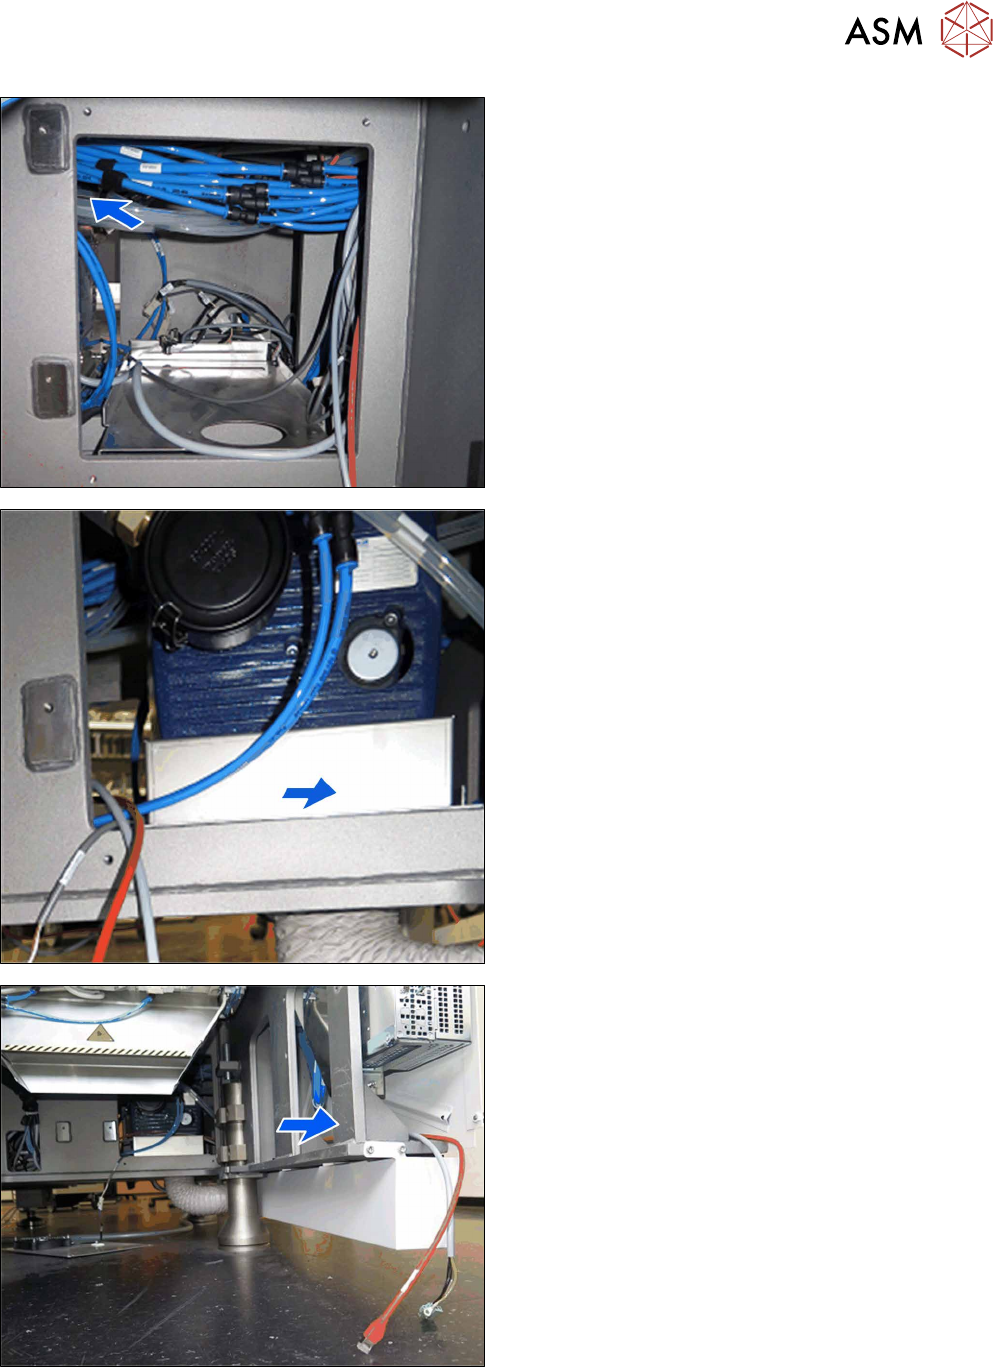
► Run the cable through the bottom of the machine
in placement area 1 to location 4.
► Run the cable out of the bottom of the machine
from location 4 to the side cover.
► Then run the cable behind the side cover from
location 4.
4 Retrofit kit for X-Series S
4.5 Connecting the BulkFeeder X computer to the station computer
126 Assembly Instructions / Montageanleitung SIPLACE BulkFeeder X Retrofit Kit for SX Series and X Series S 07/2017
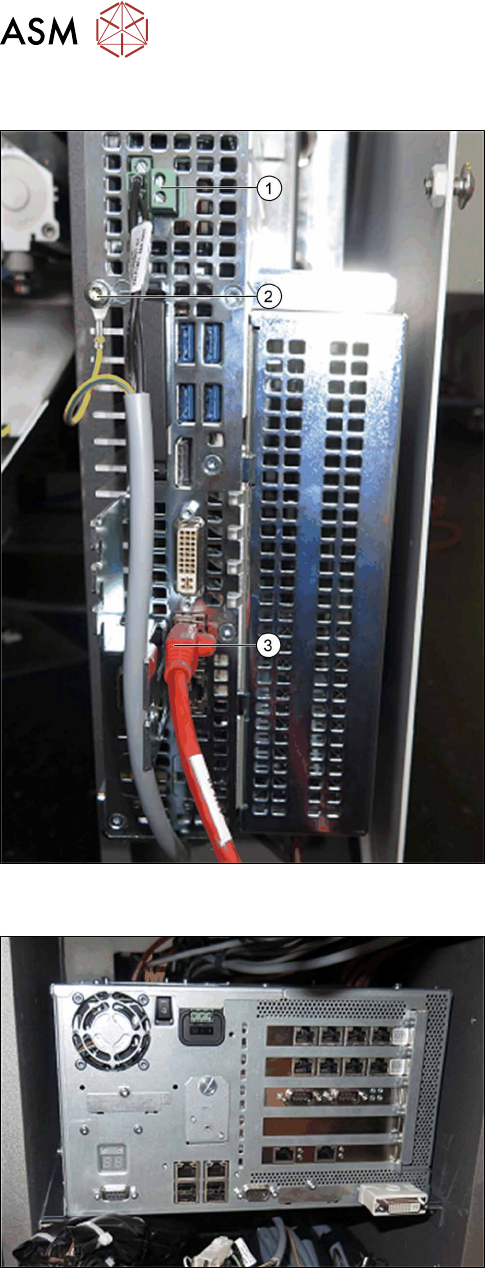
4.5.3 Connecting the cable to the BulkFeeder X computer
► Connect the cable for the power supply (1) and
the grounding (2).
► Connect the LAN cable (3).
4.5.4 Fitting the station computer
► Reposition the station computer on the velcro.
Pay attention to the position of the cable.
4 Retrofit kit for X-Series S
4.5 Connecting the BulkFeeder X computer to the station computer
Assembly Instructions / Montageanleitung SIPLACE BulkFeeder X Retrofit Kit for SX Series and X Series S 07/2017 127
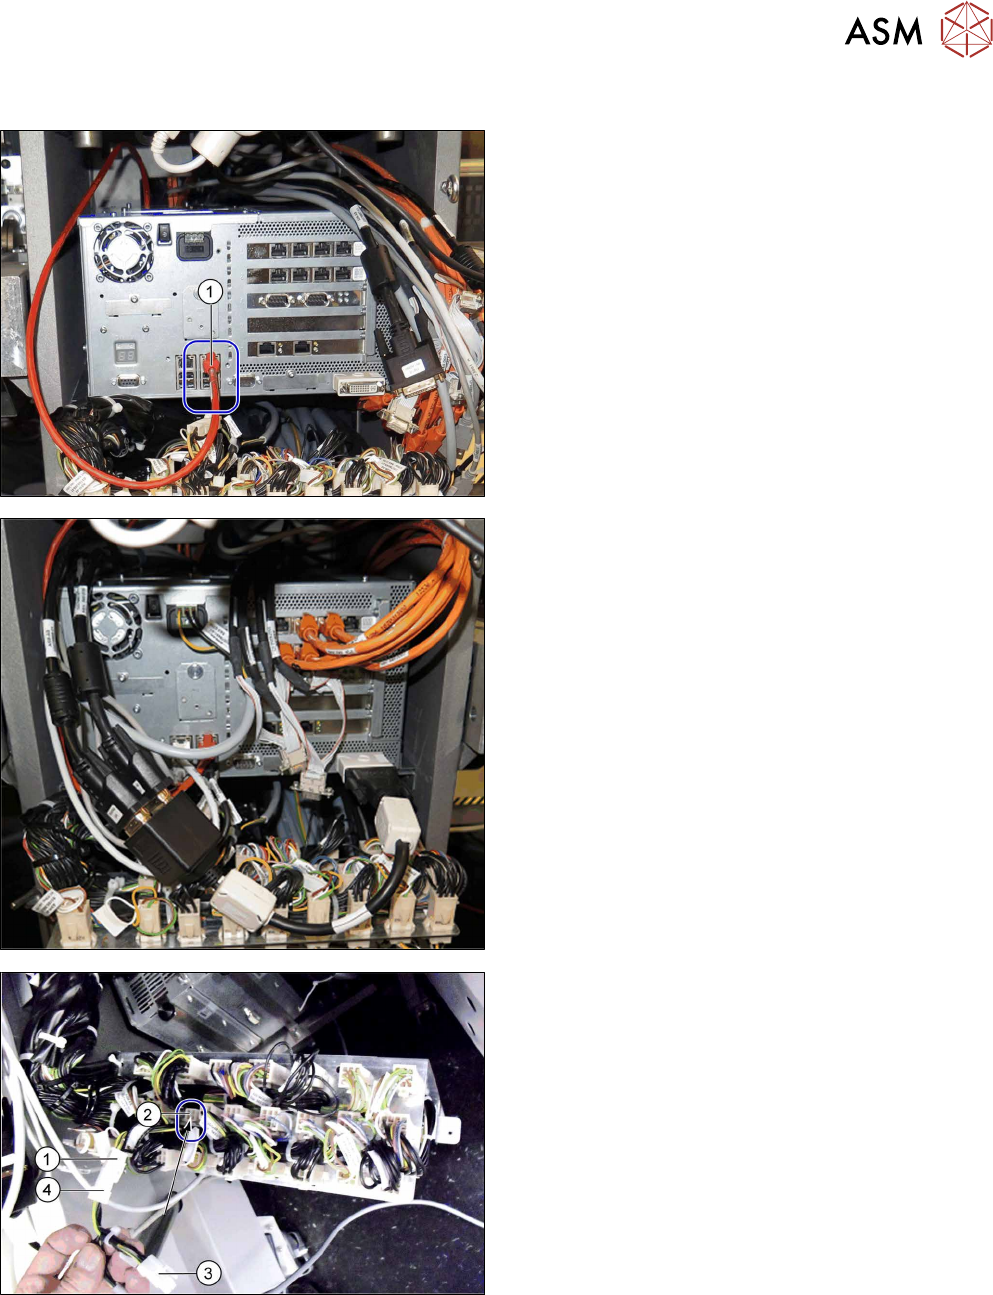
4.5.5 Connecting the cable to the station computer
► Connect the LAN cable from the BulkFeeder X
computer at the position marked (1).
From serial number H001, connect the LAN cable
to the input of the additional LAN card.
► Reconnect all other cables accordingly.
► Unplug the connector X11qa (1) from the cable
03076482-xx at the distributor terminal X11qa
(2).
► Plug the connector X11qa (3) from the adapter
cable 03145801-xx into terminal X11qa (2) from
the distributor.
► Plug the connector X11qa (1) from the cable
03076482-xx to the socket X11qa (4) from the
adapter cable 03145801-xx.