00198243-01_AI_BulkFeederX_XS-SX_DE+EN.pdf - 第107页
3 Retrofit kit for SX-Series 3.4 Inserting the cable into the machine Assembly Instructions / Montageanleitung SIPLACE BulkFeeder X Retrofit Kit for SX Series and X Series S 07/2017 107 3.4.2 Cable for connecting the Bul…
3 Retrofit kit for SX-Series
3.4 Inserting the cable into the machine
106 Assembly Instructions / Montageanleitung SIPLACE BulkFeeder X Retrofit Kit for SX Series and X Series S 07/2017
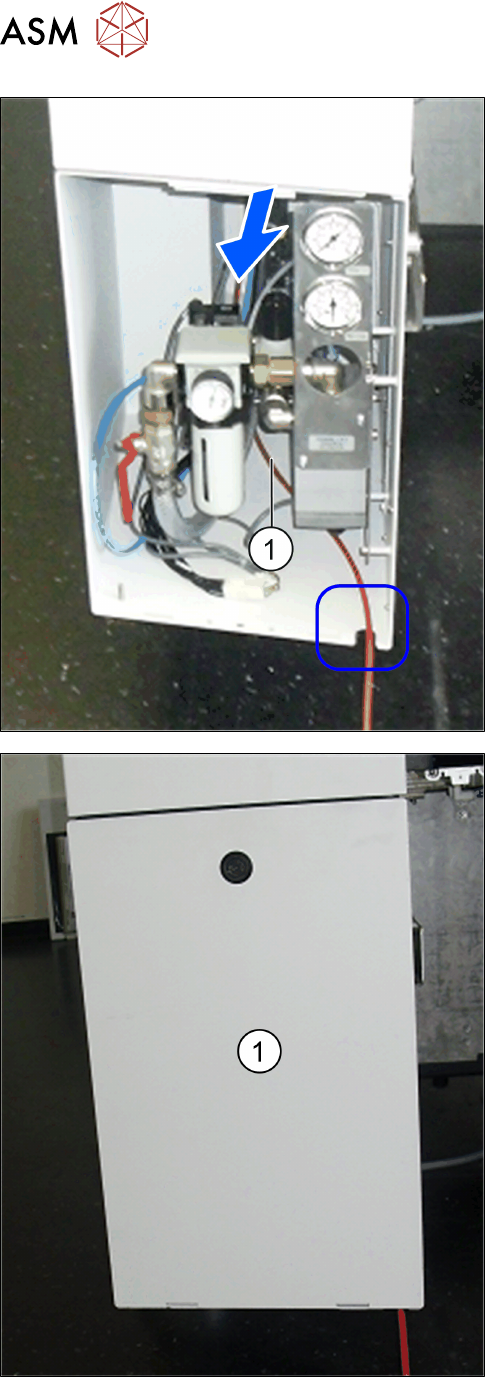
► Run the cable through the bottom recess in the
pneumatic unit.
► Fasten the door of the pneumatic unit (1) again
and relock it.
► Fit the conveyor controller covers again.
3 Retrofit kit for SX-Series
3.4 Inserting the cable into the machine
Assembly Instructions / Montageanleitung SIPLACE BulkFeeder X Retrofit Kit for SX Series and X Series S 07/2017 107
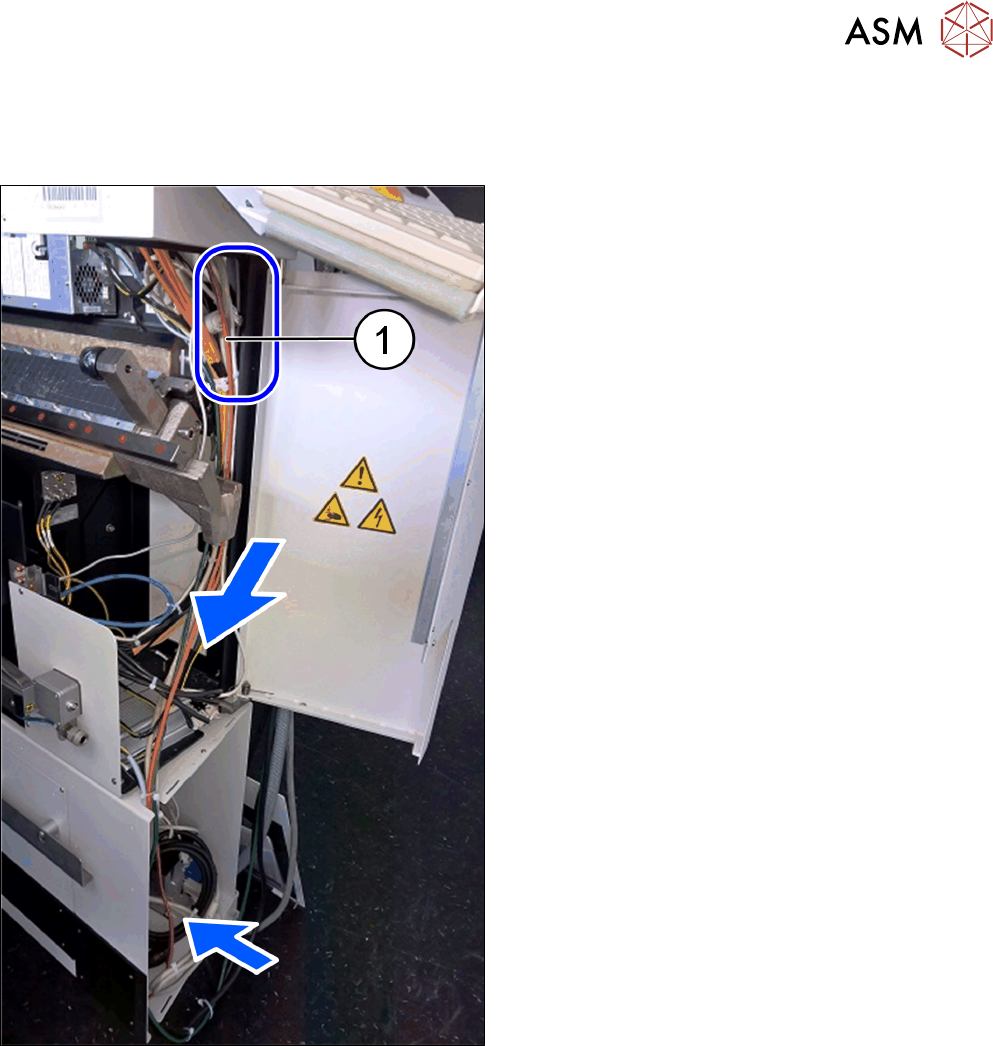
3.4.2 Cable for connecting the BulkFeeder X computer to the station computer
To connect the BulkFeeder X computer to the station computer, you need to run a LAN cable in the
machine at the infrastructure box. To do so, proceed as follows:
► Run the LAN cable (1) from the station computer,
downwards to the BulkFeeder X computer.
3 Retrofit kit for SX-Series
3.5 Connecting the cable
108 Assembly Instructions / Montageanleitung SIPLACE BulkFeeder X Retrofit Kit for SX Series and X Series S 07/2017
3.5 Connecting the cable
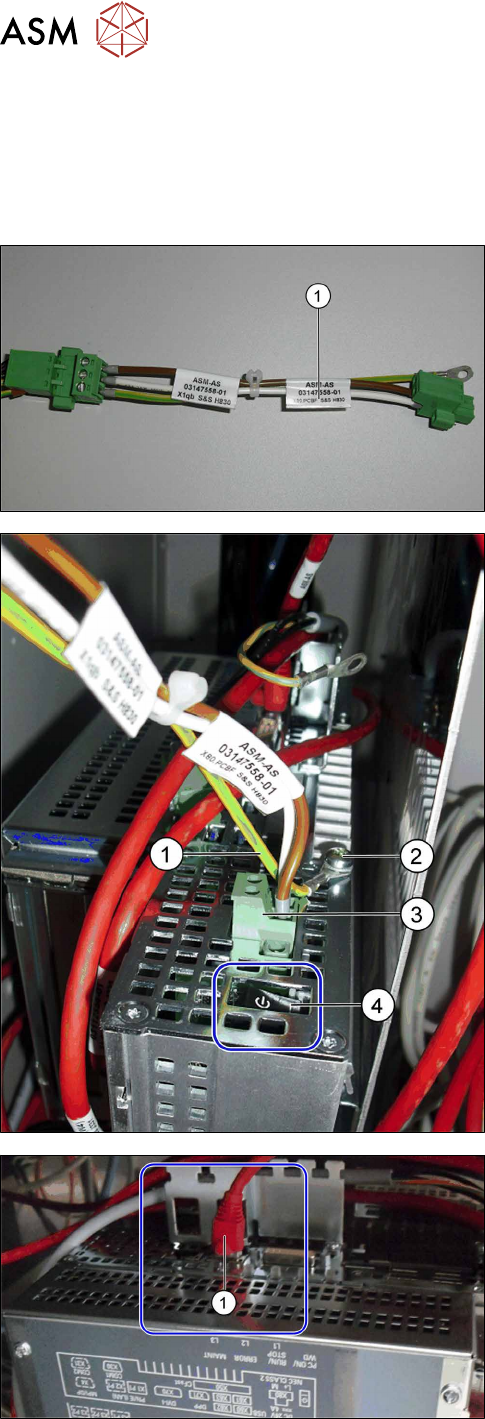
Connecting the BulkFeeder X computer to the station computer
The cable 03068126-xx is located in the infrastructure box of sector 4.
This cable is for the voltage supply of options such as the 3D coplan or the SIPLACE BulkFeeder.
► Connect the adapter 03147558-xx (1) to the
cable 03068126-xx.
► Fasten the yellow/green protective earth con-
ductor from the adapter 03147558-xx (1) to the
BulkFeeder X computer (2).
► Plug the connector into the connection for the
BulkFeeder X computer voltage supply (3).
► Switch the BulkFeeder X computer (4) "on".
► Connect the BulkFeeder X computer to the sta-
tion computer with the LAN cable (1) at the ter-
minal X1P1.