N7201A616E00_0317.pdf - 第184页
NPM-W 2 EJM7DE-MB-02 O-00 Installing suppor t pins (for automatic change) 2 Single conveyor 2 11 10 9 Put the feeder table cover back in its place 14 ENABLING 13 15 ENABLING ● The PCB-support block moves down. Confirm a …
NPM-W2 EJM7DE-MB-02O-00
To
9
8
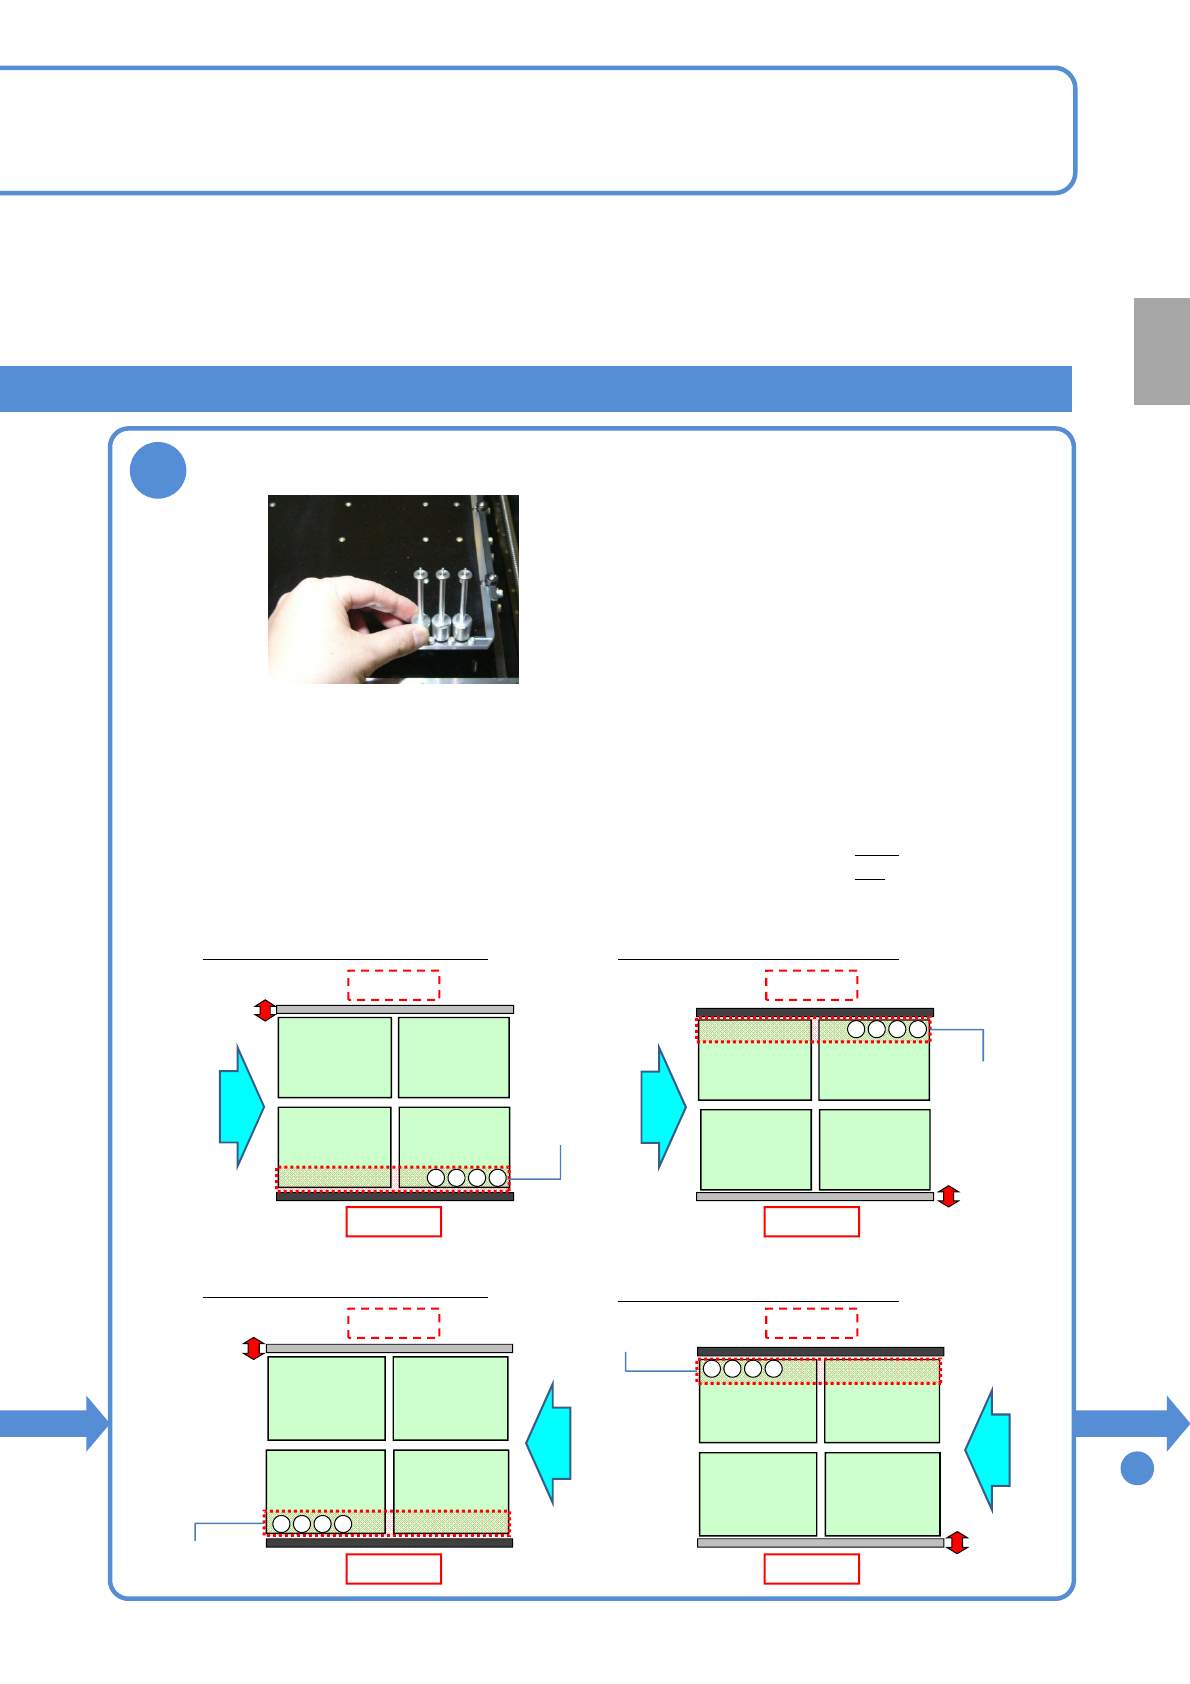
Set support pins to the PCB-support block (for automatic change)
●Make sure to always set support pins to the home position.
(Risk of interference with the conveyor)
●Set the support pins while pressing them against the bolt at the home position.
(They may interfere with vacuumed support pins during arrangement of the pins)
●Change a support pin configuration according to the PCB flow direction.
(To replace the support pins in the shortest period of time)
・When PCB flows left to right: set the pins, starting from the right
・When PCB flows right to left: set the pins, starting from the left
●Set the pins on the fixed rail side only.
■Left right flow
Configuration with the front fixed
Front side
Configuration with the rear fixed
Front side
4321
・・・
4321
・・・
■Right left flow
Configuration with the front fixed
Front side
Configuration with the rear fixed
Front side
4321
・・・
1234
・・・
Rear side Rear side
Rear side Rear side
Fixed rail
Fixed rail
Fixed rail
Fixed rail
PCB flowPCB flow
PCB flow
PCB flow
Home
position
Home
position
Home
position
Home
position
2-5-8-2
Preparation
NPM-W2 EJM7DE-MB-02O-00
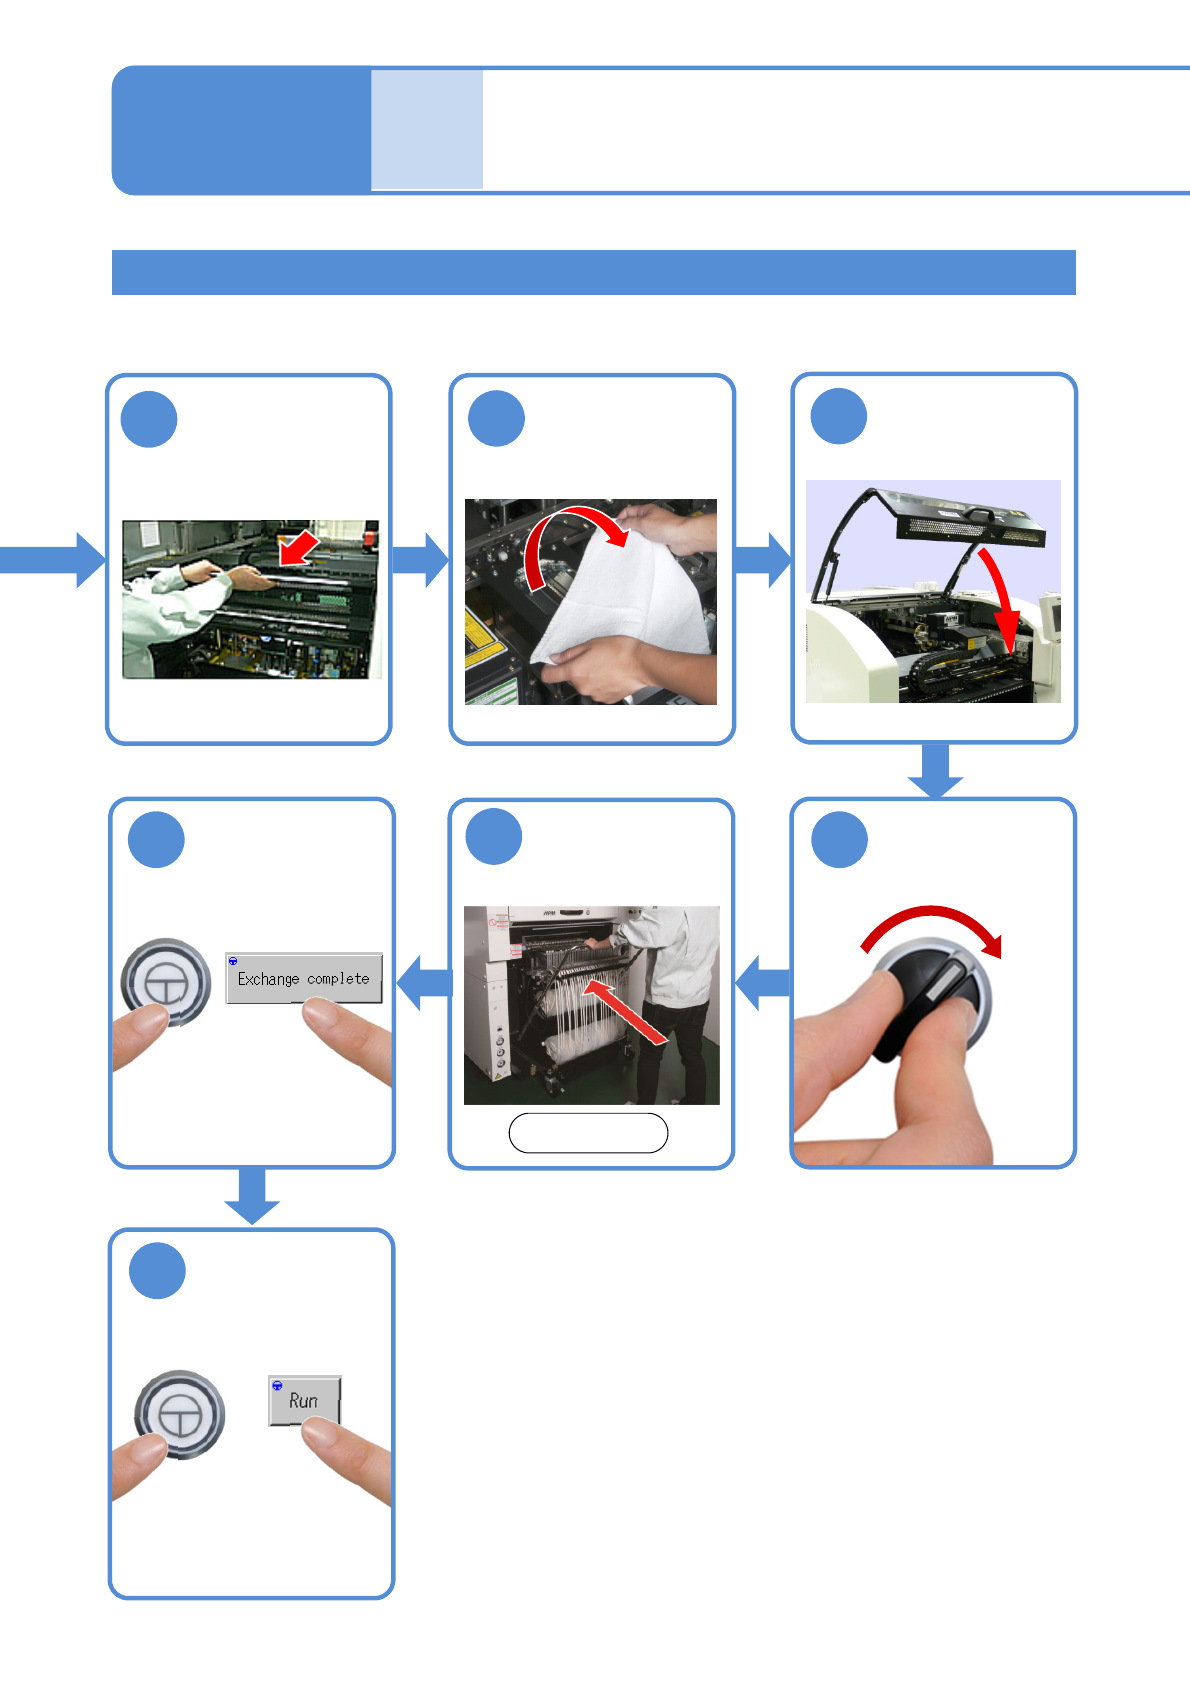
Installing support pins
(for automatic change) 2
Single conveyor 2
11
10
9
Put the feeder
table cover back
in its place
14
ENABLING
13
15
ENABLING
●The PCB-support block
moves down.
Confirm a
message
SERVO
ON
12
2-5-8-3
Attach the feeder
cart
Front side
(→[Maintenance] P.3-2)
Remove the
cloth
Individu-
al
prepara-
tion
Operating procedure
2-5-8
NPM-W2 EJM7DE-MB-02O-00
Dual conveyor 1
Follow the same steps as
1 7
1
those through used
for the single conveyor
To
2
2-5-8-4
Preparation