00197042-04_SM_X-Serie-S_Customer_EN.pdf - 第26页
2 Basic Machine 2.2 Replacing the gas pressure shock absorber on the cover 26 Service Manual SIPLACE X-Serie S 06/2019 2.2 Replacing the gas pressure shock absorber on the cover NOTICE Loose screwed fixtures ► Also obser…
2 Basic Machine
2.1 Overview of X-Series S Machines
Service Manual SIPLACE X-Serie S 06/2019 25
2 Basic Machine
DANGER
Observe User Manual
► Please observe the safety instructions in the user manual for all work!
2.1 Overview of X-Series S Machines
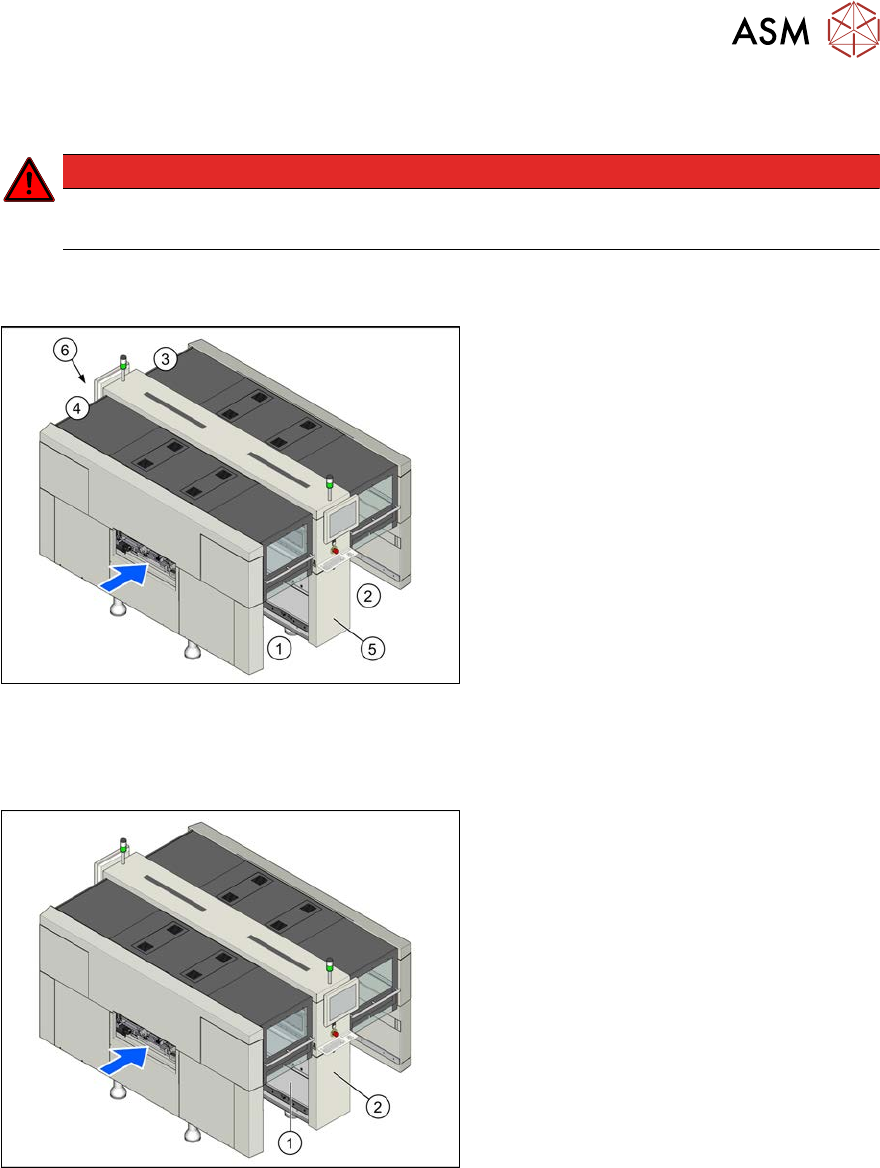
Fig.7: Machine overview (example of SIPLACE X3 S, X4 S
shown)
1. Location 1
2. Location 2
3. Location 3
4. Location 4
5. (M)GCU, BoxPC, I/O modules
6. Power supply
2.1.1 Serial Number of Module
Fig.8: Typeplate (example of SIPLACE X3S, X4S shown)
The serial number of your placement
machine can be found at location1, on the
typeplate(1) and behind the distributor
door(2), on the right, above the distributor.
2 Basic Machine
2.2 Replacing the gas pressure shock absorber on the cover
26 Service Manual SIPLACE X-Serie S 06/2019
2.2 Replacing the gas pressure shock absorber on the cover
NOTICE
Loose screwed fixtures
► Also observe section 2.2.1 "Troubleshooting – Loose Screwed Fixtures on the Gas
Pressure Shock Absorbers" [}28].
Parts, equipment and tools
Fig.9: Gas pressure shock absorber D3D3B90-135-430-004/230N [03086743-xx]
●
Gas pressure shock absorber D3D3B90-135-430-004/230N [03086743-xx] (replaces:
[03057763‑xx])
●
Loctite 638 [00317731-xx], if required (for loose screwed fixtures)
Overview
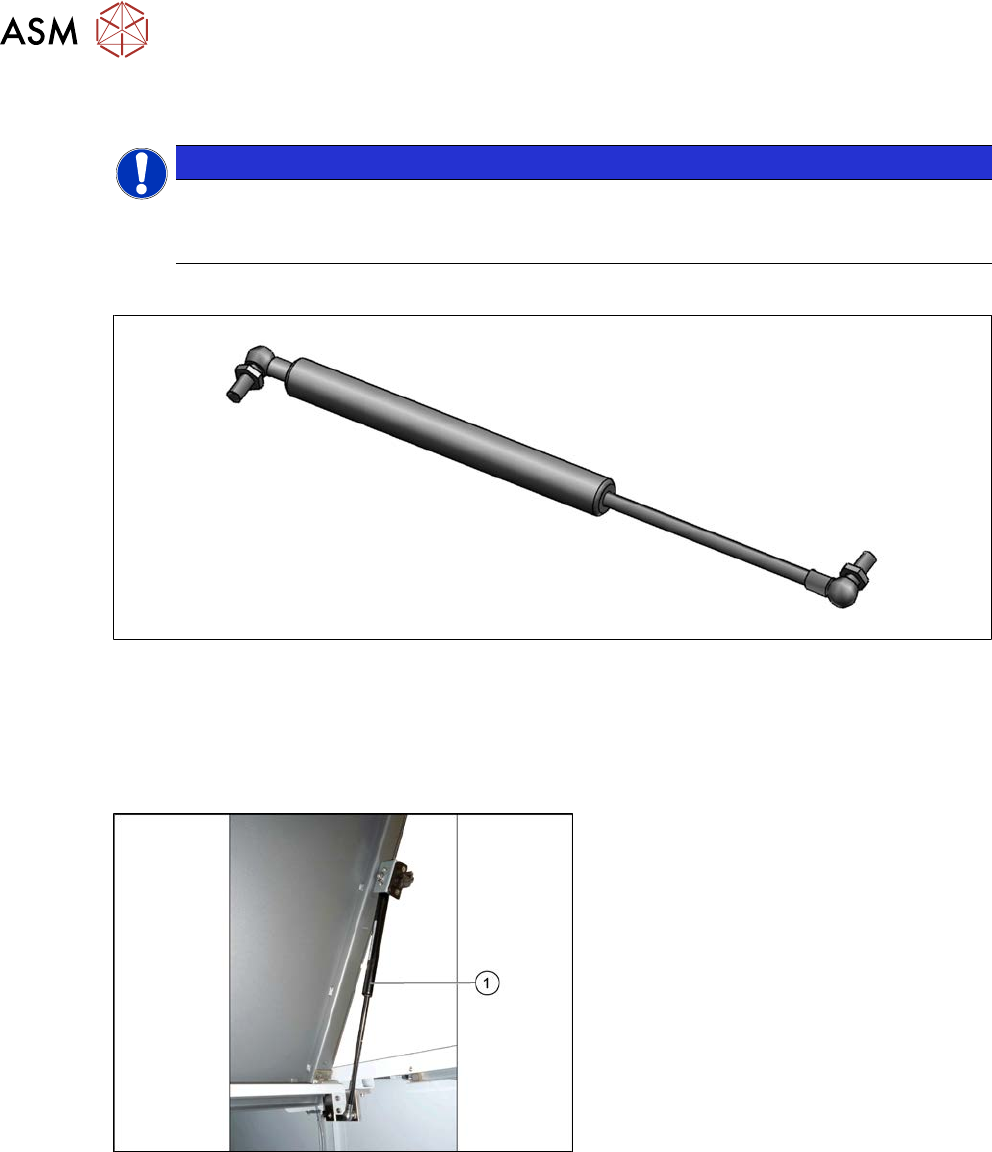
Fig.10: Gas pressure shock absorber
1. Gas pressure shock absorber on the
cover
(two per cover)
2 Basic Machine
2.2 Replacing the gas pressure shock absorber on the cover
Service Manual SIPLACE X-Serie S 06/2019 27
Removal
► Switch off the machine, disconnect it from the power supply and secure it to prevent
unauthorized reactivation.
1.2 "Preparatory work..." [}16]
► Open the cover and fix it in a position which gives you best access for working and which en-
sures that it cannot close itself on its own.
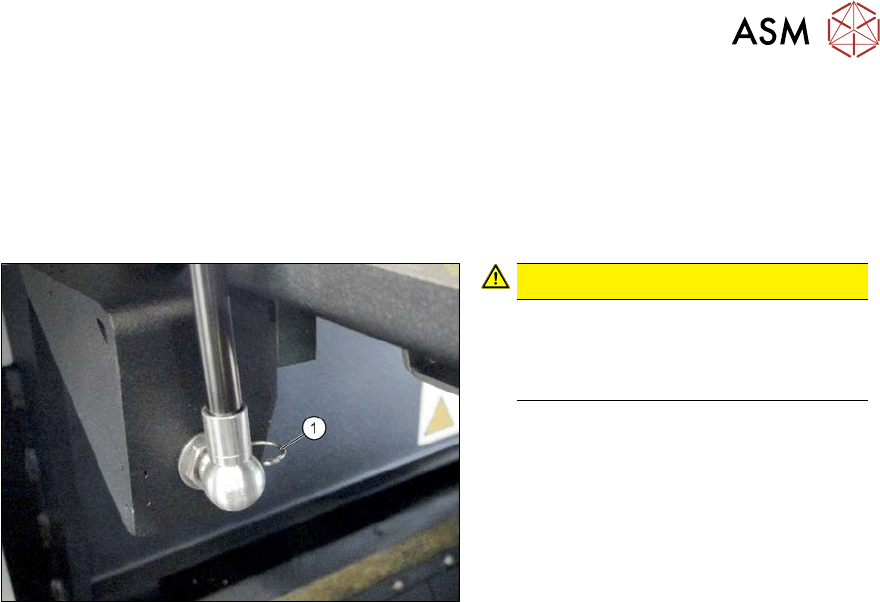
Fig.11: Circlip
CAUTION!
Fasten the cover!
As soon as one circlip is released, the
cover can fall down if not sufficiently
fixed.
.
► Release and remove the circlip (1) on
the bottom holder of the gas pressure
shock absorber.
► Repeat this on the top holder of the gas
pressure shock absorber.
► Remove the gas pressure shock absorber from the spherical head on the top and bottom
holder.
Installation
► Follow the removal instructions in reverse order for installation. Also observe the following
instructions:
► Observe the correct installation direction for the gas pressure shock absorber.
► You may have to compress the gas pressure shock absorber slightly when installing it.
► Fix the gas pressure shock absorber into place with the circlips.
► Check the cover for ease of movement and adjust if required.
2.4 "Setting the Covers" [}31]