00197042-04_SM_X-Serie-S_Customer_EN.pdf - 第27页
2 Basic Machine 2.2 Replacing the gas pressure shock absorber on the cover Service Manual SIPLACE X-Serie S 06/2019 27 Removal ► Switch off the machine, disconnect it from the power supply and secure it to prevent unauth…
2 Basic Machine
2.2 Replacing the gas pressure shock absorber on the cover
26 Service Manual SIPLACE X-Serie S 06/2019
2.2 Replacing the gas pressure shock absorber on the cover
NOTICE
Loose screwed fixtures
► Also observe section 2.2.1 "Troubleshooting – Loose Screwed Fixtures on the Gas
Pressure Shock Absorbers" [}28].
Parts, equipment and tools
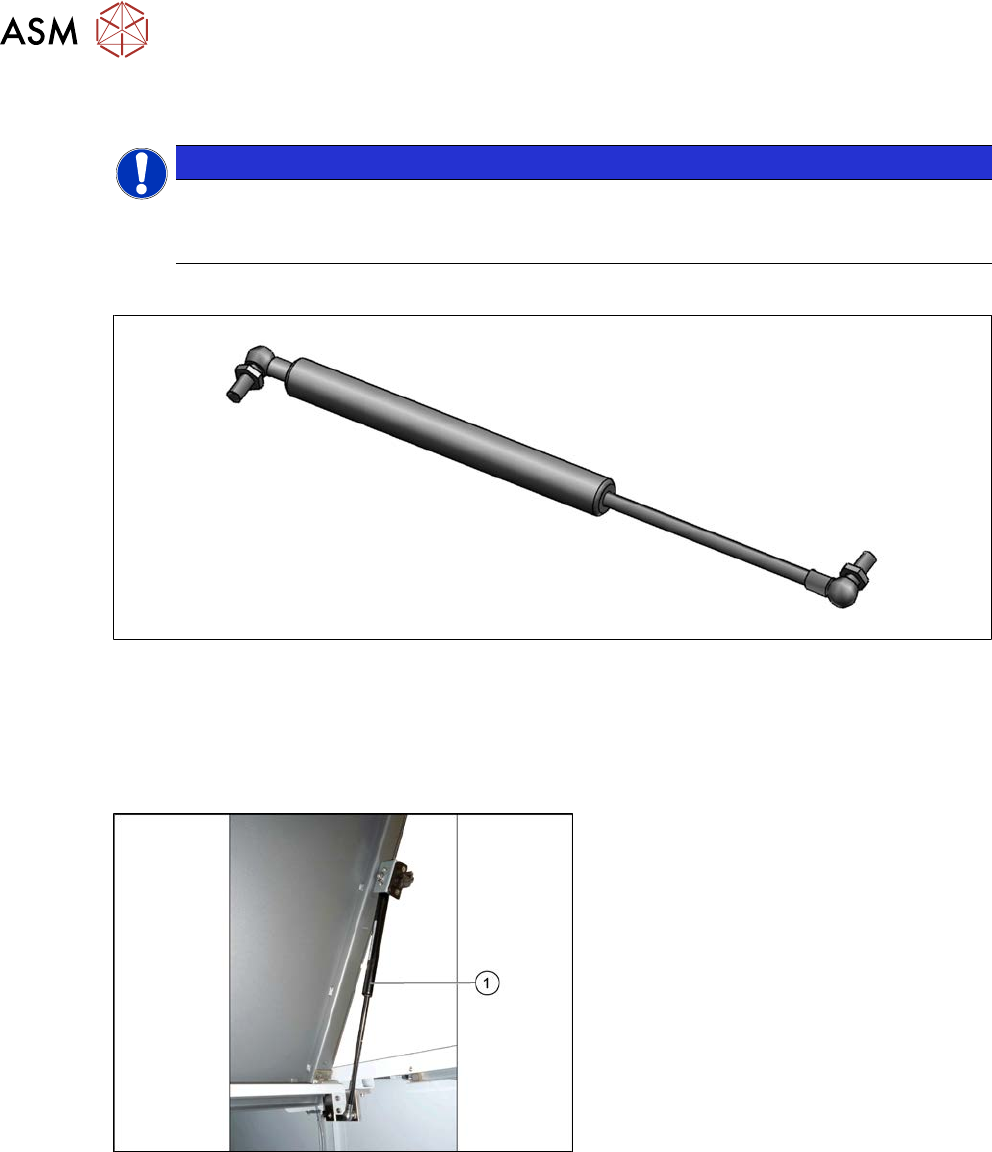
Fig.9: Gas pressure shock absorber D3D3B90-135-430-004/230N [03086743-xx]
●
Gas pressure shock absorber D3D3B90-135-430-004/230N [03086743-xx] (replaces:
[03057763‑xx])
●
Loctite 638 [00317731-xx], if required (for loose screwed fixtures)
Overview
Fig.10: Gas pressure shock absorber
1. Gas pressure shock absorber on the
cover
(two per cover)

2 Basic Machine
2.2 Replacing the gas pressure shock absorber on the cover
Service Manual SIPLACE X-Serie S 06/2019 27
Removal
► Switch off the machine, disconnect it from the power supply and secure it to prevent
unauthorized reactivation.
1.2 "Preparatory work..." [}16]
► Open the cover and fix it in a position which gives you best access for working and which en-
sures that it cannot close itself on its own.
Fig.11: Circlip
CAUTION!
Fasten the cover!
As soon as one circlip is released, the
cover can fall down if not sufficiently
fixed.
.
► Release and remove the circlip (1) on
the bottom holder of the gas pressure
shock absorber.
► Repeat this on the top holder of the gas
pressure shock absorber.
► Remove the gas pressure shock absorber from the spherical head on the top and bottom
holder.
Installation
► Follow the removal instructions in reverse order for installation. Also observe the following
instructions:
► Observe the correct installation direction for the gas pressure shock absorber.
► You may have to compress the gas pressure shock absorber slightly when installing it.
► Fix the gas pressure shock absorber into place with the circlips.
► Check the cover for ease of movement and adjust if required.
2.4 "Setting the Covers" [}31]
2 Basic Machine
2.2 Replacing the gas pressure shock absorber on the cover
28 Service Manual SIPLACE X-Serie S 06/2019
2.2.1 Troubleshooting – Loose Screwed Fixtures on the Gas Pressure Shock
Absorbers
Problem
Due to loosened screwed fixtures on the gas pressure shock absorbers, there is a risk of a gantry
crash.
Cause
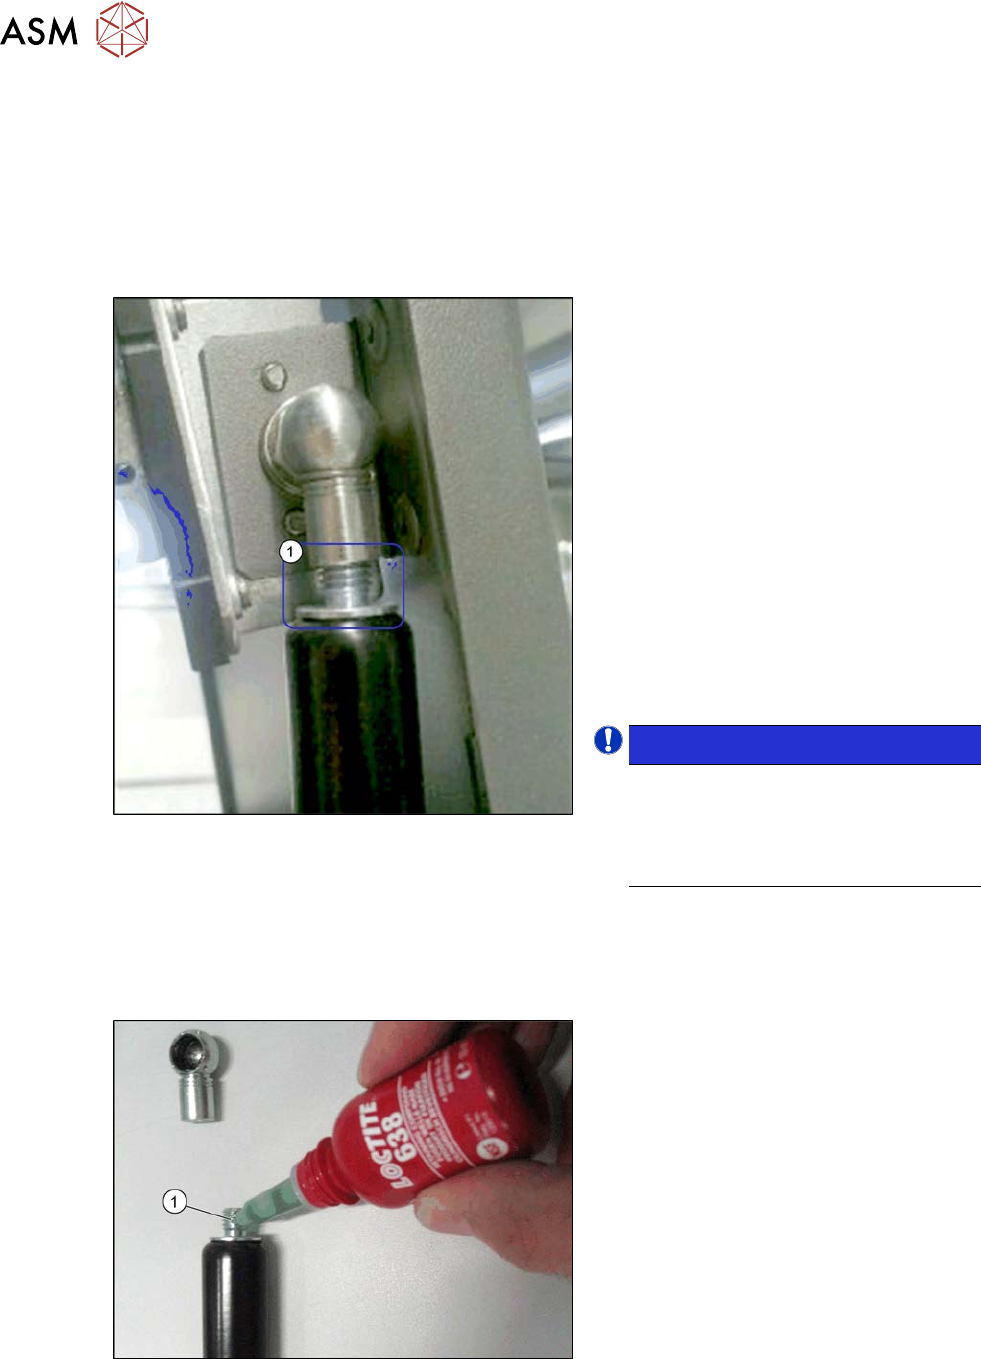
Fig.12: Screwed fixture
In older gas pressure shock absorber ver-
sions with FS01, the screwed fixtures(1)
between the gas pressure shock absorber
and the end pieces could loosen.
SX1/SX2/DX1/DX2:
Gas pressure shock absorbers 08/19 175N
[03057763‑01]
SIPLACE SX4/DX4/X-Series S:
Gas pressure shock absorbers
D3D3B90-135-430-004/230N [03086743‑01]
Machines affected:
SX1/SX2, DX1/DX2: K001G- to K800G-,
L001G- to L059G-, L200G- to L499G-
SX4/DX4: F001- to F186-
X-Series S: G001- to G102-
NOTICE!
This problem no longer exists in ma-
chines manufactured since week
30/2013 or in newer versions of the
gas pressure shock absorbers with
FS02.
.
Parts, equipment and tools
●
Loctite 638 [00317731-xx], if required
Troubleshooting for FS01
Fig.13: Fix the screws with adhesive
► Check the screwed fixtures on the gas
pressure shock absorbers.
► If the screwed fixtures have loosened,
proceed as follows:
► Remove the gas pressure shock ab-
sorber (see previous chapter).
► Dismantle the two end pieces.
► Make sure that the thread is free of
grease and dust.
► Coat the thread of the gas pressure
shock absorber with Loctite 638 and
then screw the end pieces back onto
the gas pressure shock absorber.
► Fit the gas pressure shock absorber
again (see previous chapter).