APPENDIX.pdf - 第31页
Appendix B 3D T r ouble Shooting Guide B-9 Figur e B-9. "Mark3TSG" scr een As shown in Figure B-9, ‘Hel p’ consists of 3 parts. 1. Error code: error code number and error message. 2. Problem: shows the causes o…
Samsung Component Placer CP-45F(V)/FS Operations Manual
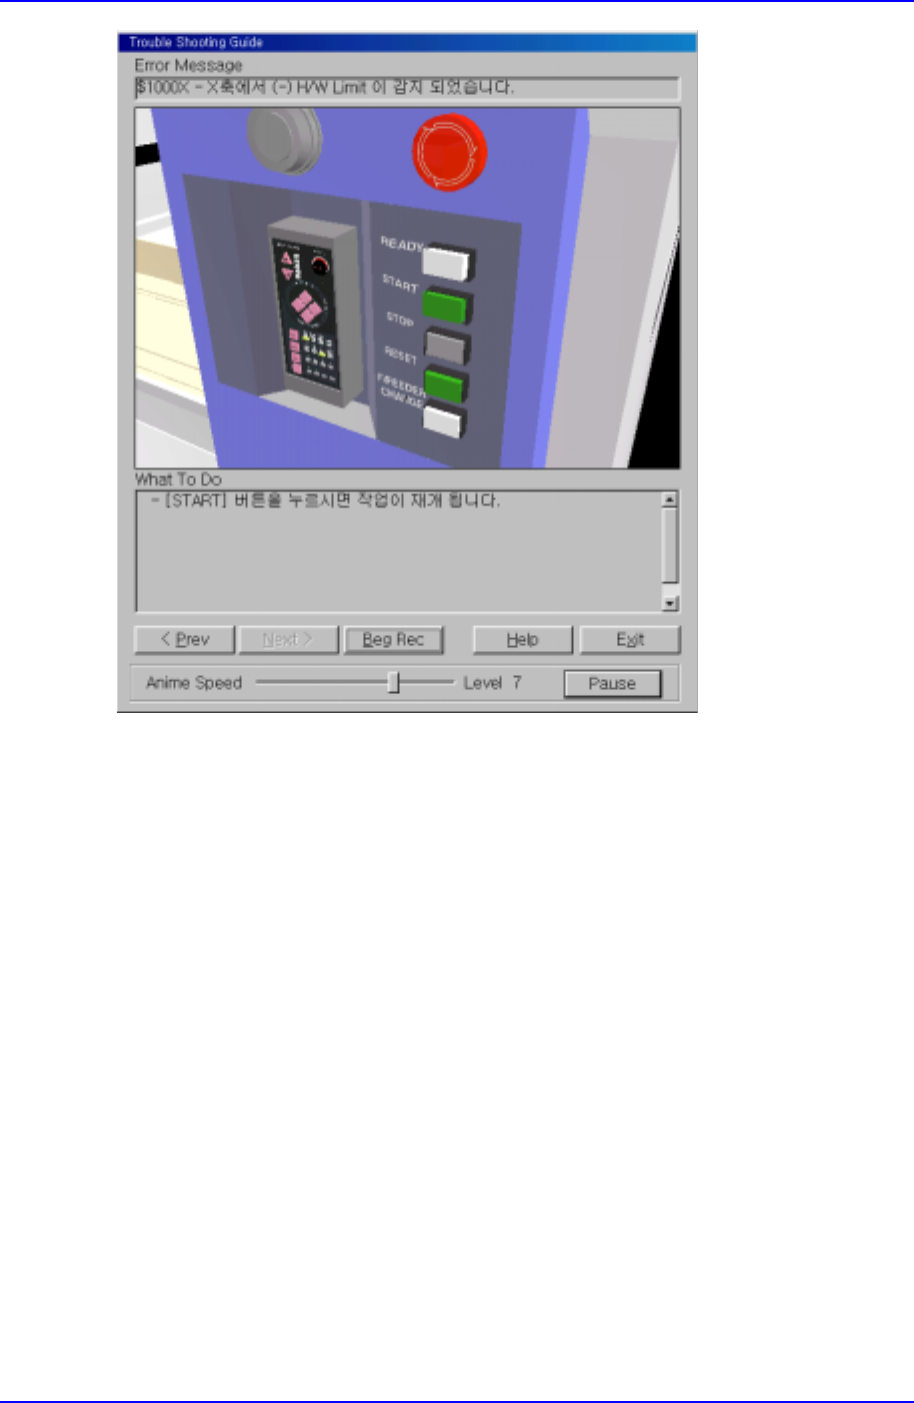
B-8
Figure B-8. "Mark3TSG" screen
B.4. Using Help
Mark3TSG provides the 'Help' function that gives information on the error being
remedied. When the Help button in Trouble Shooting Guide in Fig. B-8 is clicked on, a
Help screen showing the information related to the present error appears as in Fig. B-9.
Through 'Help', the following can be checked.
1. Explanation on the present error.
2. Searching of the contents or index of the solutions for errors provided by Mark3TSG.
3. Finding the explanation on the solution for an error through subject searching.
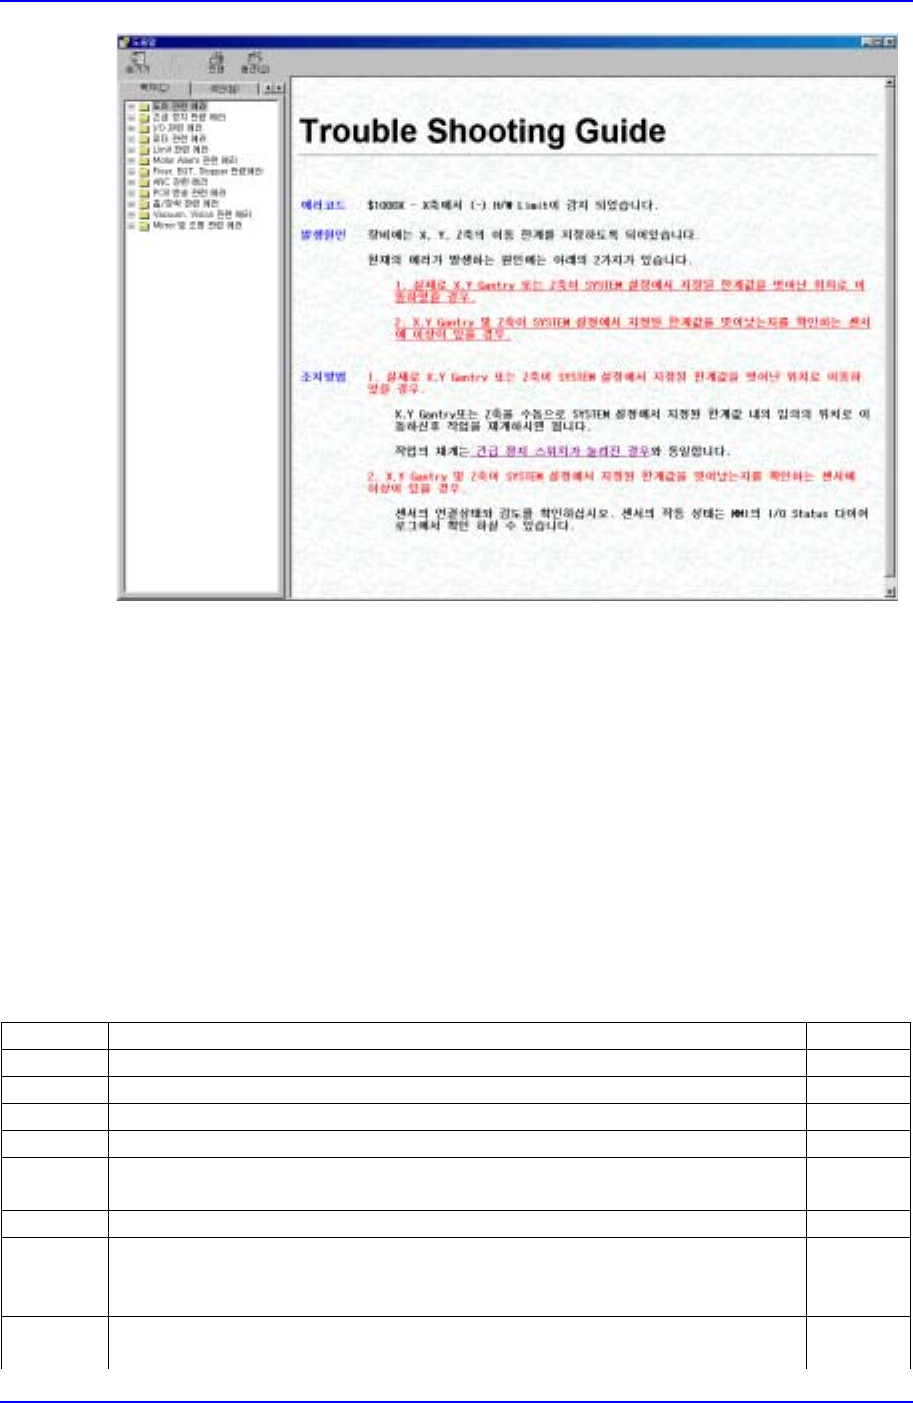
Appendix B 3D Trouble Shooting Guide
B-9
Figure B-9. "Mark3TSG" screen
As shown in Figure B-9, ‘Help’ consists of 3 parts.
1. Error code: error code number and error message.
2. Problem: shows the causes of the error.
3. Solution: shows the solution for each cause of the error.
Clicking on the underlined text in ‘Help’ takes the user to the related content. For
example, when the underlined text of a problem in Figure B-9 is clicked on, the screen
moves to the solution for the corresponding problem.
B.5. Error codes and descriptions applied in Mark3TSG
Error Code $0002 Link
Step Message
E - The front emergency switch is pressed.
Step1 - Press the STOP button (Stop the buzzer sound).
Step2 - Open the equipment door.
Step3 - Solve the problem that caused you to press the emergency switch.
- Then click on the NEXT button.
Step4 - Close the equipment door.
Step5 1. Cancel the emergency switch by turning it.
2. Press the RESET button.
- Then click on the NEXT button.
Step6 1.Turn on the power for motor.
2. Press the READY button.

Samsung Component Placer CP-45F(V)/FS Operations Manual
B-10
- Then click on the NEXT button.
Step7 1. Select the HOME mode by using the MODE button in the teaching box.
2. Turn off all the LEDs by using the AXIS button.
3. Press the HOME START button.
- Then click on the NEXT button.
Step8 - Click on START or CONTINUE on MMI
… 'START': starts operation with a new PCB.
… 'CONTINUE': continues at the point where the operation stopped.
Step9 - Press the START button to resume operation.
Error Code $0003 Link
Step Message
E - The rear emergency switch is pressed.
Step1 - Press the STOP button. (Stop the buzzer sound).
Step2 - Open the equipment door.
Step3 - Solve the problem that caused you to press the emergency switch.
- Then click on the NEXT button.
Step4 - Close the equipment door.
Step5 1. Cancel the emergency switch by turning it.
2. Press the RESET button.
- Then click on the NEXT button.
Step6 1. Turn on the power for motor.
2. Press the READY button.
- Then click on the NEXT button.
Step7 1. Select the HOME mode by using the MODE button in the teaching box.
2. Turn off all the LEDs by using the AXIS button.
3. Press the HOME START button.
- Then click on the NEXT button.
Step8 - Click on START or CONTINUE on MMI.
… 'START': starts operation with a new PCB.
… 'CONTINUE': continues at the point where the operation stopped.
Step9 - Press the START button to resume operation.
Error Code $0004 Link
Step Message
E - The MOTOR FREE switch in the teaching box is pressed.
Step1 - Press the STOP button. (Stop the buzzer sound).
Step2 - Open the equipment door.
Step3 - Solve the problem that caused you to press the emergency switch.
- Then click on the NEXT button.
Step4 - Close the equipment door.
Step5 1. Press the RESET button.
- Then click on the NEXT button.
Step6 1. Turn on the power for motor.
2. Press the READY button.
- Then click on the NEXT button.
Step7 1. Select the HOME mode by using the MODE button in the teaching box.
2. Turn off all the LEDs by using the AXIS button.
3. Press the HOME START button.
- Then click on the NEXT button.