晶圆测试说明书Cascade-11861-6-Manual.pdf - 第56页
32 • Summit 11K/12K Probe Station User’ s Guide 2. Remove the (2) #6 thumbscr ews from the back cover ( fig. 18 ) . Set aside for use in a later step. 3. Slide the back cover off by moving it toward the rear of the stati…
Chapter 3: Installing •
31
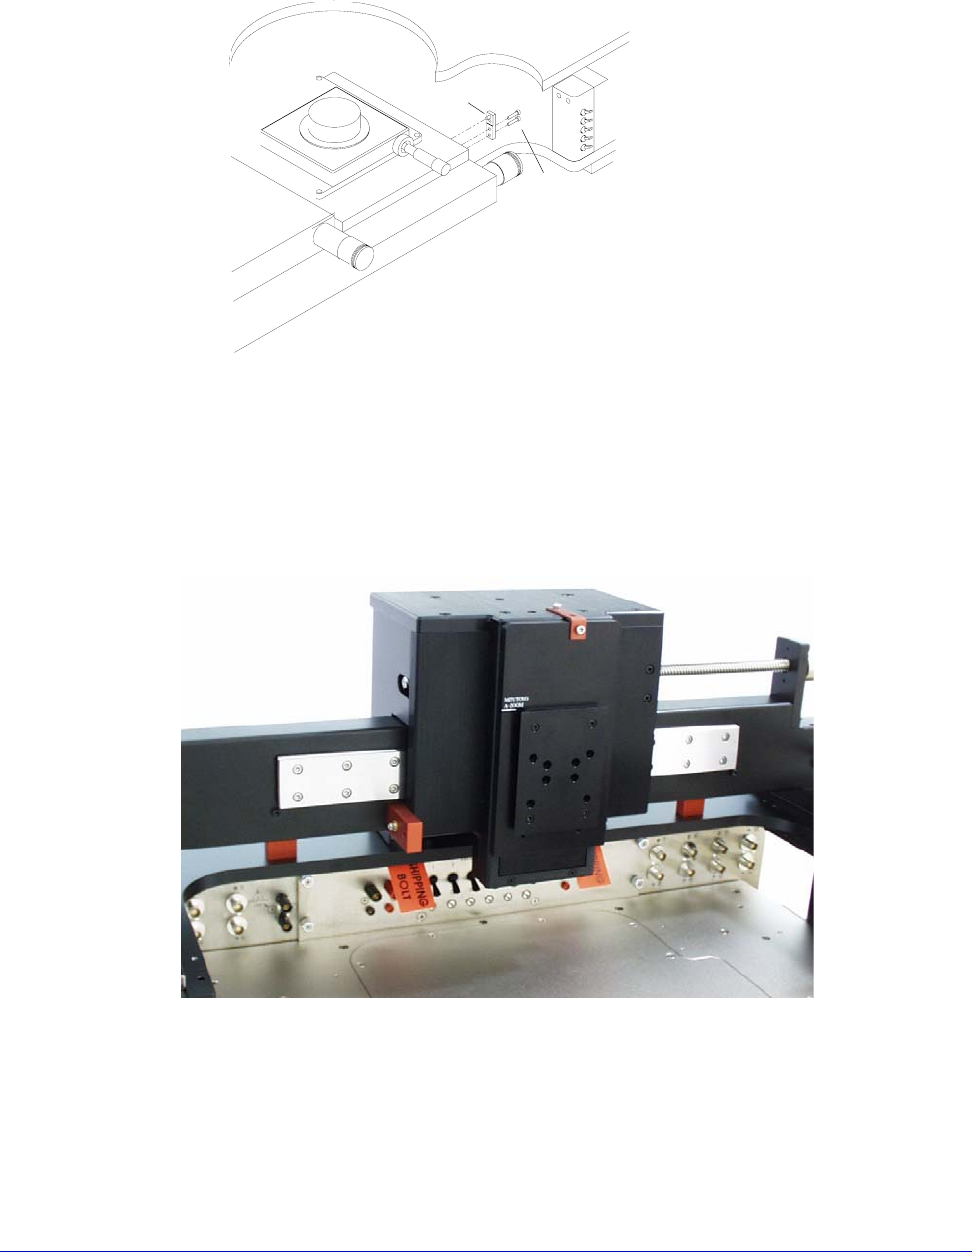
To remove the x-y stage shipping restraint
1. Unscrew the (2) #8 screws holding the X-Y stage shipping restraint (marked
with a red tag) and remove (fig. 16).
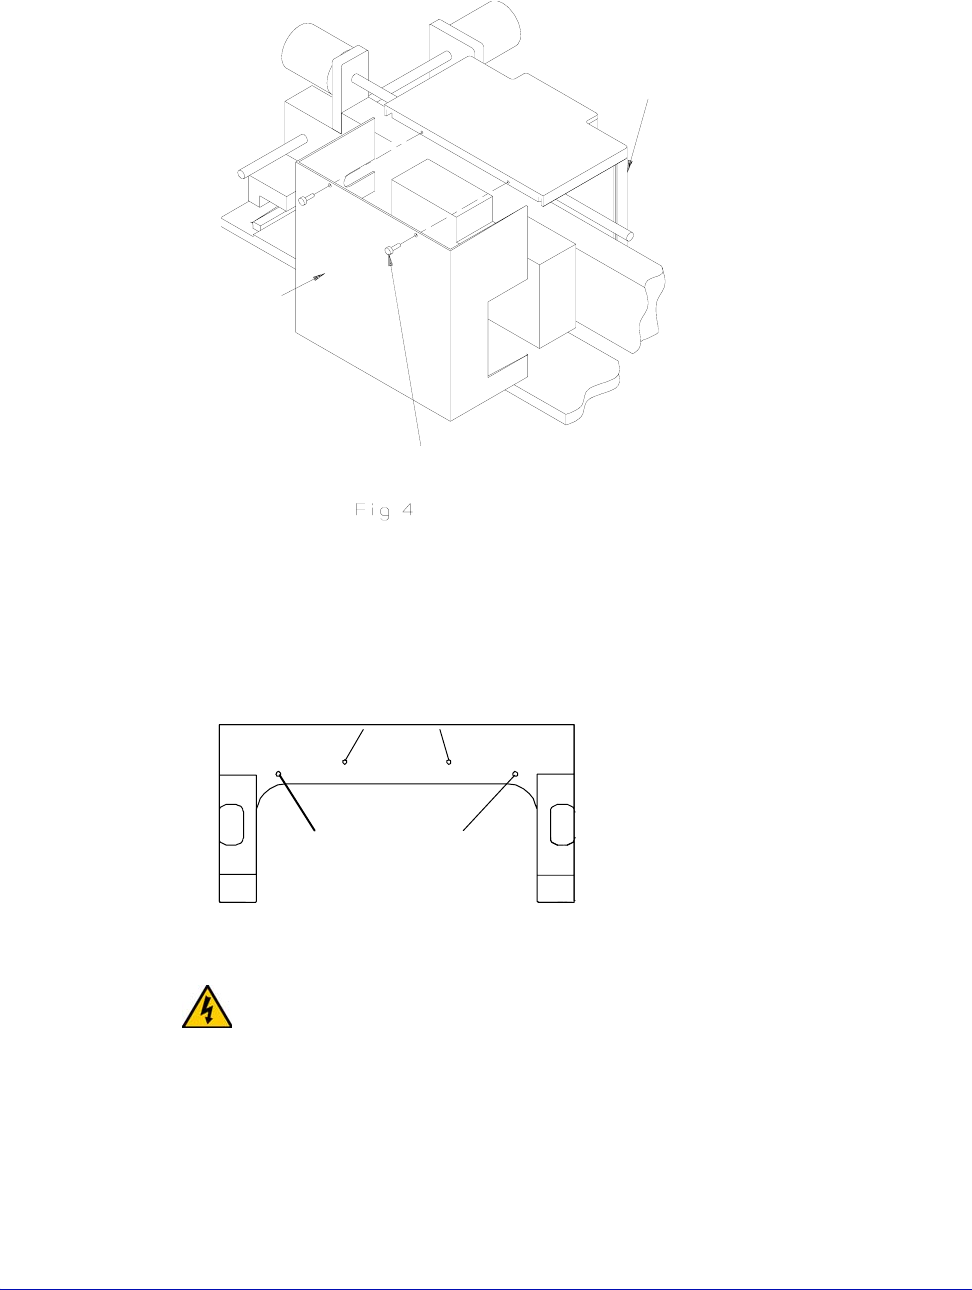
LARGE-AREA MICROSCOPE BRIDGE MOUNT
To remove the optics bridge mount shipping restraints
The optics bridge has six shipping restraints: two in the front, two in the back, and
two on the counterbalance. To remove them, you need a 9/64-inch hex wrench.
To remove the shipping blocks and spacers
1. With the 9/64-inch hex wrench, remove the two #8-32 screws securing the
shipping bracket to the front of the lift plate and the top plate (fig. 17). Save
the screws.
Fig. 16. X-y stage shipping restraint.
X-Y stage
shipping restraint
Capscrews
Fig. 17. Bridge shipping restraints.
32
• Summit 11K/12K Probe Station User’s Guide
2. Remove the (2) #6 thumbscrews from the back cover (fig. 18). Set aside for use
in a later step.
3. Slide the back cover off by moving it toward the rear of the station (fig. 18).
4. With the 9/64-inch hex wrench, remove the (2) #8 screws that hold the
counterbalance located under the rail plate (fig. 19).
WARNING
The counterbalance is heavy. Do not lift it by putting your hands on the
counterbalance itself. Otherwise, you could smash your fingers. Instead, lift the
counterbalance by pressing down on the microscope mounting plate and remove
the two restraints under the counterbalance.
5. Press down on the microscope mounting plate (fig. 17 on p. 31) to raise the
counterbalance about an inch. Hold the mounting plate down at the same
time you remove the shipping spacers from underneath the counterbalance.
See figure 20 for the location of the counterbalance spacers.
Fig. 18. Back cover removal.
Back
Thumb Screw
Front
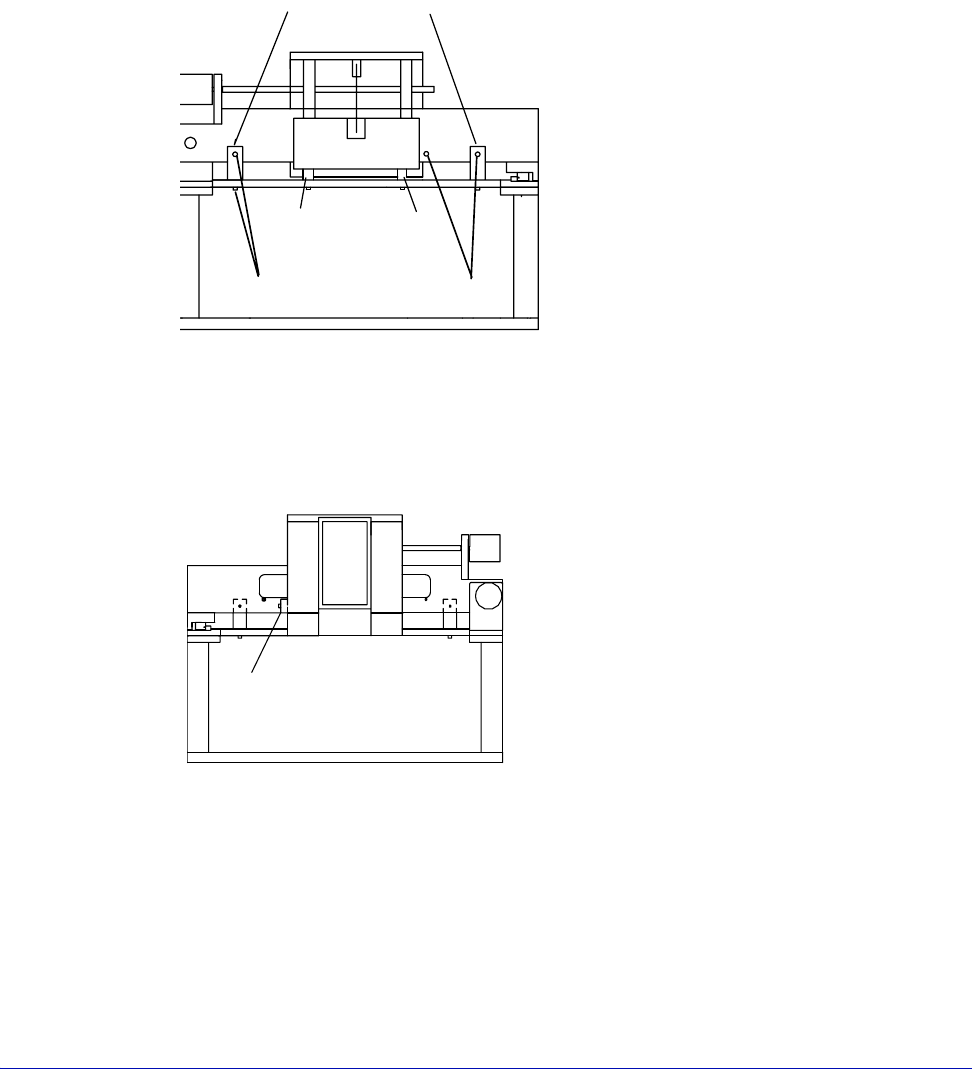
Fig. 19. Screw removal on the rail plate (bottom view).
Screws to hold the
optics bridge mount
shipping restraints
Screws to hold the
counterbalance
Chapter 3: Installing •
33
6. Slowly raise the microscope mounting plate to return the counterbalance to a
resting position.
7. Replace the back cover by sliding it into the slots in the top and secure the
cover with the (2) #6 thumb screws set aside in step two. Make sure the front
edge of the back cover slides into the slots in the front plate.
8. Use the 9/64-inch hex wrench to remove the (2) #8 screws (on the underside
of the rail plate) which hold the shipping blocks (fig. 20).
9. Use the 9/64-inch hex wrench to remove the (2) #8 screws holding the same
two shipping blocks to the beam, as shown in figure 20.
10.Use the 9/64-inch hex wrench to remove the (2) #8 screws holding the third
shipping block (fig. 20 and fig. 21) between the front plate and beam.
Save all shipping blocks and #8 screws with the rest of the packing materials.
HIGH-STABILITY MICROSCOPE BRIDGE MOUNT
To remove the optics bridge mount shipping restraints
This step requires a ¼-inch hex wrench.
Fig. 20. Shipping blocks and counterbalance spacers (rear view).
Shipping blocks
Shipping spacers
Screws for shipping blocks
Fig. 21. Shipping blocks (front view).
Shipping block