晶圆测试说明书Cascade-11861-6-Manual.pdf - 第90页
66 • Summit 11K/12K Probe Station User’ s Guide • Wipe the outer metallic surfaces of the pr obe station with a soft, lint-free cloth, lightly dampened with IPA (do no t wipe the labels with IPA). C AUTION If the Z-le ve…
Chapter 5: Maintaining •
65
CHAPTER
5
Maintaining Chapter 7
WARNING
To avoid potential damage to the prober or to yourself, disconnet power from the
probe station before performing maintenance procedures.
Your probe station is designed and built for long, trouble-free service. Follow
preventive maintenance procedures to achieve peak operation, to prolong probe
station life, and to avoid unscheduled downtime.
This chapter explains how to maintain a Summit probe station. To maintain
probes, positioners, or other components that shipped with the station, refer to
the documentation that accompanied these items.
Preventive Maintenance Procedures
WARNING
Isopropyl alcohol (IPA) is toxic and flammable. To avoid personal injury, follow the
instructions on the Material Safety Data Sheet.
You can damage the probe station by using improper solvents or abrasive
cleaners. Use only industrial-grade isopropyl alcohol (IPA) only where indicated.
Do not use IPA, or any other chemical, on the lead screws, bearings, sliding plates
in the MicroChamber, or the surfaces that they contact.
N
OTE
Dust or debris can interfere with probe-to-tip contact and affect your measurement
accuracy.
CLEANING THE PROBE STATION
Clean the probe station monthly, or more often if your process creates
contaminants.
To clean the probe station
• Use a small vacuum cleaner, such as a printer vacuum, to remove dust and
debris from the interior of the probe station and hard-to-reach areas. Avoid
knocking debris into crevices or spaces between moving parts.
• Blow dry air or nitrogen over the station surface to remove dust and large
chunks of debris
• Vacuum the interior of the MicroChamber
• Wipe the chuck with a soft, lint-free cloth, lightly dampened with IPA
66
• Summit 11K/12K Probe Station User’s Guide
• Wipe the outer metallic surfaces of the probe station with a soft, lint-free cloth,
lightly dampened with IPA (do not wipe the labels with IPA).
CAUTION
If the Z-lever friction is excessively loose, the platen may drop suddenly and
unexpectedly, crashing the probes onto the work surface and damaging the
probes, the positioners, and the wafer.
N
OTE
The friction corresponds to the tightness of the screws. Be careful to turn the
screws evenly and only a little at a time.
• a clockwise turn increases friction (tightens)
• a counterclockwise turn decreases friction (loosens)
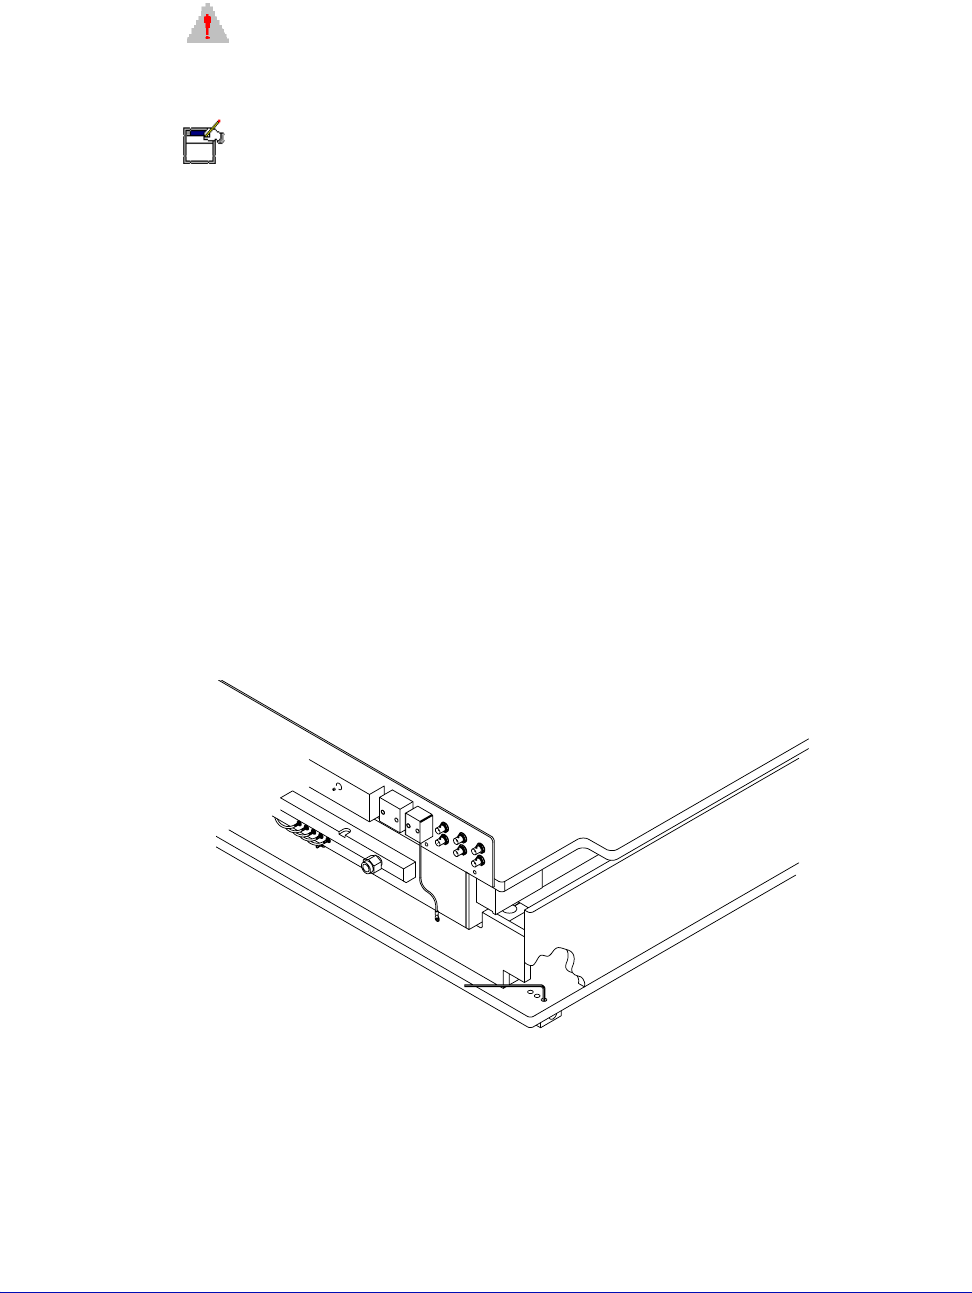
CHECKING Z-LEVER FRICTION
The Z-lever is on the probe station's lower left side. To check the Z-lever friction,
raise and lower it. The platen should move up and down correspondingly. The Z-
lever should stay in place when you release it.
As more accessories are installed on the platen, the Z-lever friction increases to
hold up the platen. Check the z-lever friction monthly and when you change
probes or positioners.
To check Z-lever friction
1. Locate the three Z-lever-friction adjustment screws, located near the probe
station's back left post. See figure 47.
2. Raise and lower the Z-lever, resting it at increments between its limits.
3. Using a 5/32-inch hex wrench, adjust the three Z-lever friction-adjustment
screws evenly, as needed, to increase or decrease friction.
4. Repeat step two after the final adjustment, to ensure that the friction is
appropriate for all Z-lever heights.
Fig. 47. Factory-set adjustable screw for Z-lever friction (rear of station).

Chapter 5: Maintaining •
67
5. Recheck the z-lever friction at all positions between fully up and down.
MAINTAINING PROBE STATION ACCESSORIES
If your probe station includes modules, such as a thermal unit that is not
manufactured by Cascade, refer to the manufacturer's documentation for
maintenance procedures. To maintain your Cascade probes and positioners, refer
to the user’s guides for those accessories.