晶圆测试说明书Cascade-11861-6-Manual.pdf - 第62页
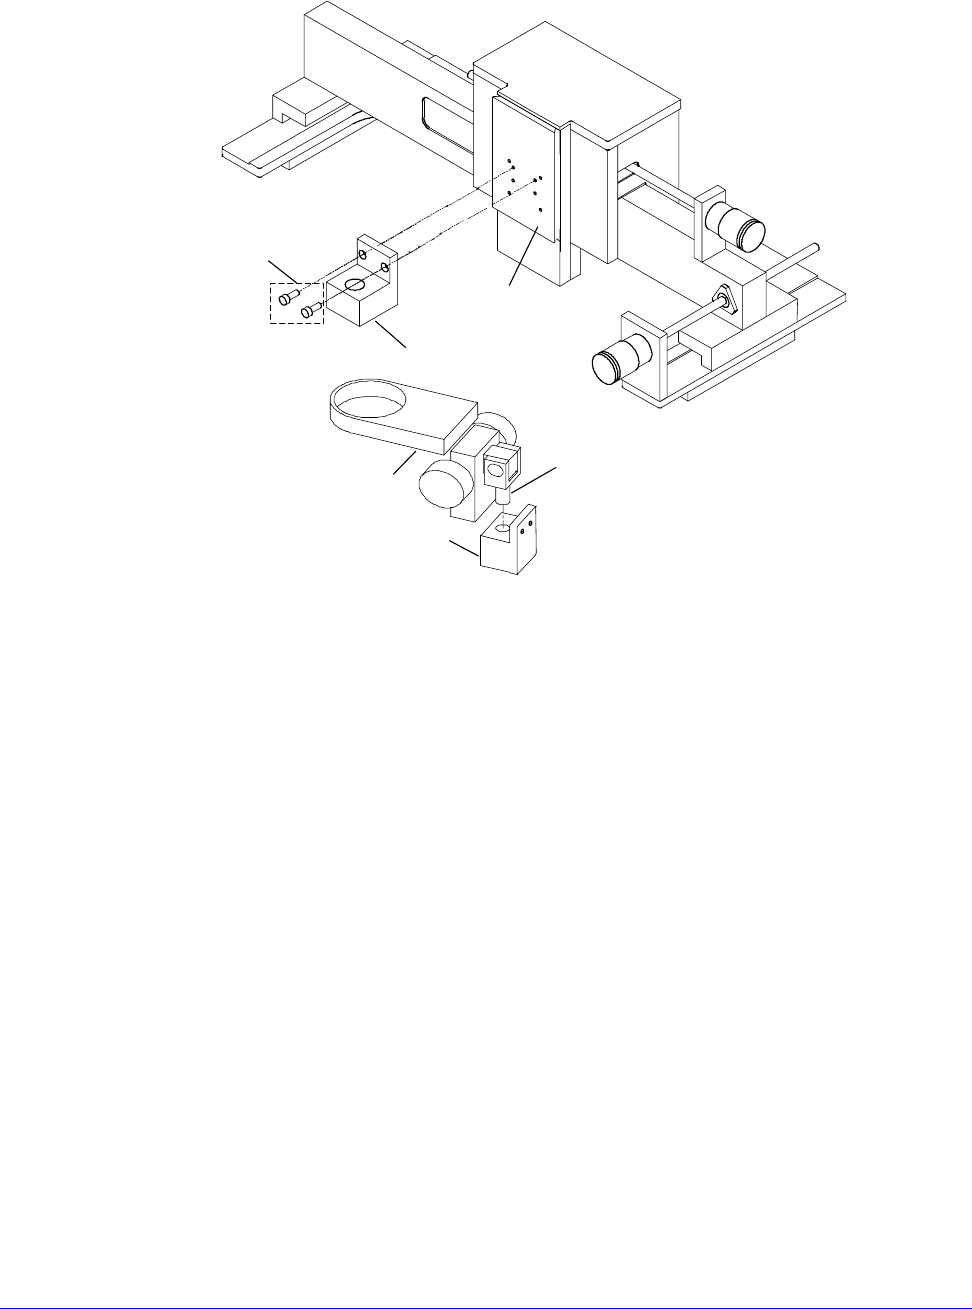
38 • Summit 11K/12K Probe Station User’ s Guide T o mount the Olympus Zoom Stereo microscope Prior to installation, obtain a 9/64-i nch hex wrench to mount the Olympus mounting block. Refer to Fig. 4-19 during the follow…
Chapter 3: Installing •
37
Obtain the appropriate tool and hardware to mount your microscope on the
optics bridge. See also, the Optem A-Zoom Instruction Manual for specific
installation procedures.
1. Slide the A-Zoom Microscope on the dovetail mount and tighten the two
screws on the left side of the mount with a 5/64-inch hex wrench.
2. Insert the fiber-optic cable into the illuminator and hand-tighten the
thumbscrews.
3. Insert the two eyepieces into the eyepiece sockets (only available with the
optional eyepiece kit). These eyepieces are normally 10x magnification.
4. Screw the objective into the objective mount (finger tight only). Slide the
objective mount into the slot at the bottom of the A-Zoom.
WARNING
Exercise care when mounting the microscope. The weight of the microscope can
cause the lift plate to lower unexpectedly.
5. Move the microscope up and down to test the counterweight.
6. Finish installing microscope video equipment according to the
manufacturer's instructions.
Fig. 26. Installing the Optem A-Zoom microscope.
Microscope Set
Screws
Optional
Eyepiece
Sockets
Dovetail
Objective
Mount
Objective
Lens
Eyepiece
38
• Summit 11K/12K Probe Station User’s Guide
To mount the Olympus Zoom Stereo microscope
Prior to installation, obtain a 9/64-inch hex wrench to mount the Olympus
mounting block. Refer to Fig. 4-19 during the following procedure.
1. Mount the mounting block onto the microscope mounting plate, using two #8
x 3/8-inch screws.
2. Place the pivot post into the mounting block.
3. Install the 8-32 x 1/4-inch setscrew in the mounting block (not shown). The
setscrew in the mounting block can be tightened to lock the pivot in place, or
it can be tightened just enough to prevent the pivot post from being pulled
back out of the block, yet allowing the microscope to rotate.
4. Route the cables over the optics bridge and plug into the light source.
5. Plug the light source power into the microscope power extender cable or a
wall outlet.
6. Move the microscope up and down to test the counterweight.
Fig. 27. Installing the Olympus Zoom Stereo microscope.
Lift plate
Pivot post
Mounting Block
Microscope holder
Mounting Block
Screws
Chapter 3: Installing •
39
INSTALL THE COMPUTER AND HOSES
(12000-Series Only)
To install the computer, cables, and hoses
1. Unpack the computer, the keyboard, the joystick, the mouse, the cables, and
the video monitor.
2. Seat the computer under your workbench, and place the keyboard, monitor,
joystick and mouse on the workbench next to the station.
3. Connect the “keyed” cables and hoses as described in Table 1. See also, figure
29 on p. 41.
Table 1. 12000-family probe station cables and hoses.
Cable or Hose From To
main control cable computer connector on
the back side of the
probe station
computer
monitor extender cable monitor connector on
computer
monitor cable
keyboard cable keyboard computer PS2 port
mouse cable mouse computer PS2 port
air line (high-stability
bridge only)
Air in (left rear of station) compressor or air supply
joystick cable joystick computer
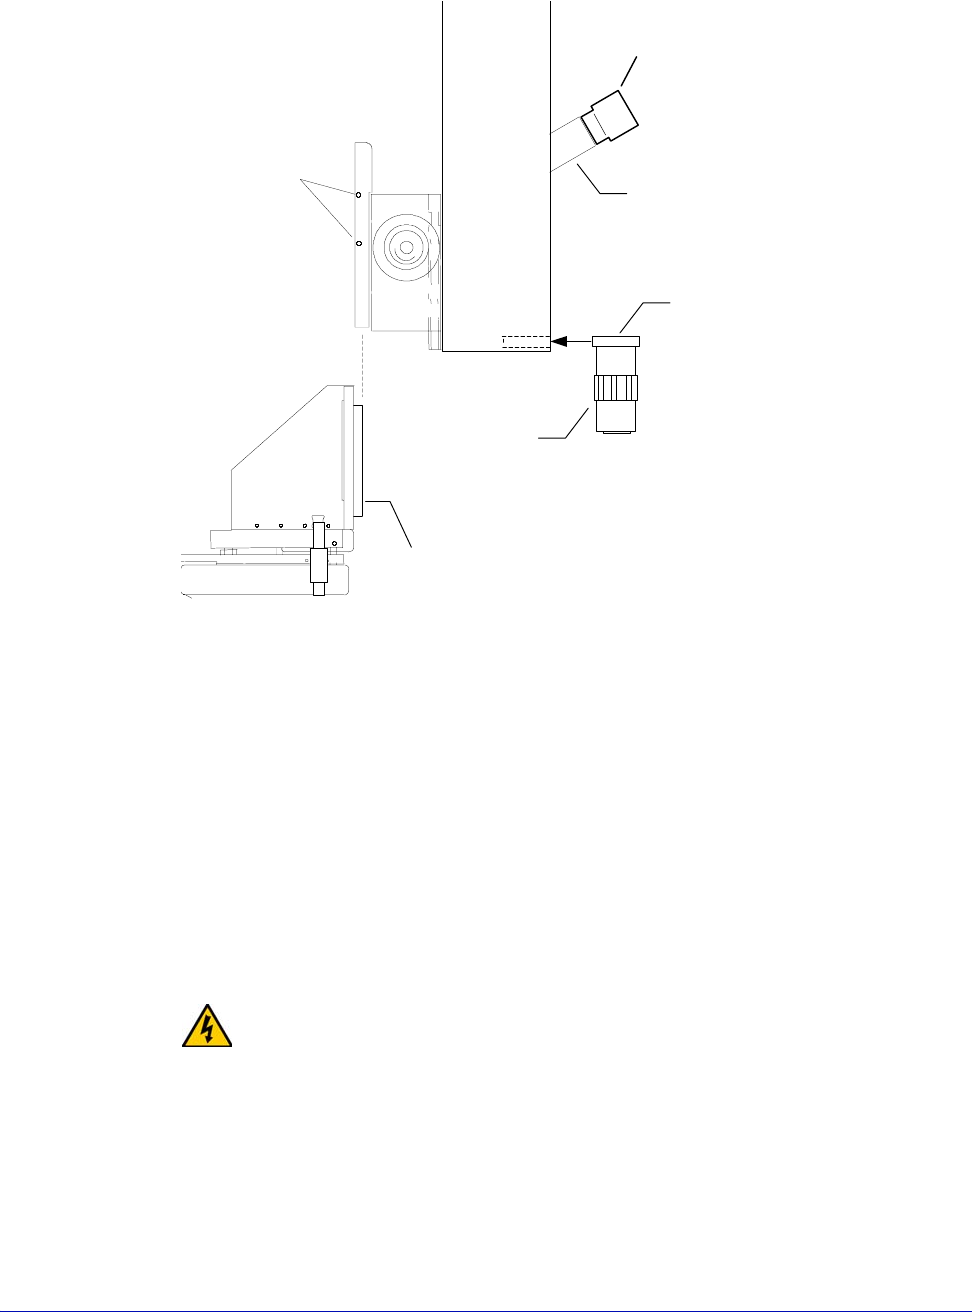
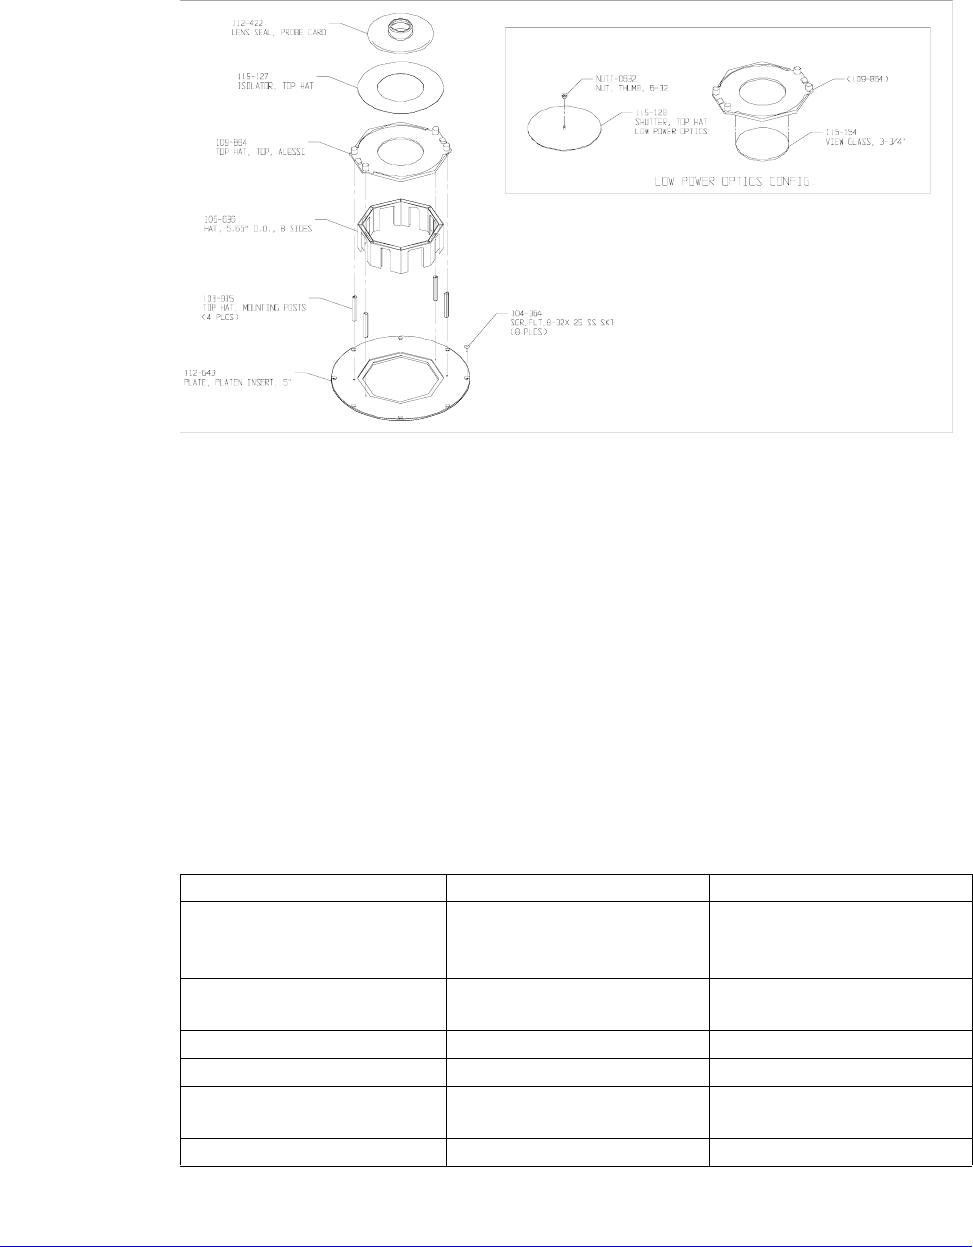
Fig. 28. Microscope TopHat seal (left) for Mitutoyo, Optem and Olympus.