MEC-CP842-1.0E.pdf - 第131页
Replacing Consumable Parts >> Servo Amplifier Battery MEC-CP842-1.0E 6-23 Procedure Replace the servo amplifier batte ry with the machine power on. 1 V erify that the machine's [SYSTEM ON] la mp is on. 2 Press…
Replacing Consumable Parts >> Servo Amplifier Battery
6-22 MEC-CP842-1.0E
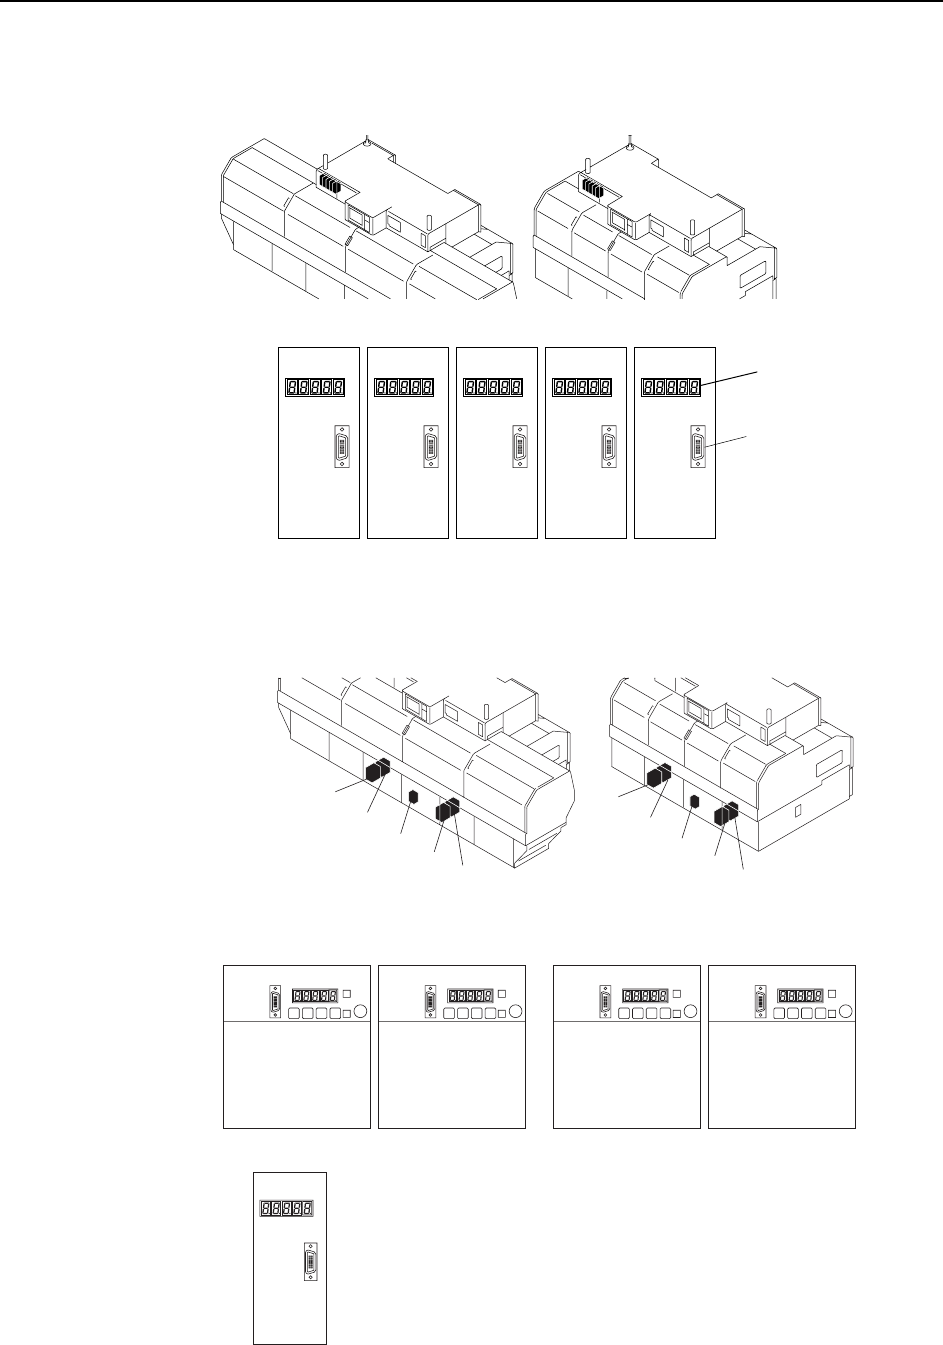
RQ-, NC-, FQ-, PQ-, and NZ-Axis Servo amplifier
D1-, D2-, X-, Cam-, and NY-Axis Servo amplifier
<CP-842ME><CP-842E>
C746M4038
CN3 connector
NZ-axisPQ-axisFQ-axisRQ-axis NC-axis
LED panel
C746M4039Ea
(1)
(5)
(2) (3) (4)
D1-axis D2-axis
Cam-axisX-axis
(1)
(2)
<CP-842E> <CP-842ME>
(1)
(2)
(4)
(3)
(4)
(3)
(5)
(5)
NY-axis
Replacing Consumable Parts >> Servo Amplifier Battery
MEC-CP842-1.0E 6-23
Procedure
Replace the servo amplifier battery with the machine power on.
1 Verify that the machine's [SYSTEM ON] lamp is on.
2 Press the EMERGENCY STOP button. This disables the 200V power supply.
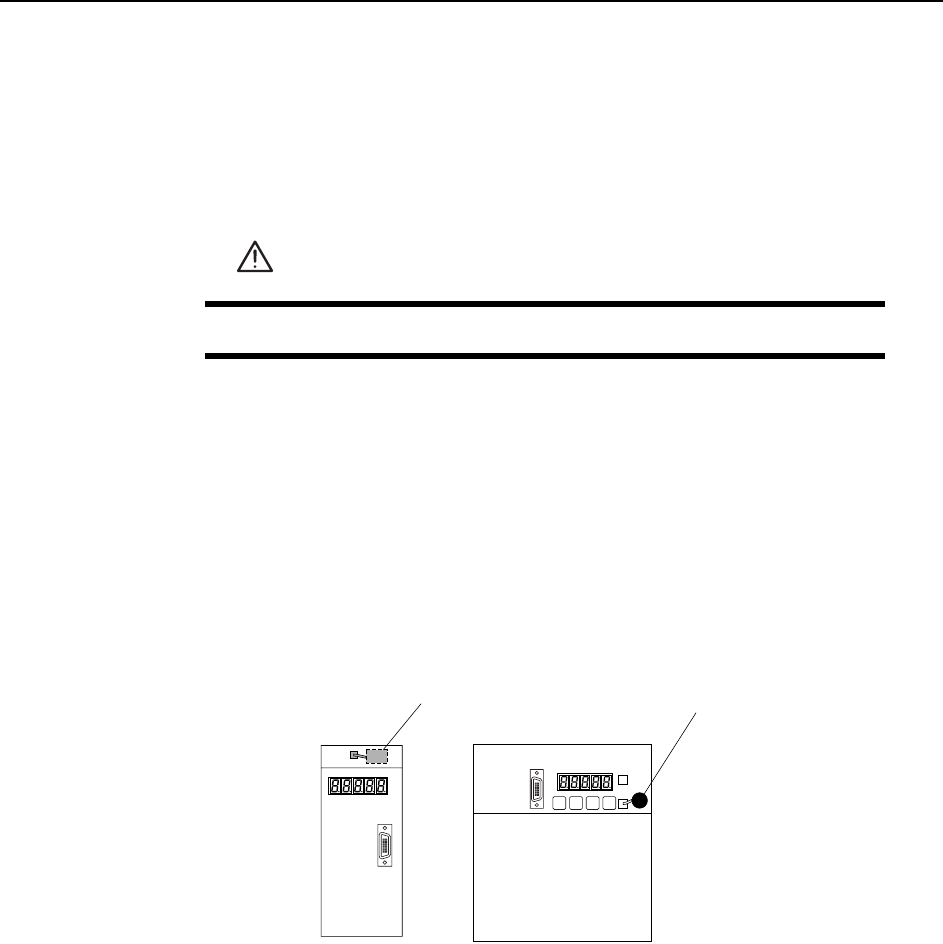
3 Identify the servo amplifier where "A.83" is displayed at the LED.
4 Locate the battery in the case located at the upper front of the servo amplifier
and replace it with a new battery.
CP-842E/842ME machines use the following 2 battery types in servo amplifiers
• Servo amplifier capacity: 30w to 5kw
Model: JZSP-BA01
• Servo amplifier capacity: 6kw, 7.5kw
Model: JZSP-BA01-01
Caution:The absolute encoder data will be lost If the old battery is removed while the servo amplifier
power LED is off. Ensure that the power LED is on before removing the old battery
5 Turn the machine power off. Reboot the machine, and verify that the "A.83"
alarm has cleared.
6 Press the [READY ON] switch to turn on the servo (200V) power. If machine
status is normal, then the procedure is complete.
WARNING
Press EMERGENCY STOP before performing this procedure.
C746M4040
Battery Battery

Replacing Consumable Parts >> Replacing the Carrier Clamp/Unclamp Air Cylinder Packings
6-24 MEC-CP842-1.0E
6.11 Replacing the Carrier Clamp/Unclamp Air
Cylinder Packings
Point
Replace these packings if a carrier air cylinder is not working properly.
Procedure
1 Close the air inlet valve lever and remove the air hose. Next, gradually open the
valve lever to release the air pressure.
2 Remove the 4 bolts to remove the air cylinder from the in- or out-carrier bracket.
3 Disconnect the air hoses and remove the forward limit sensor.
Note Make a note of the air hose connections before disconnecting them, in order to prevent
reconnecting them in the wrong positions.
4 Loosen the locknut at the end of the piston rod (for type A cylinders), and
remove the bolt.
WARNING
Press EMERGENCY STOP before performing this procedure.
C7SM3117
In-carrier clamp/unclamp cylinder
In-carrier clamp/unclamp cylinder
Out-carrier clamp/
unclamp cylinder
Air cylinder
Air hoses
Forward limit sensor
Out-carrier clamp/unclamp cylinde
r