MEC-CP842-1.0E.pdf - 第135页
Replacing Consumable Parts >> Replacing the Carrier Clamp/Unclamp Air Cylinder Packings MEC-CP842-1.0E 6-27 15 Extend the piston rod, and slid e the sensor until it turns ON. 16 Advance the sen sor an additional 0.…
Replacing Consumable Parts >> Replacing the Carrier Clamp/Unclamp Air Cylinder Packings
6-26 MEC-CP842-1.0E
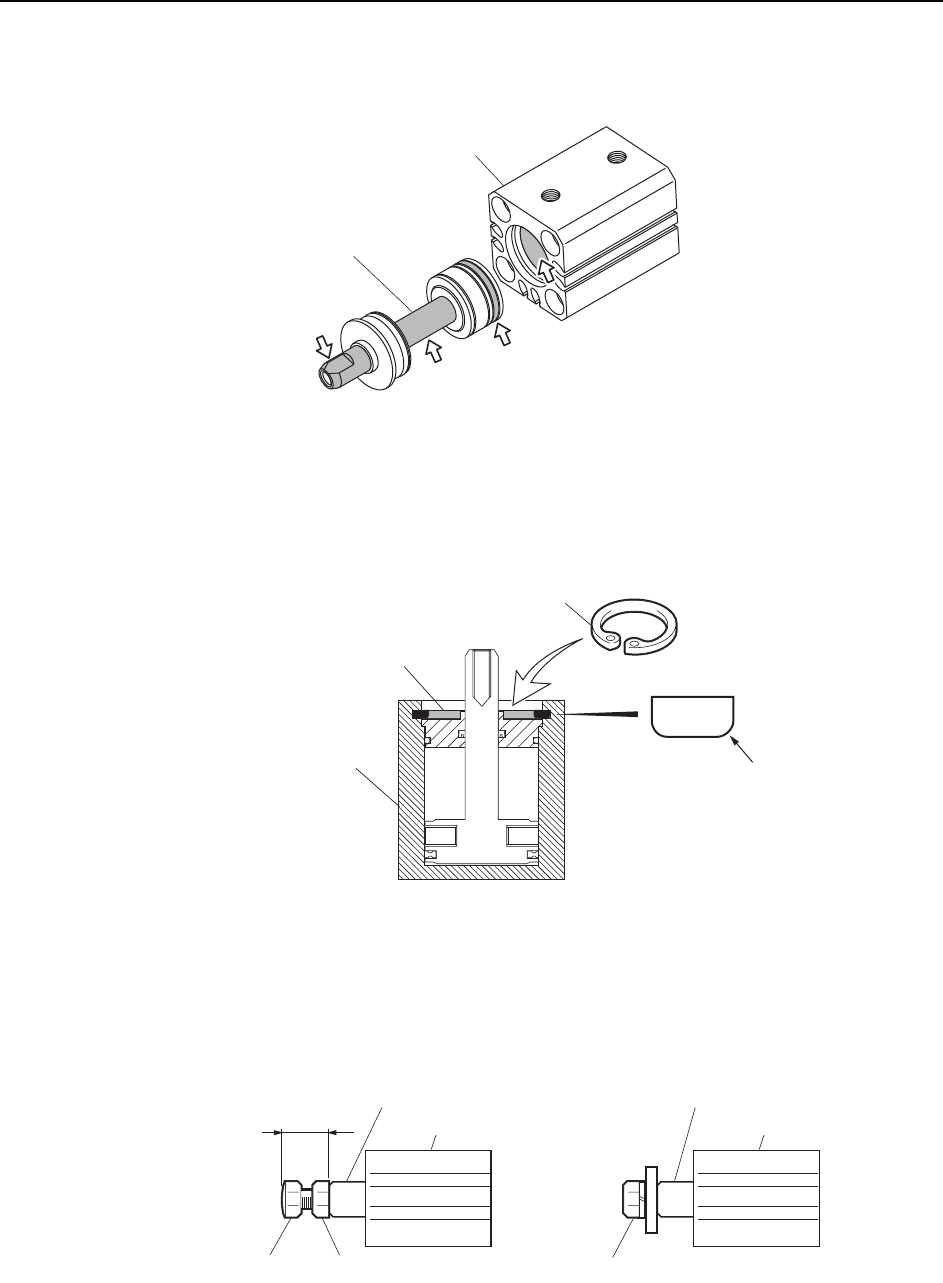
10 Apply a thin layer of Daphne Eponex No. 2 grease to the piston rod and inside of
the cylinder tube.
11 Assemble the rod cover on the piston rod, and then insert the piston rod in the
cylinder tube.
12 Use a snap-ring pliers to assemble the snap-ring in the air cylinder.
Note The side of the snap-ring with beveled edges faces the air cylinder.
13 Type A carrier clamp/unclamp air cylinder: Adjust the distance from the end of
the piston rod to the head of the bolt and lock the locknut.
Type B carrier clamp/unclamp air cylinder: Fasten the link bracket on the end of
the piston rod.
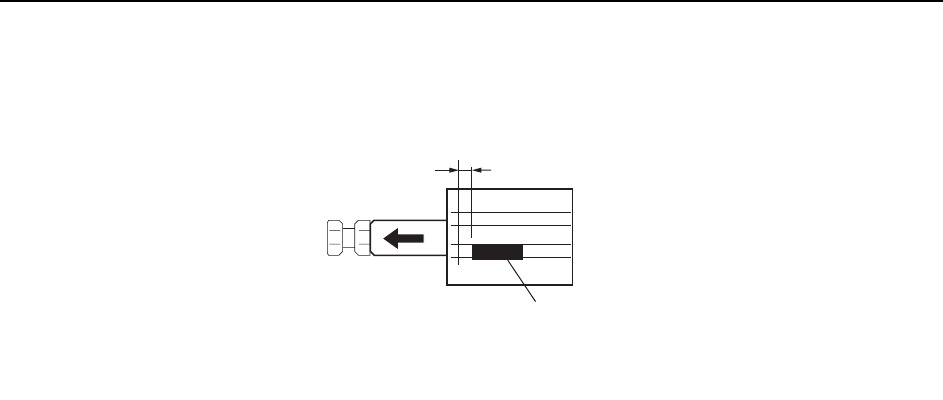
14 Temporarily position the forward limit sensor.
C7SM3120
Piston rod
Cylinder tube
Snap-ring
A
ir cylinder
Snap-ring
Cross-section of snap ring
Beveled edge
C7SM3121
Piston rod
Air cylinder
Locknut
Bolt
9 mm
C7SM3122
Type A
Piston rod
Air cylinder
Bolt
Type B
Replacing Consumable Parts >> Replacing the Carrier Clamp/Unclamp Air Cylinder Packings
MEC-CP842-1.0E 6-27
15 Extend the piston rod, and slide the sensor until it turns ON.
16 Advance the sensor an additional 0.5 mm in the ON direction, and tighten the
screw to lock the sensor in place.
17 Connect the air hoses to the air cylinder.
18 Mount the air cylinder on the carrier bracket.
19 Connect the air hose and open the valve lever fully.
Forward limit sensor
[a] is the position where the sensor will come ON when
the piston is extended.
0.5 mm
C7SM3123

Replacing Consumable Parts >> Replacing the Carrier Clamp/Unclamp Air Cylinder Packings
6-28 MEC-CP842-1.0E
MEMO: