MEC-CP842-1.0E.pdf - 第186页
Adjustments >> Station Adjustme nts 7-50 MEC-CP842-1.0E Sensor Sensitivi ty Adjustment Remove the cover of the am plifier and follow the adjustment procedure below . Note: Be careful not to drop the cover inside th…
Adjustments >> Station Adjustments
MEC-CP842-1.0E 7-49
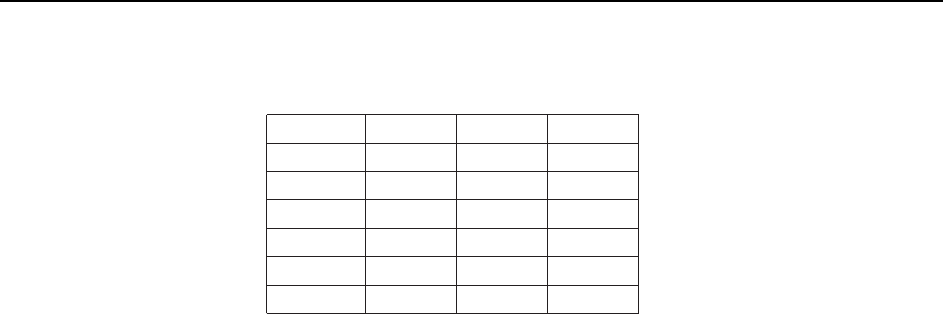
4 Ensure that the sensors display for the other nozzles as shown below.
Nozzle 1
Nozzle 2
Nozzle 3
Nozzle 4
Nozzle 5
Nozzle 6
Sensor 1
ON
OFF
OFF
ON
OFF
ON
Sensor 2
OFF
ON
OFF
ON
ON
OFF
Sensor 3
OFF
OFF
ON
OFF
ON
ON
T001
Digital display
0,1 = Sensor OFF
8,9 = Sensor ON
Adjustments >> Station Adjustments
7-50 MEC-CP842-1.0E
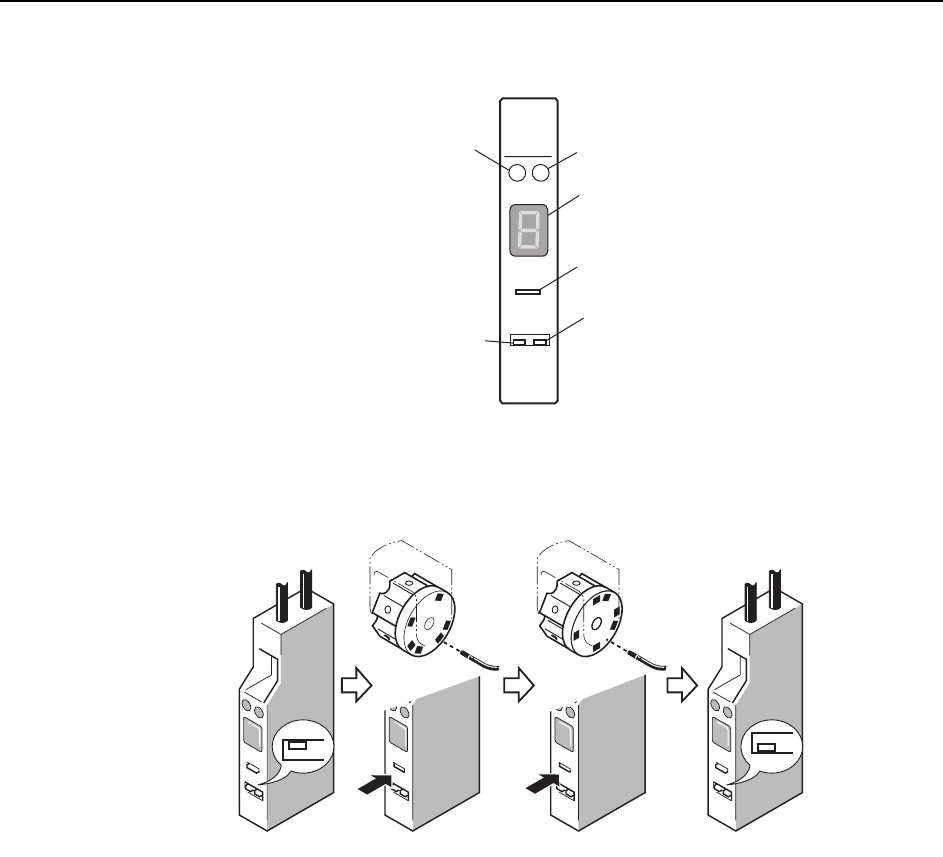
Sensor Sensitivity Adjustment
Remove the cover of the amplifier and follow the adjustment procedure below.
Note: Be careful not to drop the cover inside the machine.
Set the L-ON/D-ON switch to L-ON for the nozzle detection sensor.
1 Move the amplifier's mode change switch to the "SET" position.
2 Rotate the nozzle holder until the sensor light beam is adjacent to a dark part of
the dog and press "TUNING".
3 Rotate the nozzle holder until the sensor light beam is adjacent to a metal part
of the dog and press "TUNING".
4 Return the amplifier's mode changing switch to the "RUN" position.
At this time the sensitivity of the sensor can be checked on the digital display.
Digital display:
0 ~ 1: Stable interruption range
8 ~ 9: Stable light input range
If the display is within the stable range, setting is complete.
5 If the display is not within the stable range, check the items below and make
the necessary adjustments.
• Check the connections between the amplifier and the fiberoptic cable.
• Check the position of the sensor.
S
O
DELAY
TUNING
SET D-ON
RUN L-ON
HPY-T1
Green LED
Red LED
Digital display
Tuner
L-ON/D-ON
switch
Mode changing
switch
C7SM4046
SET
RUN
C7SM4047a
(1) (2) (3) (4)
Adjustments >> Servo Amplifier Adjustments
MEC-CP842-1.0E 7-51
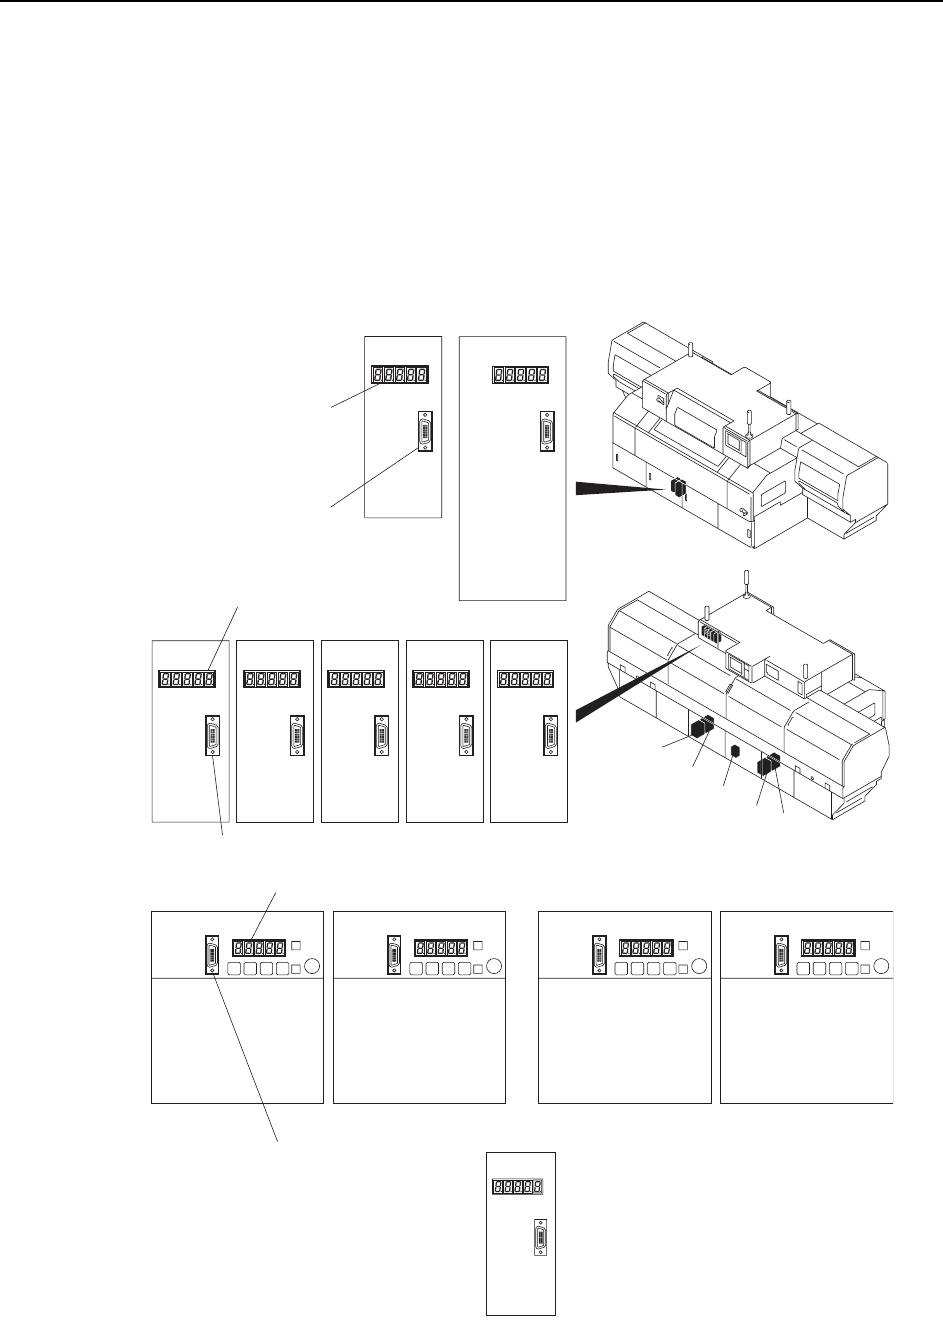
7.2 Servo Amplifier Adjustments
Required Tools
Required Tools:1 Digital Operator
7.2.1 Servo amplifier parameters
1 Connect the Digital Operator cable to the servo amplifier to be adjusted (CN-3
connector).
5GTXQCORNKHKGT
EQPPGEVQTCN3
CP-842E
Y-axisZ-axis
LED panel
<CP-842E>
C7SM4071Ea
5GTXQCORNKHKGTEQPPGEVQTCN3
5GTXQCORNKHKGTEQPPGEVQTCN3
NZ-axisPǰ-axisFǰ-axisRǰ-axis NC -axis
LED panel
LED panel
(1) (2) (3) (4)
D1-axis D2-axis Cam-axisX-axis
(1)
(2)
(4)
(3)
(5)
NY-axis
(5)