MEC-CP842-1.0E.pdf - 第52页
Basic Operati on >> Ch anging the Conveyor Width 4-2 MEC-CP842-1.0E 3 Lower the XY -table. 4 Run a test pa nel through the machine, veri fying that it is conveyed and clamped smoothly .
Basic Operation >> Changing the Conveyor Width
MEC-CP842-1.0E 4-1
4. Basic Operation
4.1 Changing the Conveyor Width
Point
Conveyor width is adjusted simultaneously for the in-conveyor, XY-table, and out-con-
veyor. The conveyors should be adjusted to a width that permits smooth panel clamp-
ing and conveyance.
Procedure
1 Execute the necessary commands to link the XY-table to the in and out-convey-
ors. At the touch panel’s main screen, select the following commands: [Con-
veyor] - [Conveyor Width] - [Change Width], then press the START button.
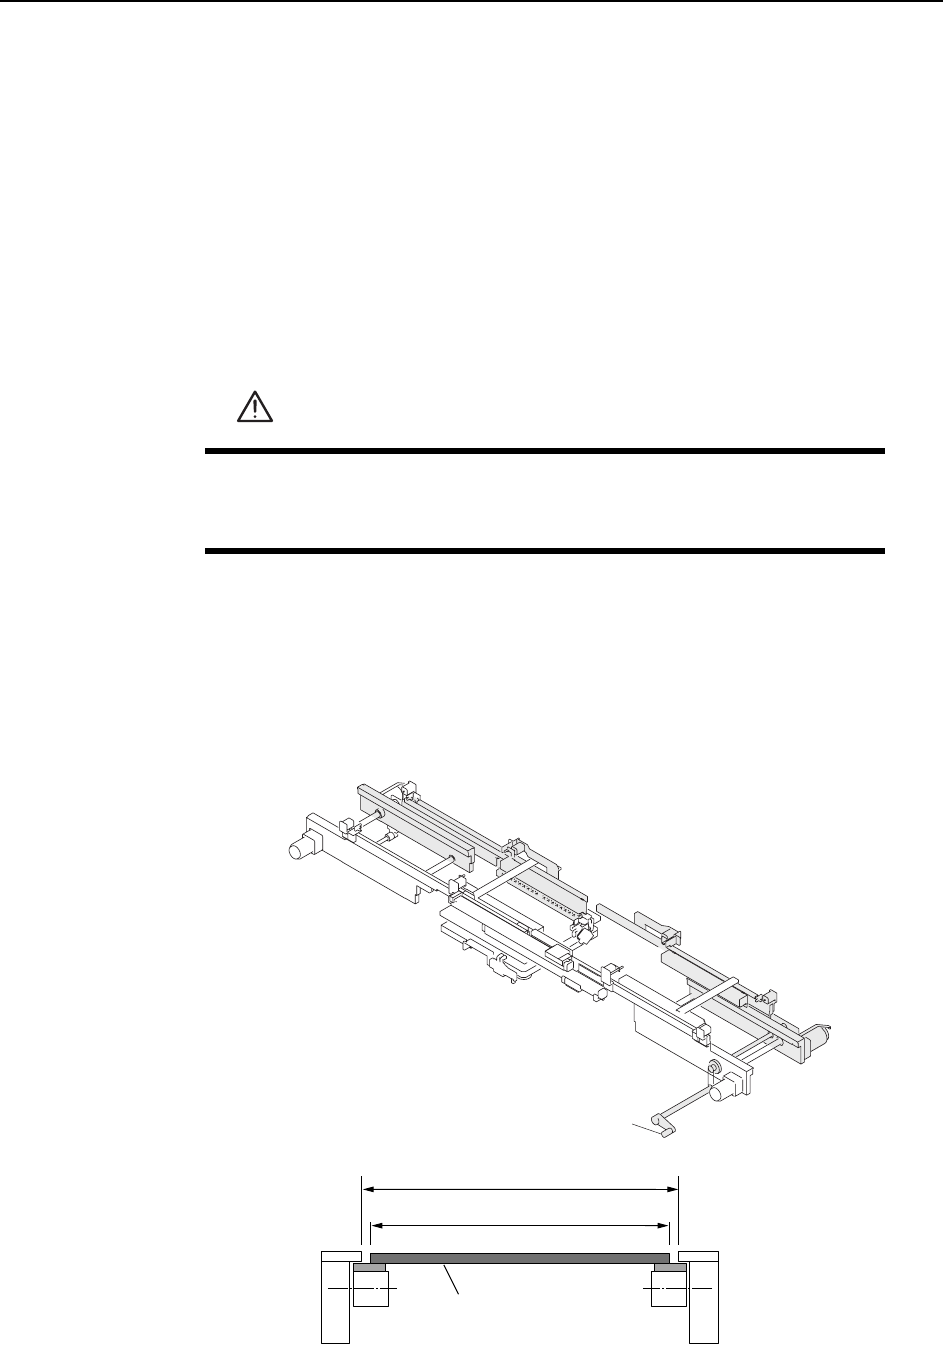
2 Turn the handle on the out-conveyor to adjust the conveyor width until the
panel can be conveyed smoothly. First increase the conveyor width then reduce
it to 0.5~1.0 mm wider than the panel.
CAUTION
Before adjusting the conveyor width, check the back-up pin posi-
tions on the XY-table to prevent interference between back-up pins
and the adjustable rail.
C46M2001
Handle
C46M2002
W+(0.5~1.0)
(mm)
W
Panel

Basic Operation >> Changing the Conveyor Width
4-2 MEC-CP842-1.0E
3 Lower the XY-table.
4 Run a test panel through the machine, verifying that it is conveyed and clamped
smoothly.
Basic Operation >> Changing the Panel Back-up Pin Positions
MEC-CP842-1.0E 4-3
4.2 Changing the Panel Back-up Pin Positions
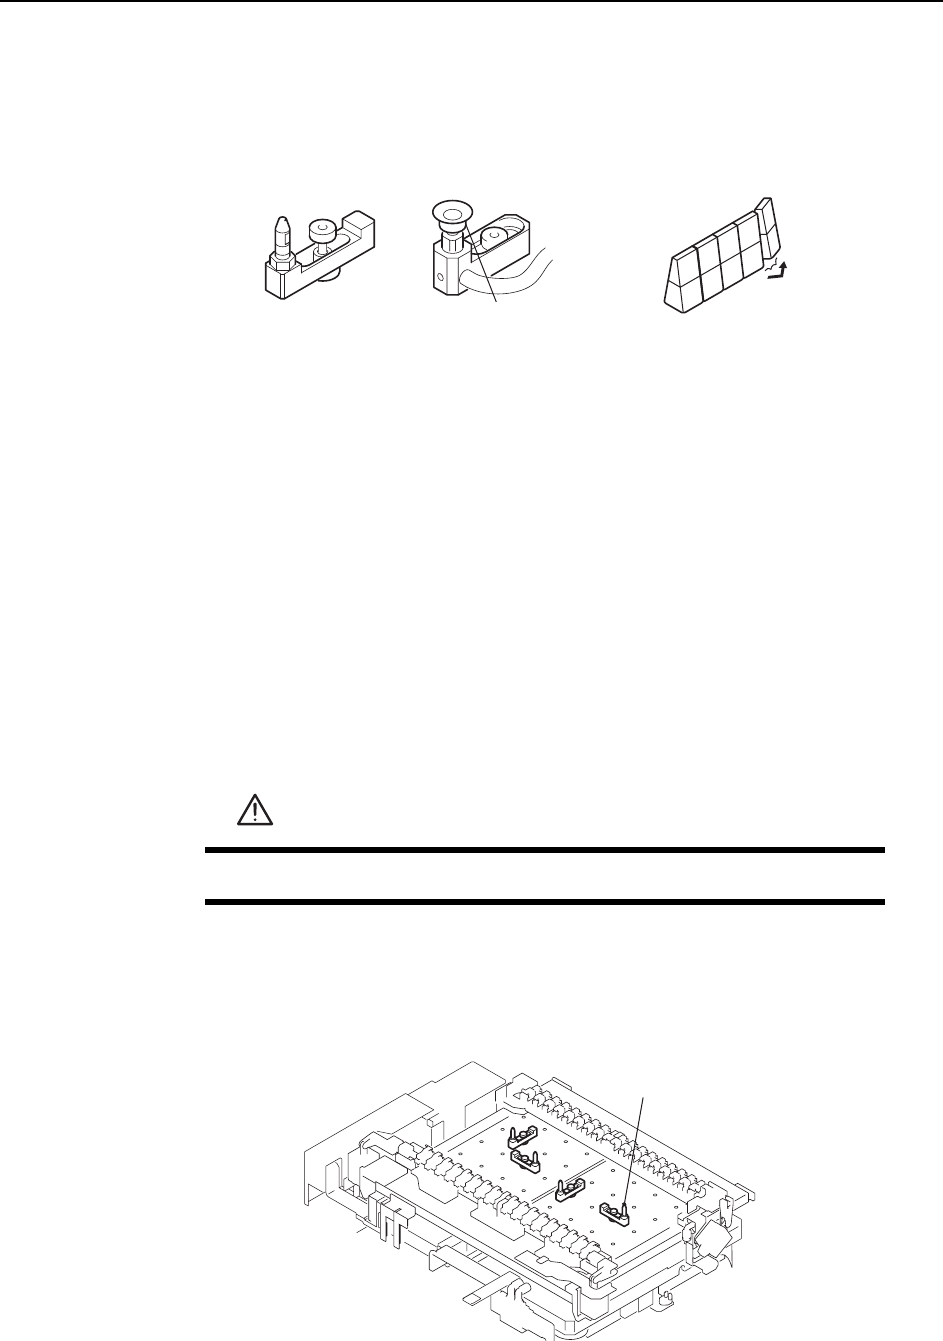
When the panel clamped on the XY-table warps down, position back-up pins, rubber
blocks, or back-up plates under the bottom surface of the panel.
Note: If the panel bends during production, then product quality may decline.
Point
The positions and quantity of back-up pins or rubber blocks depends on the panel
shape, panel size, and the presence of pre-mounted parts on the lower side of the
panel.
For panels where upward bending is a problem, back-up pins with vacuum pads
should be used to keep the panel flat.
Procedure
1 Execute the necessary commands to move the XY-table to the loading position.
2 Raise the XY-table.
3 Press the EMERGENCY STOP button. This turns off the 200V power.
4 Change the positions of the back-up pins or rubber blocks as required.
<When using back-up pins>
Loosen the pin mounting bolts and reconfigure the pins as necessary.
WARNING
Press EMERGENCY STOP before performing this procedure.
C46M2003
Vacuum pad
Back-up pin
Rubber block
C746M2004
Back-up pin