00198168-02_Technical_Training_TX-Series_EN.pdf - 第117页
5 Placement Heads 5.2 C&P20 P/M2 Head Technical Training SIPLACE TX-Series 10/2016 117 7. Software checks preconditions and displays status of necessary tools. Click Start to continue. 8. Calibration has started. 9. …
5 Placement Heads
5.2 C&P20 P/M2 Head
116 Technical Training SIPLACE TX-Series 10/2016
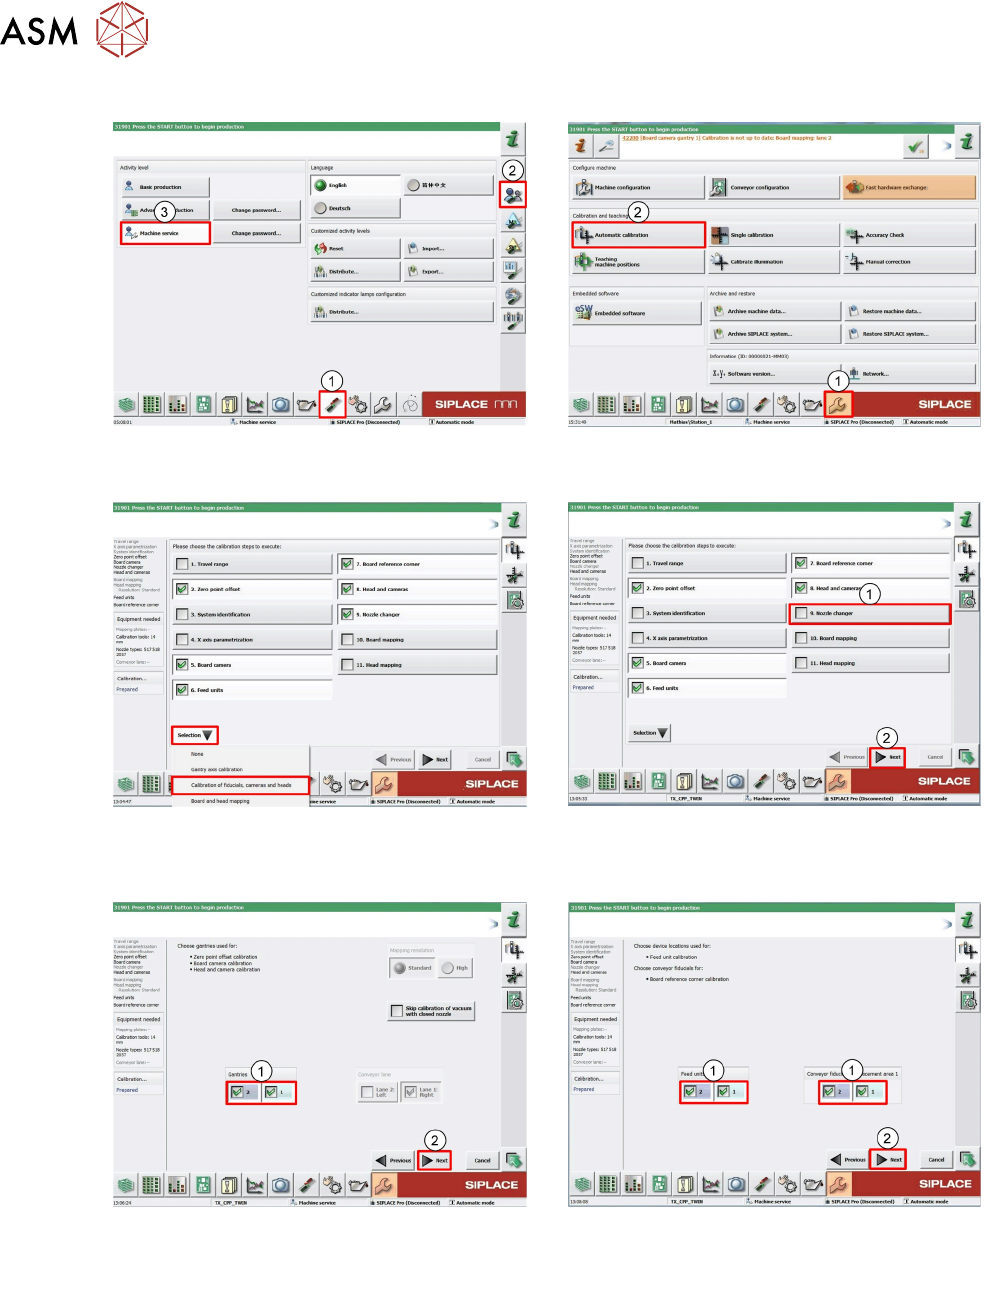
5.2.7.2 Calibration Steps
1. Log on as Machine service (1-3). 2. Click Calibration (1).
Click Automatic calibration (2).
3. Under pull down menu Selection select
Calibration of fiducials, cameras and
heads.
4. Deselect Nozzle changer (1).
Click Next (2).
5. Select Gantry which you want to calib-
rate(1).
Click Next (2).
6. Select Locations and Placements areas
you want to calibrate (1).
Click Next (2).

5 Placement Heads
5.2 C&P20 P/M2 Head
Technical Training SIPLACE TX-Series 10/2016 117
7. Software checks preconditions and displays
status of necessary tools.
Click Start to continue.
8. Calibration has started.
9. Calibration has finished.
Click Accept to approve measurement.
5 Placement Heads
5.2 C&P20 P/M2 Head
118 Technical Training SIPLACE TX-Series 10/2016
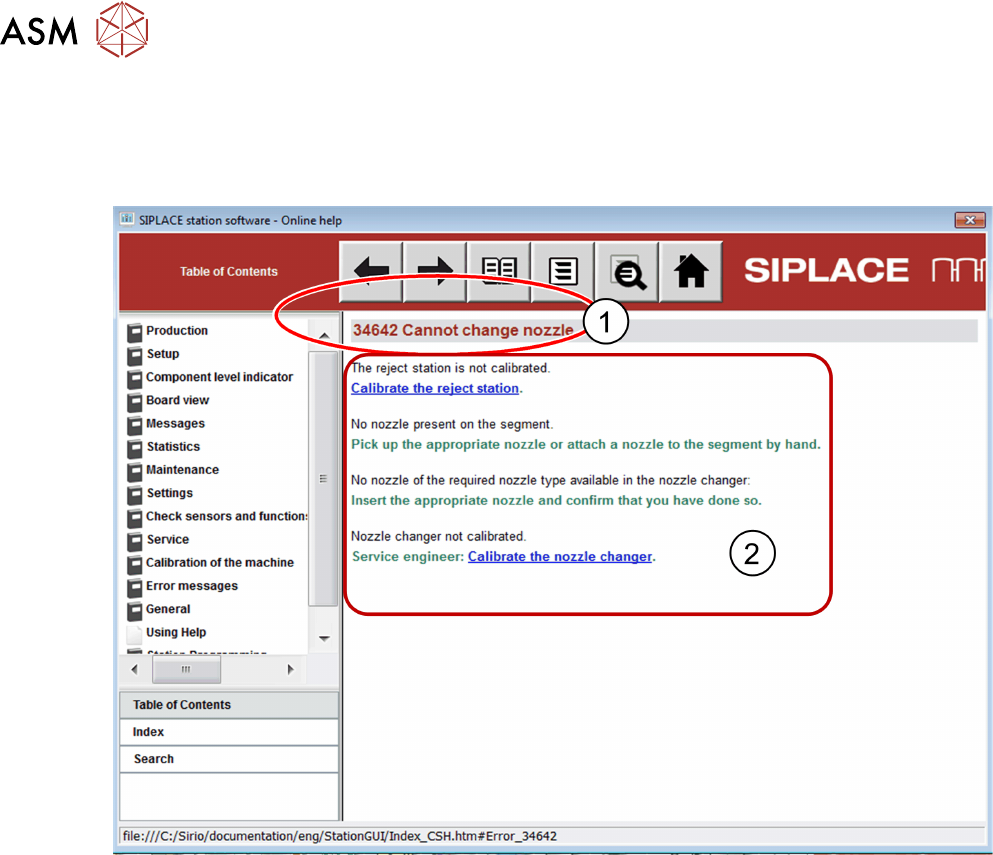
5.2.8 Analyse
5.2.8.1 Error General Information
Check Error Information from "Help", to define which kind of problem has occurred.
1. Error Number
2. Possible cause and solution
The main causes of error during production are:
●
Vacuum error
●
Z Axis problem
●
DP Axis problem
●
Nozzle change pick up/reject problem
●
Placement quality issue
Use the charts below during the training to assist with trouble shooting.