00193892-0402_AI_FeederCoverFlap_DE+EN.pdf - 第54页
Assembly instructions Feeder cover flap, SIPLACE HF-series / X-series / D3 05/2009 Edition 54 : Release the spring on both sides o f the damper . Be careful ! The springs c an be lost very easily . 2 2 : Put the damper o…
Assembly instructions Feeder cover flap, SIPLACE HF-series / X-series / D3
05/2009 Edition
53
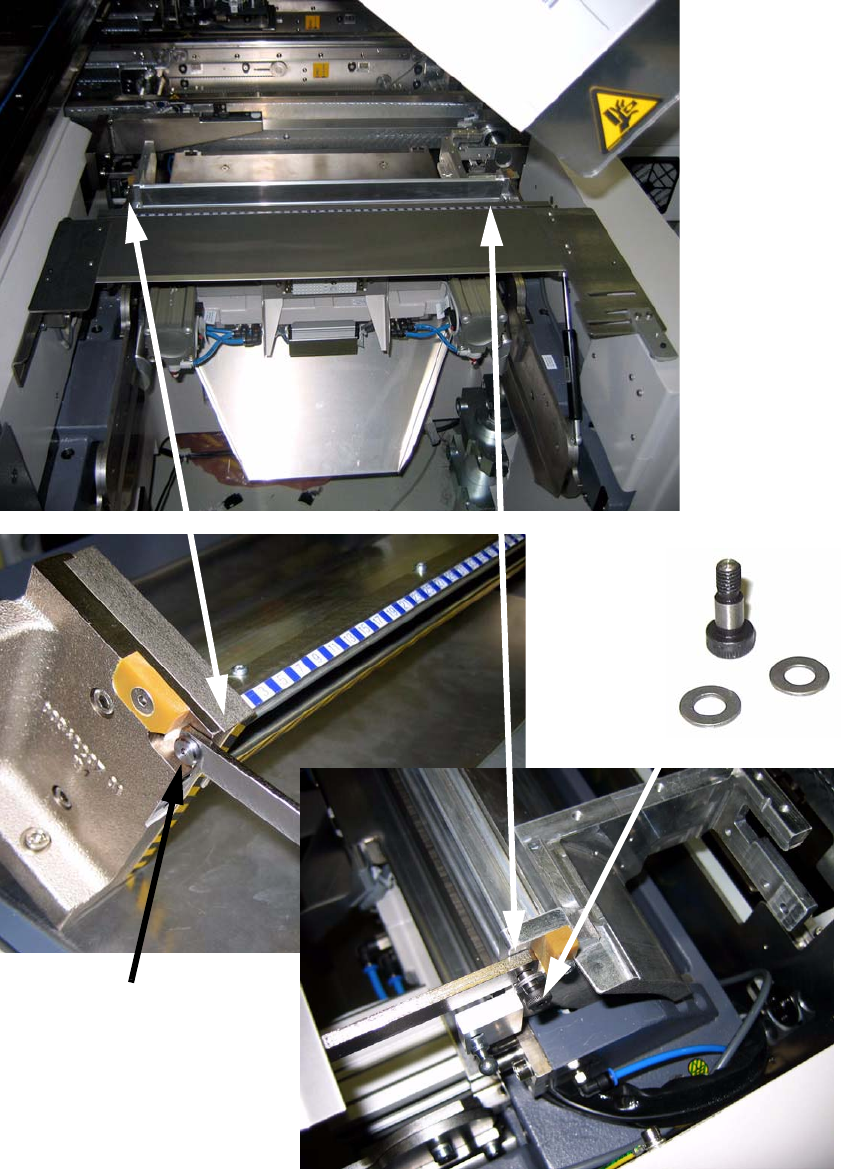
: Mount the feeder protection plate to the empty tape guide channel.
Use the screws and washers as shown in the pictures.
2
Use the smaller screw without
any washers at the left side
Use the bigger screw with two
washers at the right side.
Assembly instructions Feeder cover flap, SIPLACE HF-series / X-series / D3
05/2009 Edition
54
: Release the spring on both sides of the damper.
Be careful ! The springs can be lost very easily.
2
2
: Put the damper on the ball joint of the feeder protection plate and secure it with the spring.
: Put the damper on the ball joint at the empty tape guide channel, but don’t secure it there with
the spring.
2
2
2
2
Take out this spring to get the
damper off from the ball joint

Assembly instructions Feeder cover flap, SIPLACE HF-series / X-series / D3
05/2009 Edition
55
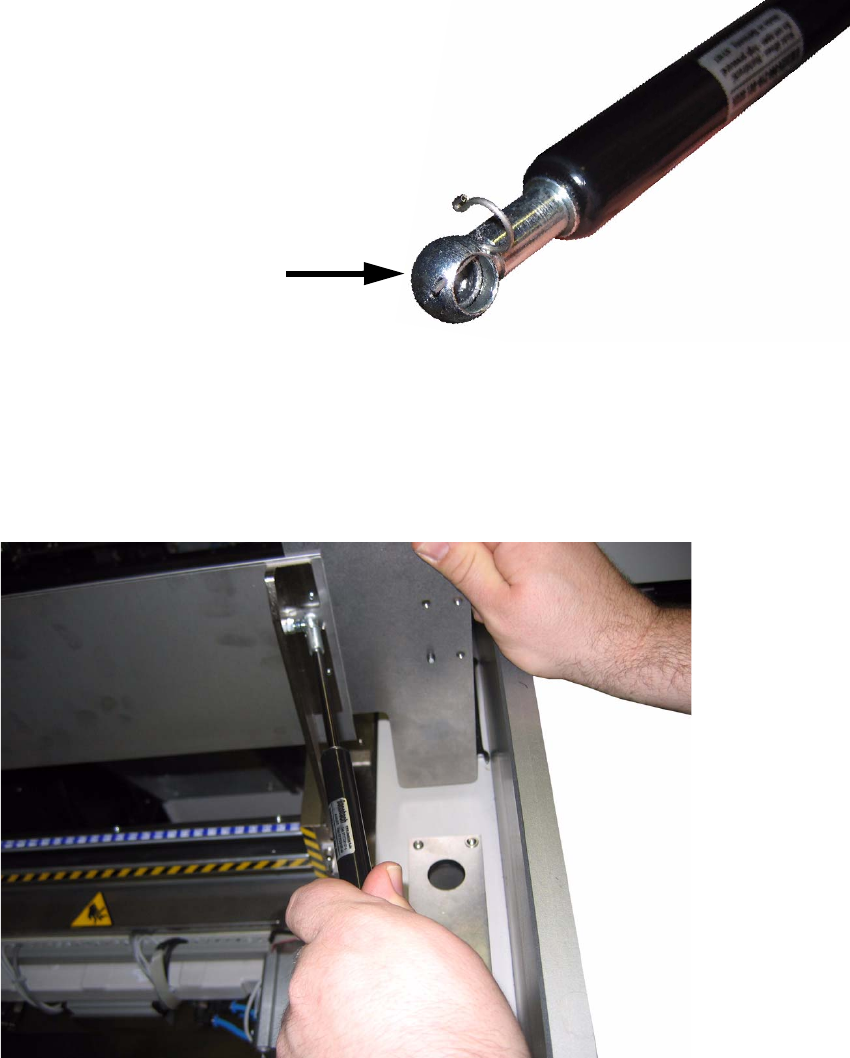
Adjusting the damper 2
2
When the damper is right adjusted the plate should close by itself when it is pushed a little bit in
approximately 2 seconds. If it closes to fast or to hard, or the plate cannot close by itself you have
to re-adjust the damping force until everything is working correctly. 2
2
: Pull the damper to his full length. Twist the damper from the left to the right while you keep on
pulling until you can feel it locking.
: Now you can adjust the damping force by turning the damper to the left or to the right.
left => decrease damping force
right=> increase damping force.
: When the damper is right adjusted secure the damper to the ball joint at the empty tape guide
channel with the spring.
2
2
2
2
2
2
2
2
2
2
2
2
2
2
2
2
2
2
2
2