00193892-0402_AI_FeederCoverFlap_DE+EN.pdf - 第75页
Assembly instructions Feeder cover flap, SIPLACE HF-series / X-series / D3 05/2009 Edition 75 : Remove the existing hand guard and fit the hand guard with the larger cut-out from the assem- bly kit. 2 : Fit the bracket t…

Assembly instructions Feeder cover flap, SIPLACE HF-series / X-series / D3
05/2009 Edition
74
: Run the connecting cable for the feeder cover flap switch behind the tape cutter / nozzle
changer.
There, the plug is already in the cable duct.
2
2
2
2
2
2
Run the cable
Plug
Assembly instructions Feeder cover flap, SIPLACE HF-series / X-series / D3
05/2009 Edition
75
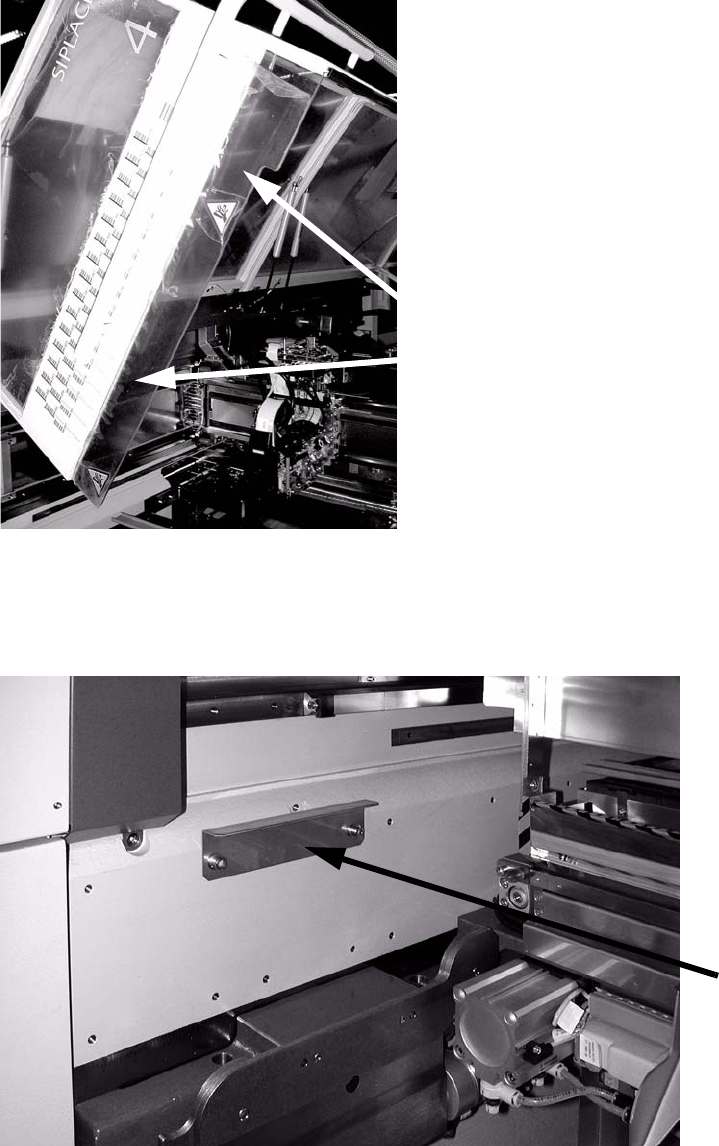
: Remove the existing hand guard and fit the hand guard with the larger cut-out from the assem-
bly kit.
2
: Fit the bracket that forms the contact surface for the feeder cover flap inside the machine.
The choice of screw holes depends on the number of gantries, since the feeder cover flap lies
further to the outside or inside, depending on the number of gantries.
2
Hand guard
Fit the con-
tact bracket
Assembly instructions Feeder cover flap, SIPLACE HF-series / X-series / D3
05/2009 Edition
76
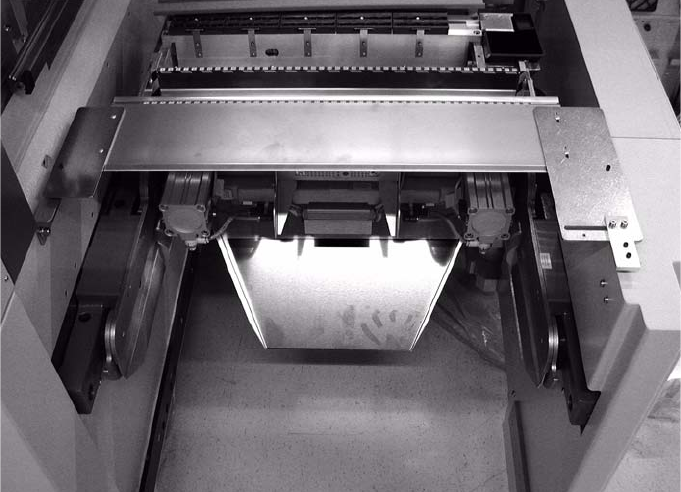
: Insert the feeder cover flap.
2
2.6.7 Final tasks
: Switch the placement machine on at the main switch.
: Make sure that the emergency stop loop is interrupted when the feeder cover flap is raised.
Check this in every placement area.
: Dock the component trolleys into the machine.
: Carry out a reference run.
2
2
2
2
2
2